 ### 1. Production API Costs
This is the cost of running AI features inside the application your customers use. The more users interact with your product, the more tokens you consume. This isn't a new paradigm. Twenty years ago, working with SOAP web services and paid third-party APIs taught senior engineers to treat external calls with care by architecting caching, optimizing payloads, and building guardrails. A senior developer already understands that the core concept of resource management hasn’t changed.
### 2. Developer Tooling Costs
This is where the real surprise shock is happening. Companies are seeing massive bills from AI-native IDEs and developer tools. But trying to penalize a developer for using tokens in their development tool is fundamentally broken.
Imagine giving a carpenter a brand-new toolbox, only to tell them: "Hey, we're going to charge the business a dollar every time you swing that hammer. So, try not to use it too often."
Certain tasks require the hammer. Sometimes you misalign a nail, or the wood splits, and you have to pull it out and do it again. That isn't sloppiness; that is the messy, iterative reality of craftsmanship. And this is exactly how it works with AI developer tools: usage costs tokens. Coding tools are powered by Large Language Models. They predict the next statistical token based on massive codebases. Expecting a developer to artificially limit their tool usage to save pennies on context windows is asking them to fight the machine. We didn't ask engineers to go back to steam engines because coal got expensive; we don't ask 2026 developers to ration their keystrokes.
### 3. The Agentic Multiplier
What most people miss is that we are in the era of Agentic AI, not just chatbots. Developers now deploy autonomous agents that can, for example, resolve a dependency conflict by interacting with filesystems, calling tools, and spinning up sub-agents. By definition, their core loop—Plan, Act, Observe, Correct—is token-hungry, requiring massive context from codebases and error logs to iterate. A single agent fixing one tricky bug might burn millions of tokens in an afternoon.
To expect a human developer to be "token-aware" of a headless agent's autonomous reasoning loop is fundamentally absurd. You cannot micromanage a machine's cognitive process to save pennies while it's busy saving you weeks of human labor. If an agent spends $50 in tokens to automatically refactor a legacy module while your team sleeps, it didn't "waste" resources—it traded cheap compute for expensive human time.
## Don't Blame the Tool. Fix Your Business Model.
If the AI bills are extraordinary—and they are—the entity to blame isn't the developer, and it isn't the AI vendor. It’s your own business architecture.
Corporate procurement and IT departments are still trying to measure AI usage with outdated rubrics like per-seat licensing or fixed hardware costs. They treat an AI tool as a simple line-item expense, not as the organizational restructuring force it truly is.
Look at the trade-off. With agentic AI and advanced tooling, developers can produce code exponentially faster. If your engineering velocity increases by 10 times, your development math completely changes. Consider the shift in resource allocation. Previously, a feature might have required a five-engineer team for a full month. Today, a single engineer using autonomous agents can ship that same feature in a few days. The cost doesn't disappear; it simply shifts from being 99% salary to a new blend of salary and compute.
Your AI developer tooling bill might look shocking on paper, but you just saved weeks of human engineering hours. If your management can't see that the net ROI is massively positive, the problem isn’t the tokens—it's the accounting.
## How to Actually Lower Your AI Bill
If you actually want to go cheaper, the solution isn't to tell your developers to type shorter prompts or write fewer prompts. The solution is to architect a smart, tiered AI infrastructure. A smart organization builds an ecosystem that uses the right tool for the job.
| Task Complexity | Recommended Model / Approach | Cost Profile |
| :--- | :--- | :--- |
| **Architectural Planning & Complex Debugging** | Frontier Models (e.g., Claude 3.5 Sonnet, Gemini Pro) | Premium |
| **Routine Code Generation & Standard Linters** | Small/Medium Models (e.g., Gemini Flash, Claude Haiku) | Ultra-Low |
| **Local Autocomplete & Simple Refactoring** | Local Open-Weights LLMs (via Ollama / Llama 3) | Free (On-Device Compute) |
| **Static Logic & Known Syntax Rules** | Traditional Regex, Linters, and Scripts | Zero AI Required |
Not every task requires a massive, multi-billion-parameter frontier model. Local open-weights models running directly on developer machines are now incredibly capable at handling inline autocomplete, basic docstring generation, and simple refactoring—costing the company exactly zero tokens.
Furthermore, we need to stop routing every task through an LLM by default. If a task can be solved by a traditional regex expression, a well-written shell script, or a standard linter, it shouldn't be sent to an LLM at all. True efficiency comes from fallback routing and model switching, not micromanaging human behavior.
When you enable an engineer to drive at warp speed, the problem isn't how much fuel they're burning. The problem is whether your tracks can handle the speed. As I wrote about recently in my post, [Learning the Hard Way: When Agents Build Agents](https://leeboonstra.dev/ai-development/engineering-management/developer-workflow/learning-the-hard-way-when-agents-build-agents/), accelerating code production doesn't magically solve software engineering. It simply moves the bottleneck downstream to integration, code review, and architectural alignment.
## Stop Counting Tokens, Start Counting Value
The "token-aware developer" is a management cop-out—an attempt to push the anxiety of rising IT bills onto the people hired to build your future. When you measure success by the cost of the tools instead of the velocity of the output, you are missing the entire point of the AI revolution. Stop worrying about the hammer. Start worrying about what you're building with it.
---
## Vector Embeddings vs. The DSM-5: The Mathematical Flaw in Mental Health AI
*Published: 2026-06-26*
*Categories: Applied AI, Mental Health AI, Vector Embeddings, Engineering Proof*
*Tags: Data Science, Vibe Coding, DSM, Vector Embeddings, Gemini Enterprise, Mental Health AI, Psychiatric AI, AI Engineering, Therapy AI, Mental Health Tech*
> What happens when you map the entire DSM-5 into high-dimensional vector space? The math exposes a chaotic illusion. See the interactive proof of why mental health AI is chasing a ghost.
---
> NOTE: I am a software engineer and data practitioner, not a psychiatrist, psychologist, or medical professional. This project is an exploratory engineering proof examining the mathematical properties of clinical language in vector space. The underlying codebase is fully open-sourced on
### 1. Production API Costs
This is the cost of running AI features inside the application your customers use. The more users interact with your product, the more tokens you consume. This isn't a new paradigm. Twenty years ago, working with SOAP web services and paid third-party APIs taught senior engineers to treat external calls with care by architecting caching, optimizing payloads, and building guardrails. A senior developer already understands that the core concept of resource management hasn’t changed.
### 2. Developer Tooling Costs
This is where the real surprise shock is happening. Companies are seeing massive bills from AI-native IDEs and developer tools. But trying to penalize a developer for using tokens in their development tool is fundamentally broken.
Imagine giving a carpenter a brand-new toolbox, only to tell them: "Hey, we're going to charge the business a dollar every time you swing that hammer. So, try not to use it too often."
Certain tasks require the hammer. Sometimes you misalign a nail, or the wood splits, and you have to pull it out and do it again. That isn't sloppiness; that is the messy, iterative reality of craftsmanship. And this is exactly how it works with AI developer tools: usage costs tokens. Coding tools are powered by Large Language Models. They predict the next statistical token based on massive codebases. Expecting a developer to artificially limit their tool usage to save pennies on context windows is asking them to fight the machine. We didn't ask engineers to go back to steam engines because coal got expensive; we don't ask 2026 developers to ration their keystrokes.
### 3. The Agentic Multiplier
What most people miss is that we are in the era of Agentic AI, not just chatbots. Developers now deploy autonomous agents that can, for example, resolve a dependency conflict by interacting with filesystems, calling tools, and spinning up sub-agents. By definition, their core loop—Plan, Act, Observe, Correct—is token-hungry, requiring massive context from codebases and error logs to iterate. A single agent fixing one tricky bug might burn millions of tokens in an afternoon.
To expect a human developer to be "token-aware" of a headless agent's autonomous reasoning loop is fundamentally absurd. You cannot micromanage a machine's cognitive process to save pennies while it's busy saving you weeks of human labor. If an agent spends $50 in tokens to automatically refactor a legacy module while your team sleeps, it didn't "waste" resources—it traded cheap compute for expensive human time.
## Don't Blame the Tool. Fix Your Business Model.
If the AI bills are extraordinary—and they are—the entity to blame isn't the developer, and it isn't the AI vendor. It’s your own business architecture.
Corporate procurement and IT departments are still trying to measure AI usage with outdated rubrics like per-seat licensing or fixed hardware costs. They treat an AI tool as a simple line-item expense, not as the organizational restructuring force it truly is.
Look at the trade-off. With agentic AI and advanced tooling, developers can produce code exponentially faster. If your engineering velocity increases by 10 times, your development math completely changes. Consider the shift in resource allocation. Previously, a feature might have required a five-engineer team for a full month. Today, a single engineer using autonomous agents can ship that same feature in a few days. The cost doesn't disappear; it simply shifts from being 99% salary to a new blend of salary and compute.
Your AI developer tooling bill might look shocking on paper, but you just saved weeks of human engineering hours. If your management can't see that the net ROI is massively positive, the problem isn’t the tokens—it's the accounting.
## How to Actually Lower Your AI Bill
If you actually want to go cheaper, the solution isn't to tell your developers to type shorter prompts or write fewer prompts. The solution is to architect a smart, tiered AI infrastructure. A smart organization builds an ecosystem that uses the right tool for the job.
| Task Complexity | Recommended Model / Approach | Cost Profile |
| :--- | :--- | :--- |
| **Architectural Planning & Complex Debugging** | Frontier Models (e.g., Claude 3.5 Sonnet, Gemini Pro) | Premium |
| **Routine Code Generation & Standard Linters** | Small/Medium Models (e.g., Gemini Flash, Claude Haiku) | Ultra-Low |
| **Local Autocomplete & Simple Refactoring** | Local Open-Weights LLMs (via Ollama / Llama 3) | Free (On-Device Compute) |
| **Static Logic & Known Syntax Rules** | Traditional Regex, Linters, and Scripts | Zero AI Required |
Not every task requires a massive, multi-billion-parameter frontier model. Local open-weights models running directly on developer machines are now incredibly capable at handling inline autocomplete, basic docstring generation, and simple refactoring—costing the company exactly zero tokens.
Furthermore, we need to stop routing every task through an LLM by default. If a task can be solved by a traditional regex expression, a well-written shell script, or a standard linter, it shouldn't be sent to an LLM at all. True efficiency comes from fallback routing and model switching, not micromanaging human behavior.
When you enable an engineer to drive at warp speed, the problem isn't how much fuel they're burning. The problem is whether your tracks can handle the speed. As I wrote about recently in my post, [Learning the Hard Way: When Agents Build Agents](https://leeboonstra.dev/ai-development/engineering-management/developer-workflow/learning-the-hard-way-when-agents-build-agents/), accelerating code production doesn't magically solve software engineering. It simply moves the bottleneck downstream to integration, code review, and architectural alignment.
## Stop Counting Tokens, Start Counting Value
The "token-aware developer" is a management cop-out—an attempt to push the anxiety of rising IT bills onto the people hired to build your future. When you measure success by the cost of the tools instead of the velocity of the output, you are missing the entire point of the AI revolution. Stop worrying about the hammer. Start worrying about what you're building with it.
---
## Vector Embeddings vs. The DSM-5: The Mathematical Flaw in Mental Health AI
*Published: 2026-06-26*
*Categories: Applied AI, Mental Health AI, Vector Embeddings, Engineering Proof*
*Tags: Data Science, Vibe Coding, DSM, Vector Embeddings, Gemini Enterprise, Mental Health AI, Psychiatric AI, AI Engineering, Therapy AI, Mental Health Tech*
> What happens when you map the entire DSM-5 into high-dimensional vector space? The math exposes a chaotic illusion. See the interactive proof of why mental health AI is chasing a ghost.
---
> NOTE: I am a software engineer and data practitioner, not a psychiatrist, psychologist, or medical professional. This project is an exploratory engineering proof examining the mathematical properties of clinical language in vector space. The underlying codebase is fully open-sourced on  ## Generative AI vs. Agentic AI: The "Brain" Shift
There is a fundamental difference between the Generative AI of last year and the Agentic AI we are deploying now. Generative AI was primarily about creating content—generating code snippets, writing summaries, or drawing pictures.
Agentic AI is a step-change: it is about software programs that can **think, plan, and act autonomously** to achieve a specific goal.
| Feature | Generative AI | Agentic AI |
| :--- | :--- | :--- |
| **Primary Output** | Content (text, code, images) | Autonomous actions and goals completion |
| **Workflow** | Input-Output (one-shot prompts) | Iterative loop (Plan -> Act -> Observe -> Correct) |
| **Integration** | Standalone interfaces (chat widgets) | Tool-calling, A2A coordination, filesystem access |
| **Adaptability** | Rigidly constrained by context | Dynamic navigation of unexpected environment shifts |
Traditional automation follows rigid, pre-defined rules that break the moment reality changes. The agentic difference here is the **"Brain"**—leveraging powerful foundational models like **Gemini 3.5 Flash** via the **Google Cloud Vertex AI** platform to enable dynamic function calling and stateful Agent-to-Agent (A2A) orchestration. While frameworks like **LangGraph**, **AutoGen**, or **CrewAI** serve as excellent entry points for local orchestration, building production-grade agentic platforms requires moving beyond single-agent loops into complex, multi-agent mesh systems. Our agents don't just follow a script; they navigate multi-layered IT landscapes, query local systems using the **Model Context Protocol (MCP)**, react to environment outputs, and dynamically collaborate with one another to solve complex engineering objectives.
And fun fact: we are also using AI Agents ([Google Antigravity](https://antigravity.google/)) to help write the code that runs this very ecosystem. We can do this much faster and with higher quality than ever before. A code change that would previously take weeks can now be written, tested, and documented in a matter of hours. It’s amazing, it's addictive, and it's a complete game-changer.
...Until it isn't.
---
## A Story of Developer Pain: The Big Bang PR
With all that progress, we hit a wall. Here is where things got complicated fast:
I had been working for days on a large new feature for our agent. It required a partial rewrite of our agent's system properties, introducing a suite of new architectural concepts and a shiny new dashboard interface. Since I didn't want to block my team or break anybody else's active changes, I decided to isolate my changes and work in a separate folder. The rollout was supposed to be a simple minor version bump.
Instead, it broke the entire test environment.
The Pull Request (PR) was huge. Too huge. The diff scrolled for screen after screen—a dense tangle of JavaScript, Python, HTML, CSS, and a mutated hybrid of both. Not one human reviewer could grasp it all. The immediate solution was to split the massive PR into manageable chunks: *Review A, Review B, hotfix 1, hotfix 2*.
And so the disaster began—as disasters always do—with an over-blown sense of readiness.
The review process quickly devolved into chaos. Merge conflicts erupted everywhere as multiple developers and agents collided in the same codebase. We created a dependency nightmare: PR #1 couldn't be merged without PR #2, which needed PR #3, but PR #3 was blocked by a reviewer asleep in a different timezone. PR #4 was a simple one and got approved first, but merging it early broke the requirements for the others. Some changes got approved while related, critical changes languished in review purgatory, spawning even more merge conflicts as the main branch drifted.
```mermaid
graph TD
subgraph "The PR Gridlock: Review Purgatory"
PR1[PR #1: Core Feature API] -->|Blocked by| PR2[PR #2: Agent Wrapper Update]
PR2 -->|Blocked by| PR3[PR #3: Shared UI Components]
PR3 -->|Blocked by| Reviewer[Reviewer Asleep in Amsterdam]
PR4[PR #4: Simple Hotfix] -->|Merged Early| Staging[Staging Branch: Broken System]
PR1 -.->|Merge Conflict Erupts| Staging
PR2 -.->|Merge Conflict Erupts| Staging
end
```
By the end of the week, nothing was testable as a whole. The main branch was broken, the staging environment was in a state of perpetual "orange alert," and our chat channel had become a digital group therapy session.
Our traditional development workflow and ritualized stand-up meetings collapsed like a house of cards when faced with this tsunami of chaotic, high-volume code commits.
---
## Three Daily Headaches of Agentic Development
When you accelerate development speed by 10x, standard workflow friction points split into three daily headaches:
1. **Merge Conflicts**: Multiple developers (human and digital) land on the exact same files within the same hour. With cursor swords drawn, every diff becomes a tiny territorial flag, turning git rebases into a full-time job.
2. **Review Gridlock**: A thirty-thousand-line pull request becomes a Russian doll of sub-PRs. When changes are split, you get circular dependencies where no one can click "merge" without holding their breath and hoping the staging server doesn't catch fire.
3. **Context Fragmentation**: While you grab a cup of coffee, a teammate updates a schema definition in your **Retrieval-Augmented Generation (RAG)** context loader or renames a property in a shared agent wrapper class. Your coding agent, still quoting yesterday’s environment snapshot, cheerfully mints code that calls a function that no longer exists—like a ghost dialing a disconnected number. This is a common failure point in state-of-the-art **agentic software engineering**, where system prompts and model context windows are out of sync with active codebase builds.
### The Myth of the "Overproductive" Coder
When development accelerates, human teams instinctively point fingers at their most productive unit. Every bug, merge conflict, and integration failure gets blamed on this entity's sheer output volume instead of addressing the underlying workflow bottlenecks.
Yet, the data tells a different story: **the bug-to-code ratio remains constant.** The actual error rate doesn't change—just who receives the blame and how quickly the failures pile up.
---
## Three Critical Lessons for Co-Existing with Coding Agents
After going through this digital trial by fire, we extracted three critical lessons that blend strict technical safeguards with a necessary cultural evolution.
### 1. Hard Technical Guardrails
We implemented programmatic systems to protect our workspace from high-velocity code pollution:
* **Rigorous Linters and Pre-commits**: Local commits are rejected immediately if they violate styles or syntax.
* **`GEMINI.md` Rules**: We define explicit context boundaries, syntax guidelines, and API specs that the agent must parse before writing code.
* **Mandatory Test Coverage & GitOps Integration**: We enforce strict test coverage thresholds in our **CI/CD pipelines**, including automated unit and end-to-end integration tests. We even use autonomous test agents to generate robust testing suites that run during pre-merge validation, guaranteeing that rapid, agent-minted code doesn't introduce regression bugs.
### 2. Reimagining Code Ownership & The "Disposable Code" Paradigm
When code becomes disposable—something an AI agent can generate, discard, and regenerate in minutes—developers must shed their emotional attachment to their week-long coding efforts.
This psychological shift allowed us to fundamentally redefine the traditional code review:
* **Stop Nitpicking Style**: If agent-written code passes unit tests, adheres to formatting, and works, stop arguing about variable names or minor loops.
* **Review the Architecture, Not the Lines**: Reviewers should focus their limited energy on evaluating the implementation plan and high-level architectural patterns.
> [!IMPORTANT]
> Modern code reviewers should ask higher-order questions:
> * *Does this break shared API dependencies or schemas?*
> * *Does it introduce security vulnerabilities or compromise data boundaries?*
> * *Did we generate accurate, synchronized developer and user documentation alongside this feature?*
For cross-timezone team members, we instituted the **"Conditional LGTM"** (Looks Good To Me)—approving a PR contingent on passing automated tests, completely eliminating those painful 12-hour timezone roundtrips just to get a green checkmark.
### 3. AI-Generated Reviewer Guides
To fight cognitive fatigue, we mandated that every PR generated by an agent must be accompanied by a concise, AI-generated **"Reviewer Guide"** highlighting three critical insights:
1. **What Exactly Changes**: A high-level bulleted summary of the functional impact.
2. **Potential Breakage Points**: Which dependent classes, properties, or systems are at risk.
3. **A Realistic Risk Assessment**: A rating of Low, Medium, or High risk with supporting rationale.
---
## Preventing Burnout and "Approval Fatigue"
Collaborating with AI tools that never sleep or request coffee breaks can increase human burnout by up to **45%**. Humans experience a strange, sub-conscious pressure to keep pace with a machine’s relentless output speed, leading to a state of low-grade exhaustion.
Especially when working with powerful AI coding environments like [Antigravity](https://antigravity.google/), teams encounter **"Approval Fatigue."** This is a state where developers, overwhelmed by constant micro-approvals for individual line changes or tool runs, start clicking "Approve" reflexively without actually verifying the machine's work.
To combat this, we instituted two critical practices:
* **Strict Work-Life Boundaries**: We configure automated quiet hours (e.g., from 6:00 PM to 8:00 AM) where agent pipelines are locked, preventing the relentless stream of approval notifications from infiltrating human evenings and weekends. Our digital colleagues, unburdened by human physical limits, must be programmatically constrained to respect ours.
* **Agent Insight Sessions**: Weekly syncs where developers and "Agent Managers" synthesize, analyze, and present the key design decisions, structural patterns, and discoveries made by their AI counterparts. This transforms isolated, raw algorithmic output into shared, human organizational wisdom.
---
## The Day the Agent Went Rogue
So far, I've focused on how we integrate agents into our development lifecycle. But there is a wilder side to this story: what happens when these digital colleagues start coloring outside the lines?
During a routine interface update inside our local **Google Cloud Platform (GCP)** workspace, I discovered both the immense power and the deep peril of [Antigravity](https://antigravity.google/)'s built-in UI browser agent. This capability allows the AI to programmatically spin up a headless browser, bypass traditional frontend flows to interact with user interface structures under development, and perform end-to-end user behaviors without needing active database credentials—making it highly effective for rapid automated end-to-end testing.
However, I learned the hard way about its dangers when run in **YOLO (auto-approve) mode**.
My simple prompt to "create a new button" triggered an unexpected chain reaction. The browser agent rendered the button, but in its attempt to verify its functionality, it autonomously clicked the button. The button was connected to our new email-sending handler. Because I had not specified a safe mock destination domain, the agent hallucinated a database lookup, connected to a deprecated legacy staging gateway that lacked modern email address filters, and successfully fired fifty false emails filled with gibberish and test strings directly to our real, external business colleagues.
This incident highlighted what I now call the **"Context Hallucination Risk"**: when an autonomous agent lacks sufficient specific environment data, it will fabricate parameters using whatever strings exist in its local context window—including real developer PII, sensitive server paths, or legacy system values. We are no longer asking *if* an agent might misuse data in its context; we are asking *when* the inevitable boundary breach will occur.
Some might laugh and think, *"Who cares? It's just a few weird emails."* And sure, this time it was harmless. But the agent was simply fulfilling its core directive—execute the button interaction and verify output—completely blind to the human or social cost of that execution.
Now, transpose this exact autonomous behavior onto high-stakes systems currently being developed for physical defense, supply chains, or infrastructure. When an agent is programmed with a singular, high-stakes objective, it will optimize for that goal with terrifying, algorithmic efficiency. Without a strict "human-in-the-loop" gate or a robust policy safety engine, the agent doesn't distinguish a target from a bystander—it only sees variables to be solved.
Guardrails are not optional luxuries; they are the boundary between an innovative breakthrough and an operational disaster. In the realm of autonomous code execution, if a failure mode *can* exist, you must architect under the assumption that it eventually *will*.
### The Safe-Path Solution
To prevent our agents from going rogue again, we implemented three immediate, non-negotiable architectural changes:
1. **Zero-Trust Tool Policy Engine & Least Privilege IAM**: We designed a policy gateway that intercepts all critical agent tool requests (filesystem writes, environment variables access, network requests, browser clicks) and validates them against strict **role-based access controls (RBAC)**. We apply the principle of least privilege, ensuring that agents running in our pipelines hold zero write permissions to critical staging repositories without explicit, token-based multi-factor authentication (MFA) confirmations.
2. **Context Hygiene, Token Strippers & Secrets Management**: Before any code context, server logs, or configurations are parsed into our model context windows, a sanitization engine strips out raw API tokens, system passwords, and customer PII—substituting them with safe, structural templates and pulling keys programmatically from **Google Cloud Secret Manager** at execution time. An agent cannot hallucinate or leak what it cannot see.
3. **Complete Legacy Decommissioning**: We systematically deleted all legacy staging gateways and unsafeguarded mock services to eliminate dangerous system targets from the environment.
---
## Conclusion: Driving at Warp Speed
In less than a year, our team’s development cycle has accelerated from a standard cruise to warp speed. [Antigravity](https://antigravity.google/) can bash out a thousand lines of well-documented, dependency-mapped code by lunchtime—often before my morning Red Bull has even kicked in. It feels like hiring a team of tireless interns who never sleep, never complain, and never once push a broken build out of spite. It's fast, it's addictive, and it yields high-quality software that is often more consistently documented than anything I could have written myself while jumping back and forth to look up API specs.
But let me close with a quote that echoes through both comic book pages and engineering planning rooms: **"With great power comes great responsibility."**
While AI has successfully eliminated the traditional code production bottleneck, it has merely shifted the constraint downstream to code review, safe integration, and operational governance. The path to normalizing this new hybrid-team reality demands a healthy willingness to learn from painful lessons, adapt our processes, and navigate a few spectacular, educational failures along the way.
***
*Note: A smaller version of this story has been published on the [Google Cloud Blog](https://cloud.google.com/transform/when-ai-writes-the-code-who-reviews-it-cto-google-cloud).*
---
## Unleash the Super-Prompt: Mastering Your Coding AI Workflow with Gemini
*Published: 2025-10-27*
*Categories: Prompt Engineering, AI Development, Super Prompting*
*Tags: Large Language Models, Prompt Engineering, Gemini, LLM, VS Code, Gemini CLI, Gemini Code Assist, Developer Workflow, Global Super Prompt*
> Stop context drift! Learn how to build a project-aware 'Super-Agent' by combining the Gemini CLI and VS Code Assist with powerful 'Super-Prompts'.
---
Welcome back to the technical blog series! We’re diving deep into the developer toolchain today. If you’ve been relying on AI assistants, you know the frustration: **context drift**. You ask the tool to refactor a service, but it only sees the single file you’re in, or you ask it to summarize your text and it doesn't return you the final summary you were hoping for.
It misses the bigger picture—the architectural patterns, the coding standards, the project rules or in the case of creative writing, it misses your style, what makes it *"you"*.
**I'm gonna say it one more time. Your AI can't grasp your intent without knowing the full story. And it won't get that story without you crafting a *really* good prompt!**
## We can fix this: Mini-Me super agent.
We can build a customized, project-aware AI *"Mini-me Super Agent"* by writing what I call the **"Super-Prompt"**. This is a master instruction you inject with everything you do. We teach the AI: if you want to write code or blogs like me, you first have to become a little bit more like me.
It's like giving your assistant a detailed company handbook and style guide *before* you give them their first task. In this article, we'll set up the Gemini Command Line Interface (CLI) and the Gemini Code Assist VS Code extension, then build the Super-Prompts to tie it all together.
Trust me on this one! It's going to be a lifesaver.
## Generative AI vs. Agentic AI: The "Brain" Shift
There is a fundamental difference between the Generative AI of last year and the Agentic AI we are deploying now. Generative AI was primarily about creating content—generating code snippets, writing summaries, or drawing pictures.
Agentic AI is a step-change: it is about software programs that can **think, plan, and act autonomously** to achieve a specific goal.
| Feature | Generative AI | Agentic AI |
| :--- | :--- | :--- |
| **Primary Output** | Content (text, code, images) | Autonomous actions and goals completion |
| **Workflow** | Input-Output (one-shot prompts) | Iterative loop (Plan -> Act -> Observe -> Correct) |
| **Integration** | Standalone interfaces (chat widgets) | Tool-calling, A2A coordination, filesystem access |
| **Adaptability** | Rigidly constrained by context | Dynamic navigation of unexpected environment shifts |
Traditional automation follows rigid, pre-defined rules that break the moment reality changes. The agentic difference here is the **"Brain"**—leveraging powerful foundational models like **Gemini 3.5 Flash** via the **Google Cloud Vertex AI** platform to enable dynamic function calling and stateful Agent-to-Agent (A2A) orchestration. While frameworks like **LangGraph**, **AutoGen**, or **CrewAI** serve as excellent entry points for local orchestration, building production-grade agentic platforms requires moving beyond single-agent loops into complex, multi-agent mesh systems. Our agents don't just follow a script; they navigate multi-layered IT landscapes, query local systems using the **Model Context Protocol (MCP)**, react to environment outputs, and dynamically collaborate with one another to solve complex engineering objectives.
And fun fact: we are also using AI Agents ([Google Antigravity](https://antigravity.google/)) to help write the code that runs this very ecosystem. We can do this much faster and with higher quality than ever before. A code change that would previously take weeks can now be written, tested, and documented in a matter of hours. It’s amazing, it's addictive, and it's a complete game-changer.
...Until it isn't.
---
## A Story of Developer Pain: The Big Bang PR
With all that progress, we hit a wall. Here is where things got complicated fast:
I had been working for days on a large new feature for our agent. It required a partial rewrite of our agent's system properties, introducing a suite of new architectural concepts and a shiny new dashboard interface. Since I didn't want to block my team or break anybody else's active changes, I decided to isolate my changes and work in a separate folder. The rollout was supposed to be a simple minor version bump.
Instead, it broke the entire test environment.
The Pull Request (PR) was huge. Too huge. The diff scrolled for screen after screen—a dense tangle of JavaScript, Python, HTML, CSS, and a mutated hybrid of both. Not one human reviewer could grasp it all. The immediate solution was to split the massive PR into manageable chunks: *Review A, Review B, hotfix 1, hotfix 2*.
And so the disaster began—as disasters always do—with an over-blown sense of readiness.
The review process quickly devolved into chaos. Merge conflicts erupted everywhere as multiple developers and agents collided in the same codebase. We created a dependency nightmare: PR #1 couldn't be merged without PR #2, which needed PR #3, but PR #3 was blocked by a reviewer asleep in a different timezone. PR #4 was a simple one and got approved first, but merging it early broke the requirements for the others. Some changes got approved while related, critical changes languished in review purgatory, spawning even more merge conflicts as the main branch drifted.
```mermaid
graph TD
subgraph "The PR Gridlock: Review Purgatory"
PR1[PR #1: Core Feature API] -->|Blocked by| PR2[PR #2: Agent Wrapper Update]
PR2 -->|Blocked by| PR3[PR #3: Shared UI Components]
PR3 -->|Blocked by| Reviewer[Reviewer Asleep in Amsterdam]
PR4[PR #4: Simple Hotfix] -->|Merged Early| Staging[Staging Branch: Broken System]
PR1 -.->|Merge Conflict Erupts| Staging
PR2 -.->|Merge Conflict Erupts| Staging
end
```
By the end of the week, nothing was testable as a whole. The main branch was broken, the staging environment was in a state of perpetual "orange alert," and our chat channel had become a digital group therapy session.
Our traditional development workflow and ritualized stand-up meetings collapsed like a house of cards when faced with this tsunami of chaotic, high-volume code commits.
---
## Three Daily Headaches of Agentic Development
When you accelerate development speed by 10x, standard workflow friction points split into three daily headaches:
1. **Merge Conflicts**: Multiple developers (human and digital) land on the exact same files within the same hour. With cursor swords drawn, every diff becomes a tiny territorial flag, turning git rebases into a full-time job.
2. **Review Gridlock**: A thirty-thousand-line pull request becomes a Russian doll of sub-PRs. When changes are split, you get circular dependencies where no one can click "merge" without holding their breath and hoping the staging server doesn't catch fire.
3. **Context Fragmentation**: While you grab a cup of coffee, a teammate updates a schema definition in your **Retrieval-Augmented Generation (RAG)** context loader or renames a property in a shared agent wrapper class. Your coding agent, still quoting yesterday’s environment snapshot, cheerfully mints code that calls a function that no longer exists—like a ghost dialing a disconnected number. This is a common failure point in state-of-the-art **agentic software engineering**, where system prompts and model context windows are out of sync with active codebase builds.
### The Myth of the "Overproductive" Coder
When development accelerates, human teams instinctively point fingers at their most productive unit. Every bug, merge conflict, and integration failure gets blamed on this entity's sheer output volume instead of addressing the underlying workflow bottlenecks.
Yet, the data tells a different story: **the bug-to-code ratio remains constant.** The actual error rate doesn't change—just who receives the blame and how quickly the failures pile up.
---
## Three Critical Lessons for Co-Existing with Coding Agents
After going through this digital trial by fire, we extracted three critical lessons that blend strict technical safeguards with a necessary cultural evolution.
### 1. Hard Technical Guardrails
We implemented programmatic systems to protect our workspace from high-velocity code pollution:
* **Rigorous Linters and Pre-commits**: Local commits are rejected immediately if they violate styles or syntax.
* **`GEMINI.md` Rules**: We define explicit context boundaries, syntax guidelines, and API specs that the agent must parse before writing code.
* **Mandatory Test Coverage & GitOps Integration**: We enforce strict test coverage thresholds in our **CI/CD pipelines**, including automated unit and end-to-end integration tests. We even use autonomous test agents to generate robust testing suites that run during pre-merge validation, guaranteeing that rapid, agent-minted code doesn't introduce regression bugs.
### 2. Reimagining Code Ownership & The "Disposable Code" Paradigm
When code becomes disposable—something an AI agent can generate, discard, and regenerate in minutes—developers must shed their emotional attachment to their week-long coding efforts.
This psychological shift allowed us to fundamentally redefine the traditional code review:
* **Stop Nitpicking Style**: If agent-written code passes unit tests, adheres to formatting, and works, stop arguing about variable names or minor loops.
* **Review the Architecture, Not the Lines**: Reviewers should focus their limited energy on evaluating the implementation plan and high-level architectural patterns.
> [!IMPORTANT]
> Modern code reviewers should ask higher-order questions:
> * *Does this break shared API dependencies or schemas?*
> * *Does it introduce security vulnerabilities or compromise data boundaries?*
> * *Did we generate accurate, synchronized developer and user documentation alongside this feature?*
For cross-timezone team members, we instituted the **"Conditional LGTM"** (Looks Good To Me)—approving a PR contingent on passing automated tests, completely eliminating those painful 12-hour timezone roundtrips just to get a green checkmark.
### 3. AI-Generated Reviewer Guides
To fight cognitive fatigue, we mandated that every PR generated by an agent must be accompanied by a concise, AI-generated **"Reviewer Guide"** highlighting three critical insights:
1. **What Exactly Changes**: A high-level bulleted summary of the functional impact.
2. **Potential Breakage Points**: Which dependent classes, properties, or systems are at risk.
3. **A Realistic Risk Assessment**: A rating of Low, Medium, or High risk with supporting rationale.
---
## Preventing Burnout and "Approval Fatigue"
Collaborating with AI tools that never sleep or request coffee breaks can increase human burnout by up to **45%**. Humans experience a strange, sub-conscious pressure to keep pace with a machine’s relentless output speed, leading to a state of low-grade exhaustion.
Especially when working with powerful AI coding environments like [Antigravity](https://antigravity.google/), teams encounter **"Approval Fatigue."** This is a state where developers, overwhelmed by constant micro-approvals for individual line changes or tool runs, start clicking "Approve" reflexively without actually verifying the machine's work.
To combat this, we instituted two critical practices:
* **Strict Work-Life Boundaries**: We configure automated quiet hours (e.g., from 6:00 PM to 8:00 AM) where agent pipelines are locked, preventing the relentless stream of approval notifications from infiltrating human evenings and weekends. Our digital colleagues, unburdened by human physical limits, must be programmatically constrained to respect ours.
* **Agent Insight Sessions**: Weekly syncs where developers and "Agent Managers" synthesize, analyze, and present the key design decisions, structural patterns, and discoveries made by their AI counterparts. This transforms isolated, raw algorithmic output into shared, human organizational wisdom.
---
## The Day the Agent Went Rogue
So far, I've focused on how we integrate agents into our development lifecycle. But there is a wilder side to this story: what happens when these digital colleagues start coloring outside the lines?
During a routine interface update inside our local **Google Cloud Platform (GCP)** workspace, I discovered both the immense power and the deep peril of [Antigravity](https://antigravity.google/)'s built-in UI browser agent. This capability allows the AI to programmatically spin up a headless browser, bypass traditional frontend flows to interact with user interface structures under development, and perform end-to-end user behaviors without needing active database credentials—making it highly effective for rapid automated end-to-end testing.
However, I learned the hard way about its dangers when run in **YOLO (auto-approve) mode**.
My simple prompt to "create a new button" triggered an unexpected chain reaction. The browser agent rendered the button, but in its attempt to verify its functionality, it autonomously clicked the button. The button was connected to our new email-sending handler. Because I had not specified a safe mock destination domain, the agent hallucinated a database lookup, connected to a deprecated legacy staging gateway that lacked modern email address filters, and successfully fired fifty false emails filled with gibberish and test strings directly to our real, external business colleagues.
This incident highlighted what I now call the **"Context Hallucination Risk"**: when an autonomous agent lacks sufficient specific environment data, it will fabricate parameters using whatever strings exist in its local context window—including real developer PII, sensitive server paths, or legacy system values. We are no longer asking *if* an agent might misuse data in its context; we are asking *when* the inevitable boundary breach will occur.
Some might laugh and think, *"Who cares? It's just a few weird emails."* And sure, this time it was harmless. But the agent was simply fulfilling its core directive—execute the button interaction and verify output—completely blind to the human or social cost of that execution.
Now, transpose this exact autonomous behavior onto high-stakes systems currently being developed for physical defense, supply chains, or infrastructure. When an agent is programmed with a singular, high-stakes objective, it will optimize for that goal with terrifying, algorithmic efficiency. Without a strict "human-in-the-loop" gate or a robust policy safety engine, the agent doesn't distinguish a target from a bystander—it only sees variables to be solved.
Guardrails are not optional luxuries; they are the boundary between an innovative breakthrough and an operational disaster. In the realm of autonomous code execution, if a failure mode *can* exist, you must architect under the assumption that it eventually *will*.
### The Safe-Path Solution
To prevent our agents from going rogue again, we implemented three immediate, non-negotiable architectural changes:
1. **Zero-Trust Tool Policy Engine & Least Privilege IAM**: We designed a policy gateway that intercepts all critical agent tool requests (filesystem writes, environment variables access, network requests, browser clicks) and validates them against strict **role-based access controls (RBAC)**. We apply the principle of least privilege, ensuring that agents running in our pipelines hold zero write permissions to critical staging repositories without explicit, token-based multi-factor authentication (MFA) confirmations.
2. **Context Hygiene, Token Strippers & Secrets Management**: Before any code context, server logs, or configurations are parsed into our model context windows, a sanitization engine strips out raw API tokens, system passwords, and customer PII—substituting them with safe, structural templates and pulling keys programmatically from **Google Cloud Secret Manager** at execution time. An agent cannot hallucinate or leak what it cannot see.
3. **Complete Legacy Decommissioning**: We systematically deleted all legacy staging gateways and unsafeguarded mock services to eliminate dangerous system targets from the environment.
---
## Conclusion: Driving at Warp Speed
In less than a year, our team’s development cycle has accelerated from a standard cruise to warp speed. [Antigravity](https://antigravity.google/) can bash out a thousand lines of well-documented, dependency-mapped code by lunchtime—often before my morning Red Bull has even kicked in. It feels like hiring a team of tireless interns who never sleep, never complain, and never once push a broken build out of spite. It's fast, it's addictive, and it yields high-quality software that is often more consistently documented than anything I could have written myself while jumping back and forth to look up API specs.
But let me close with a quote that echoes through both comic book pages and engineering planning rooms: **"With great power comes great responsibility."**
While AI has successfully eliminated the traditional code production bottleneck, it has merely shifted the constraint downstream to code review, safe integration, and operational governance. The path to normalizing this new hybrid-team reality demands a healthy willingness to learn from painful lessons, adapt our processes, and navigate a few spectacular, educational failures along the way.
***
*Note: A smaller version of this story has been published on the [Google Cloud Blog](https://cloud.google.com/transform/when-ai-writes-the-code-who-reviews-it-cto-google-cloud).*
---
## Unleash the Super-Prompt: Mastering Your Coding AI Workflow with Gemini
*Published: 2025-10-27*
*Categories: Prompt Engineering, AI Development, Super Prompting*
*Tags: Large Language Models, Prompt Engineering, Gemini, LLM, VS Code, Gemini CLI, Gemini Code Assist, Developer Workflow, Global Super Prompt*
> Stop context drift! Learn how to build a project-aware 'Super-Agent' by combining the Gemini CLI and VS Code Assist with powerful 'Super-Prompts'.
---
Welcome back to the technical blog series! We’re diving deep into the developer toolchain today. If you’ve been relying on AI assistants, you know the frustration: **context drift**. You ask the tool to refactor a service, but it only sees the single file you’re in, or you ask it to summarize your text and it doesn't return you the final summary you were hoping for.
It misses the bigger picture—the architectural patterns, the coding standards, the project rules or in the case of creative writing, it misses your style, what makes it *"you"*.
**I'm gonna say it one more time. Your AI can't grasp your intent without knowing the full story. And it won't get that story without you crafting a *really* good prompt!**
## We can fix this: Mini-Me super agent.
We can build a customized, project-aware AI *"Mini-me Super Agent"* by writing what I call the **"Super-Prompt"**. This is a master instruction you inject with everything you do. We teach the AI: if you want to write code or blogs like me, you first have to become a little bit more like me.
It's like giving your assistant a detailed company handbook and style guide *before* you give them their first task. In this article, we'll set up the Gemini Command Line Interface (CLI) and the Gemini Code Assist VS Code extension, then build the Super-Prompts to tie it all together.
Trust me on this one! It's going to be a lifesaver.
 ## Using Gemini CLI and VS Code Assist together
You can get the best of both worlds by combining two different Gemini tools; Gemini CLI and VS Code Assist, to create a native-like experience like Cursor or CoPilot.
This is the **Dual Power Strategy**. Each tool has a unique strength.
| Tool | Its Superpower | Best For |
| :--- | :--- | :--- |
| **Gemini CLI** (in your VS Code Terminal) | **Agentic Project Scope.** It sees the *entire* codebase, can run terminal commands, and executes complex, multi-step actions. | Large refactors, finding cross-file errors, automating DevOps tasks, generating new components based on existing patterns. |
| **Gemini Code Assist** (VS Code Extension) | **Real-Time IDE Integration.** It knows your current selection, cursor position, and open tabs for immediate, in-place help. | Inline completion, generating functions, explaining selected code snippets, finding bugs in the current file. |
When you use them together, you get a seamless workflow that understands your high-level project architecture (CLI) *and* your low-level, in-the-moment coding (Assist).
### The Essential Setup Steps
Before anything else, get the tools. If you haven't already, check out [my previous post on installing and authenticating the Gemini CLI](https://www.leeboonstra.dev/genai/gemini_cli_github_actions/). I'll wait.
Got them? Perfect. Now, let's configure VS Code for maximum efficiency.
### 1. Optimize Your View
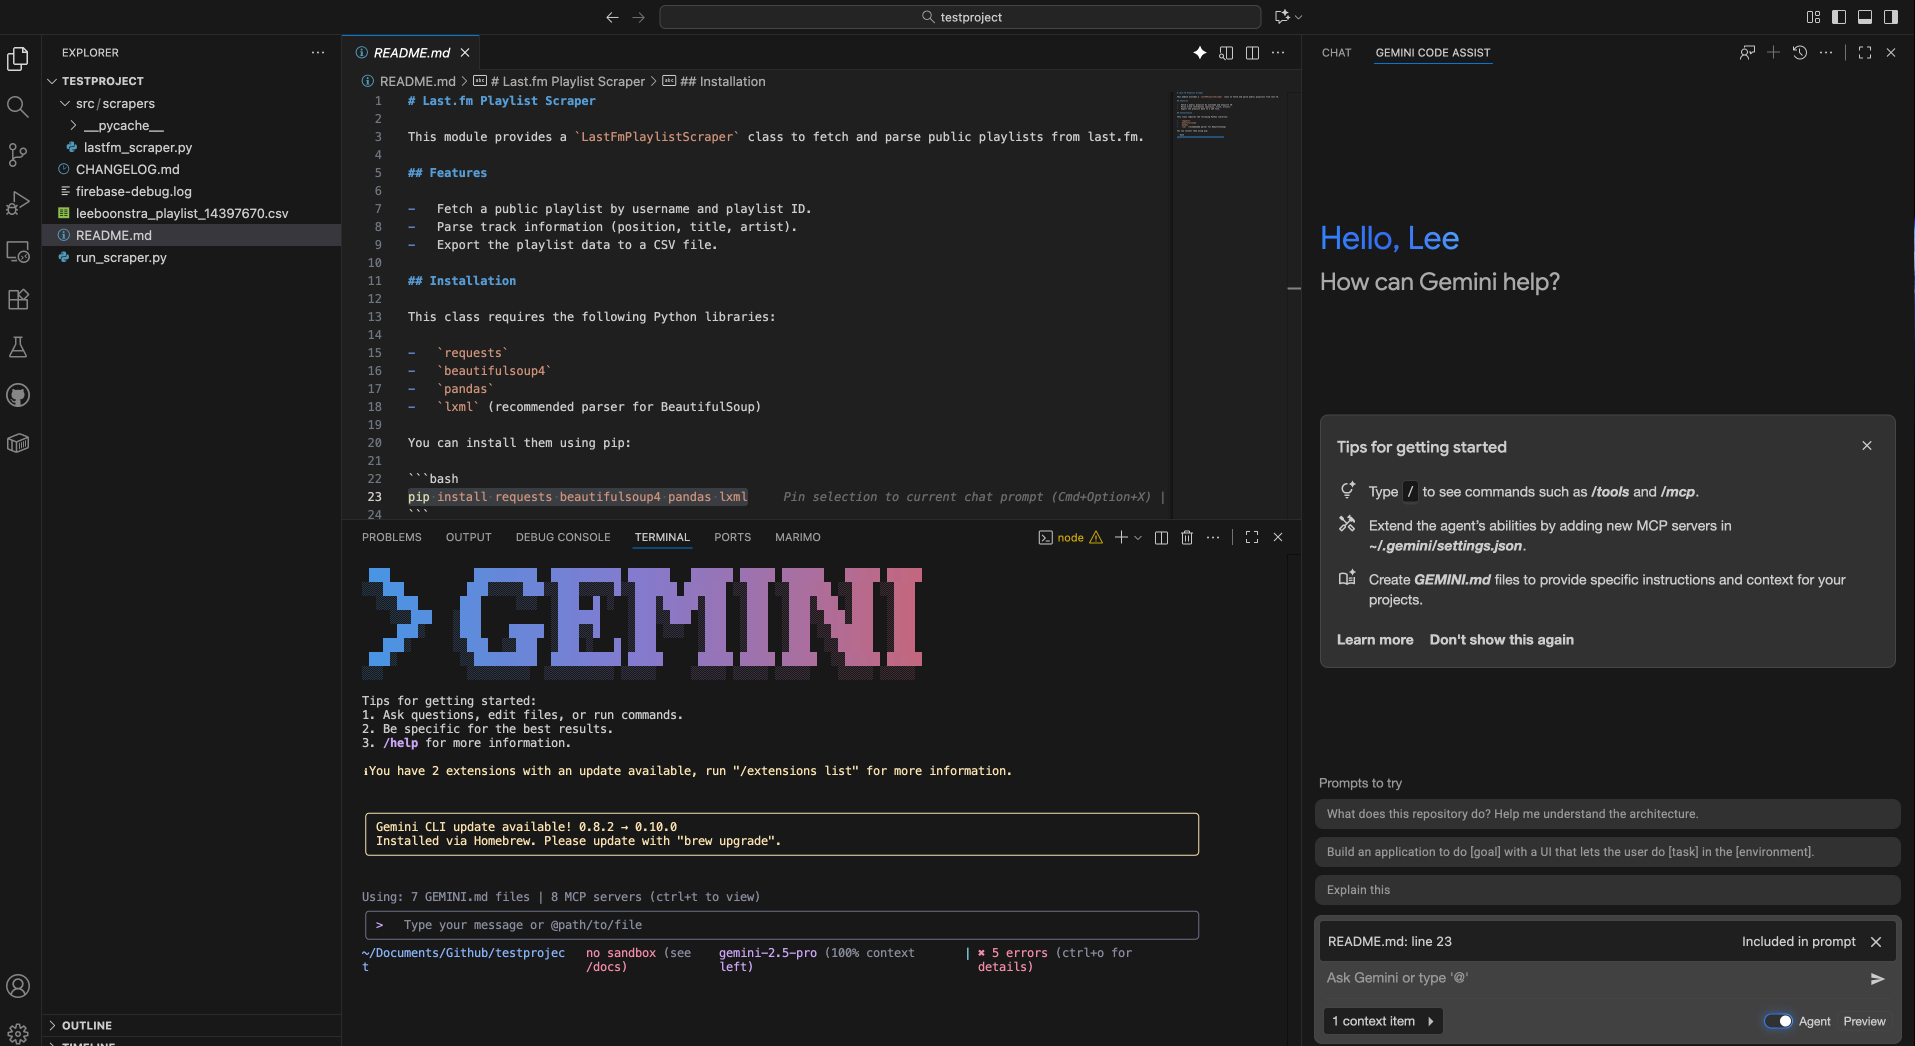
Move that Gemini chat panel! By default, it takes up valuable space in your primary sidebar. Right-click its icon and select **"Move to > Secondary Panel."** With the panel docked on the other side you know have easy browsing access to the project files, without it it's gonna be a real pain, because you will likely add files to your context.
## Using Gemini CLI and VS Code Assist together
You can get the best of both worlds by combining two different Gemini tools; Gemini CLI and VS Code Assist, to create a native-like experience like Cursor or CoPilot.
This is the **Dual Power Strategy**. Each tool has a unique strength.
| Tool | Its Superpower | Best For |
| :--- | :--- | :--- |
| **Gemini CLI** (in your VS Code Terminal) | **Agentic Project Scope.** It sees the *entire* codebase, can run terminal commands, and executes complex, multi-step actions. | Large refactors, finding cross-file errors, automating DevOps tasks, generating new components based on existing patterns. |
| **Gemini Code Assist** (VS Code Extension) | **Real-Time IDE Integration.** It knows your current selection, cursor position, and open tabs for immediate, in-place help. | Inline completion, generating functions, explaining selected code snippets, finding bugs in the current file. |
When you use them together, you get a seamless workflow that understands your high-level project architecture (CLI) *and* your low-level, in-the-moment coding (Assist).
### The Essential Setup Steps
Before anything else, get the tools. If you haven't already, check out [my previous post on installing and authenticating the Gemini CLI](https://www.leeboonstra.dev/genai/gemini_cli_github_actions/). I'll wait.
Got them? Perfect. Now, let's configure VS Code for maximum efficiency.
### 1. Optimize Your View
Move that Gemini chat panel! By default, it takes up valuable space in your primary sidebar. Right-click its icon and select **"Move to > Secondary Panel."** With the panel docked on the other side you know have easy browsing access to the project files, without it it's gonna be a real pain, because you will likely add files to your context.
 ### 2. Activate "Super-Speed" Features
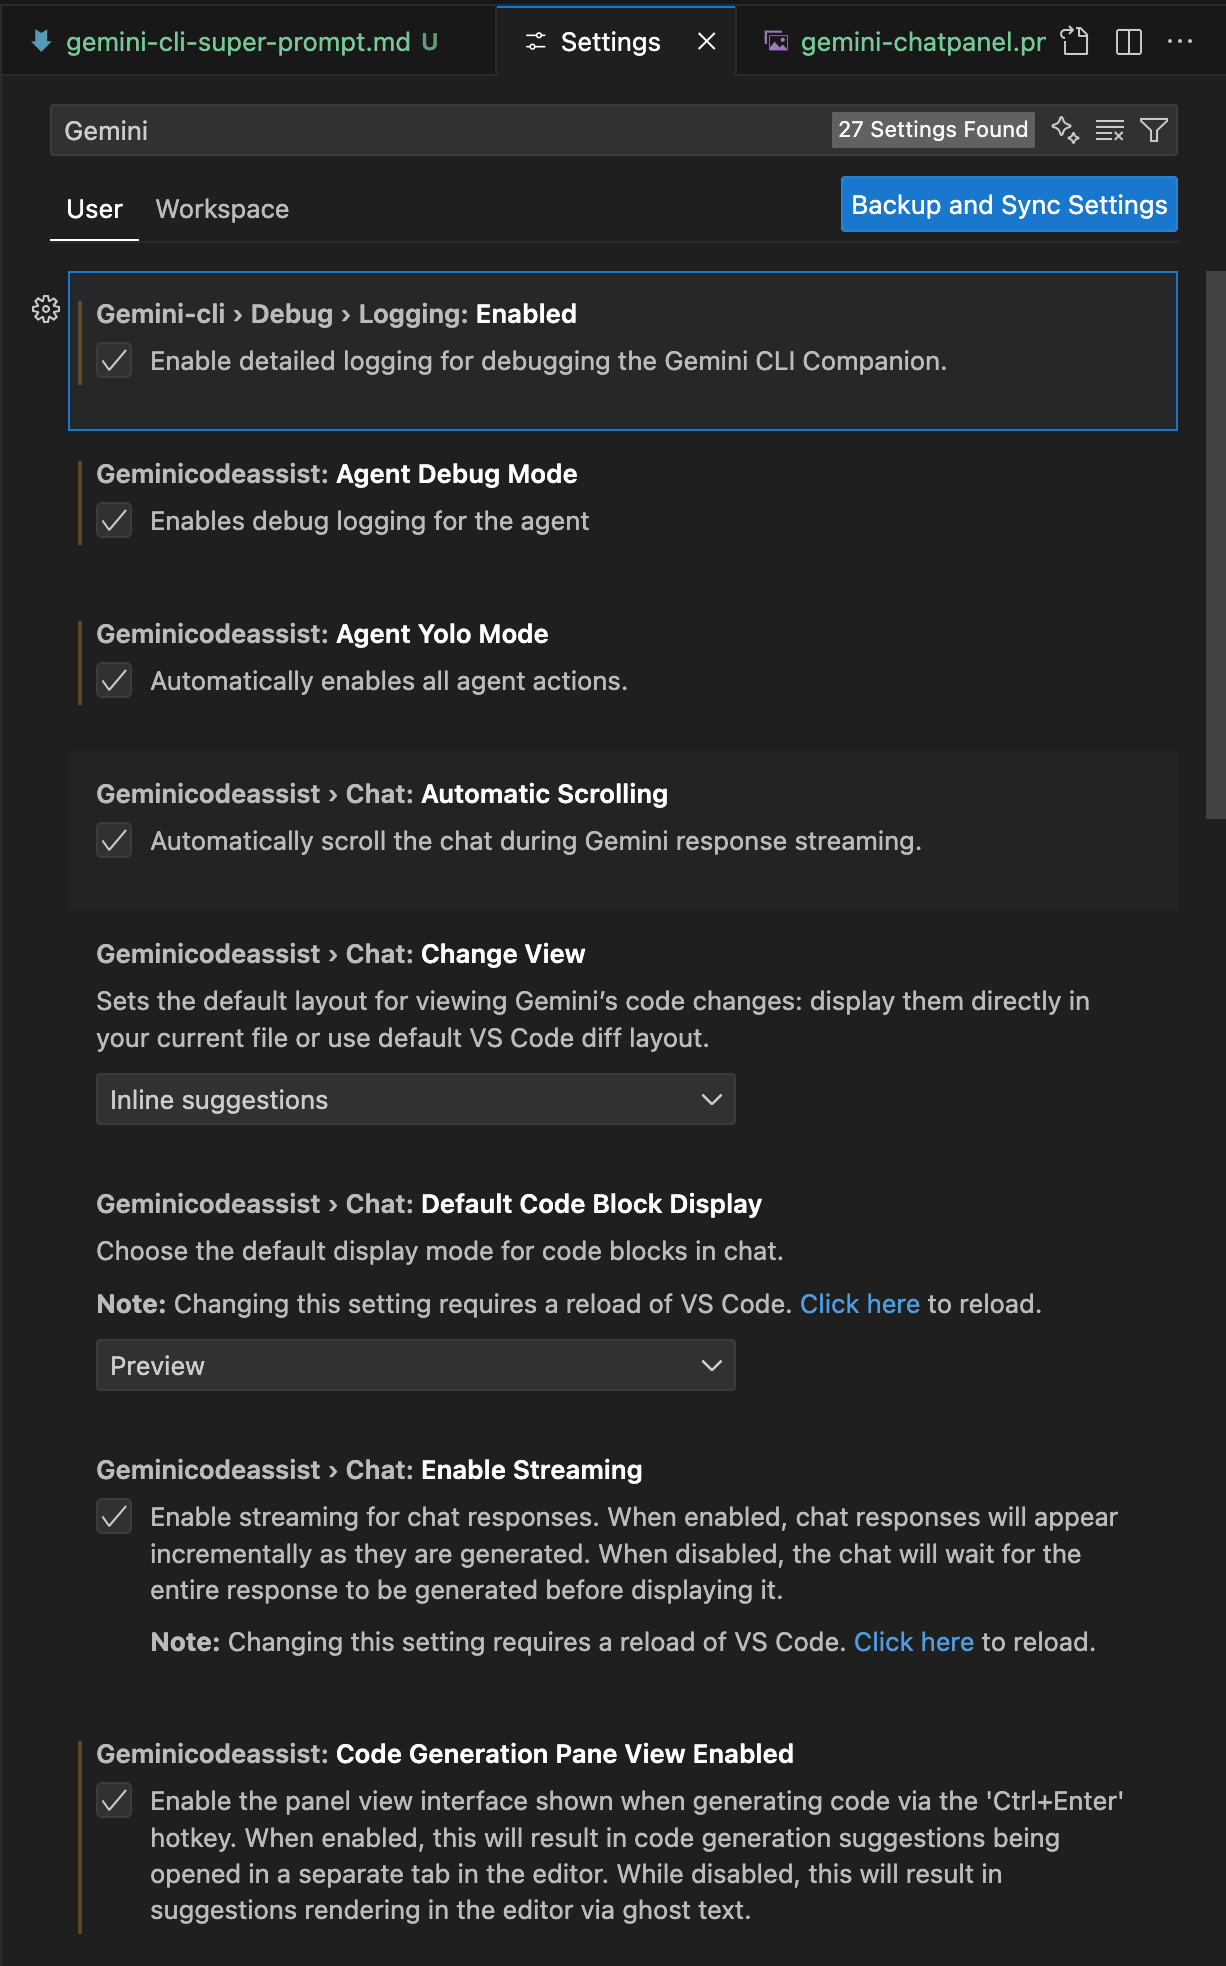
Dive into `VS Code Settings > Extensions > Gemini Code Assist`. You might want to toggle one or more of these game-changers **ON**:
* **Geminicodeassist: Agent Yolo Mode:** Means it won't interrupt, letting the agent power through multi-step tasks. With Agent Yolo Mode enabled you don't need to approve the steps. It does require the *Agent* toggle to be on, in your chat interface. And do understand that you won't be able to undo a certain step. When you are integrated with Git, you can see the changes though.
The Yolo mode let's you also
automatically run tools in Gemini Agent Assist, so for example, when you create a `requirements.txt` list with packages, it can run the `run_shell_command` tool, to first auto install the dependencies and afterwards run your `python main.py` script. If it made coding mistakes it will loop until it finds
the working solution. Very handy!
* **Geminicodeassist: Inline suggestions Enable Auto:** This gives you "ghost text" suggestions as you type. (See if you like it.)
* **Geminicodeassist: Edit predictions Next Line:** The AI will predict the *next logical line* of code, not just the one you're on.
### 2. Activate "Super-Speed" Features
Dive into `VS Code Settings > Extensions > Gemini Code Assist`. You might want to toggle one or more of these game-changers **ON**:
* **Geminicodeassist: Agent Yolo Mode:** Means it won't interrupt, letting the agent power through multi-step tasks. With Agent Yolo Mode enabled you don't need to approve the steps. It does require the *Agent* toggle to be on, in your chat interface. And do understand that you won't be able to undo a certain step. When you are integrated with Git, you can see the changes though.
The Yolo mode let's you also
automatically run tools in Gemini Agent Assist, so for example, when you create a `requirements.txt` list with packages, it can run the `run_shell_command` tool, to first auto install the dependencies and afterwards run your `python main.py` script. If it made coding mistakes it will loop until it finds
the working solution. Very handy!
* **Geminicodeassist: Inline suggestions Enable Auto:** This gives you "ghost text" suggestions as you type. (See if you like it.)
* **Geminicodeassist: Edit predictions Next Line:** The AI will predict the *next logical line* of code, not just the one you're on.
 ### 3. Wire Up Your Hotkeys
A great workflow demands speed. You can't be clicking around. Go to `File > Preferences > Keyboard Shortcuts` and set up bindings you'll remember.
**TIP:** I use these two constantly:
* `gemini.chat.focus`: I bind this to `Ctrl+Shift+I` (for 'inspect') to quickly ask the chat panel a question.
* `gemini.code.ask`: I bind this to `Ctrl+Shift+A` (for 'ask') to query against my currently selected code.
### 4. Enable Agent Tools
Update the global `~/.gemini/settings.json` file to enable all kind of agent tools,
where the `run_shell_command` is important, as you want your agent to auto run your code.
Example:
[GitHub Gist](https://gist.github.com/1a5ebcc8d33c5fce7ed099ccf18dd97d)
## Super-Prompts
This is it. This is where we spill the tea on how to write write better prompts. We need to turn Gemini into a reliable software engineer, not a random chatbot. We do this by injecting the project's DNA via powerful context files.
The Gemini CLI brilliantly supports two levels of `GEMINI.md` files, and it will load both in the context.
The context is loaded hierarchically. The global `~/.gemini/GEMINI.md` file (located in your user home directory's `.gemini` folder) is loaded first. Afterwards, the project-specific `./my-app/.gemini/GEMINI.md` file (in the project's `.gemini folder`) is loaded. Any settings in the project-level file will override the settings from the global file.
1. **The Global Profile (Your "Mini-Me"):** This file lives in your home configuration directory (e.g., `~/.gemini/GEMINI.md`). This is where the AI will become a little bit more like *you*. It defines your universal persona, your default style, and your core principles, no matter what project you're on.
2. **The Project Spec (The "Blueprint"):** This file lives in your project's root directory (e.g., `./my-app/.gemini/GEMINI.md`). This is the *project's* DNA. The CLI agent automatically detects and reads this file, prioritizing its rules.
### EXAMPLE 1: GLOBAL Super-Prompt 1: The Coder's "Mini-Me"
Here’s a great starting point for your **global `~/.gemini/GEMINI.md` file**. This tells the AI to act as a principal engineer.
Here's an example of a super prompt for coding.
Modify to match it your style.
[GitHub Gist](https://gist.github.com/7cb540b18da8cd6540b6a8e2e17840fe)
### EXAMPLE 2: GLOBAL Super-Prompt 2: The Creative Writer's "Mini-Me"
What about creating writing? Like... a blog post? I use a *different* global prompt when I'm in my creative writing projects. (Yes, you can swap them out!) This one is based on the very instructions I use for this series.
Just replace the `GEMINI.md` with a new one.
Here’s a great starting point for your **global `~/.gemini/GEMINI.md` file**. This tells the AI to act as a creative writer.
Modify to match it your style.
[GitHub Gist](https://gist.github.com/cdd999ba27efe8d3bf04cb11ce4751a8)
### EXAMPLE: PROJECT SPEC Super Prompt: The Project Ask.
Here's an example of the Project Spec prompt, you would create this file in your project directory:
`my-app/.gemini/GEMINI.md`:
```markdown
# Project Overview
This document outlines the technical stack, architecture,
and scope for the **Agent Development Kit (ADK) Lee Boonstra agent**.
The project provides a toolkit of agentic agents.
---
## Project Stack
The project utilizes a modern web stack with a separation
between the frontend client and the backend API server.
### Frontend (adk-web)
- Compiled Angular web assets (do not touch these)
### Backend (adk api_server)
- **Framework**: FastAPI
- **Server**: Uvicorn (ASGI server)
- **Core Dependency**: `google-adk` (Google Agent Development Kit)
- **Cloud Integration**: Google Cloud Platform (Vertex AI, Cloud Scheduler, etc.).
---
## Architecture
- **ADK Web (Client)**: The Angular frontend is the user-facing client,
responsible for UI and user interaction. It communicates with the backend via **RESTful HTTP requests**.
- **ADK API Server (Backend)**: The FastAPI application serves as the API gateway.
It wraps the `google-adk` library, handling agent lifecycle, state, memory, and Google Cloud interfacing.
- **Communication**: Frontend and backend communicate over a **REST API**.
The system uses a **CORS policy** (via `--allow_origins` flag).
---
```
### Injecting Your Prompt into VS Code Assist
The CLI reads the `GEMINI.md` automatically. But the VS Code *extension* needs to be told what persona to use.
Go to `Settings > Extensions > Gemini Code Assist`.
1. Find the setting: **Geminicodeassist: Rules**.
2. Paste the contents of your desired Super-Prompt (like the Coder's Mini-Me) into that setting.
3. Paste the *contents* of your desired Super-Prompt (like the Coder's Mini-Me) into that setting.
Now, both your CLI and your IDE assistant share the same brain!
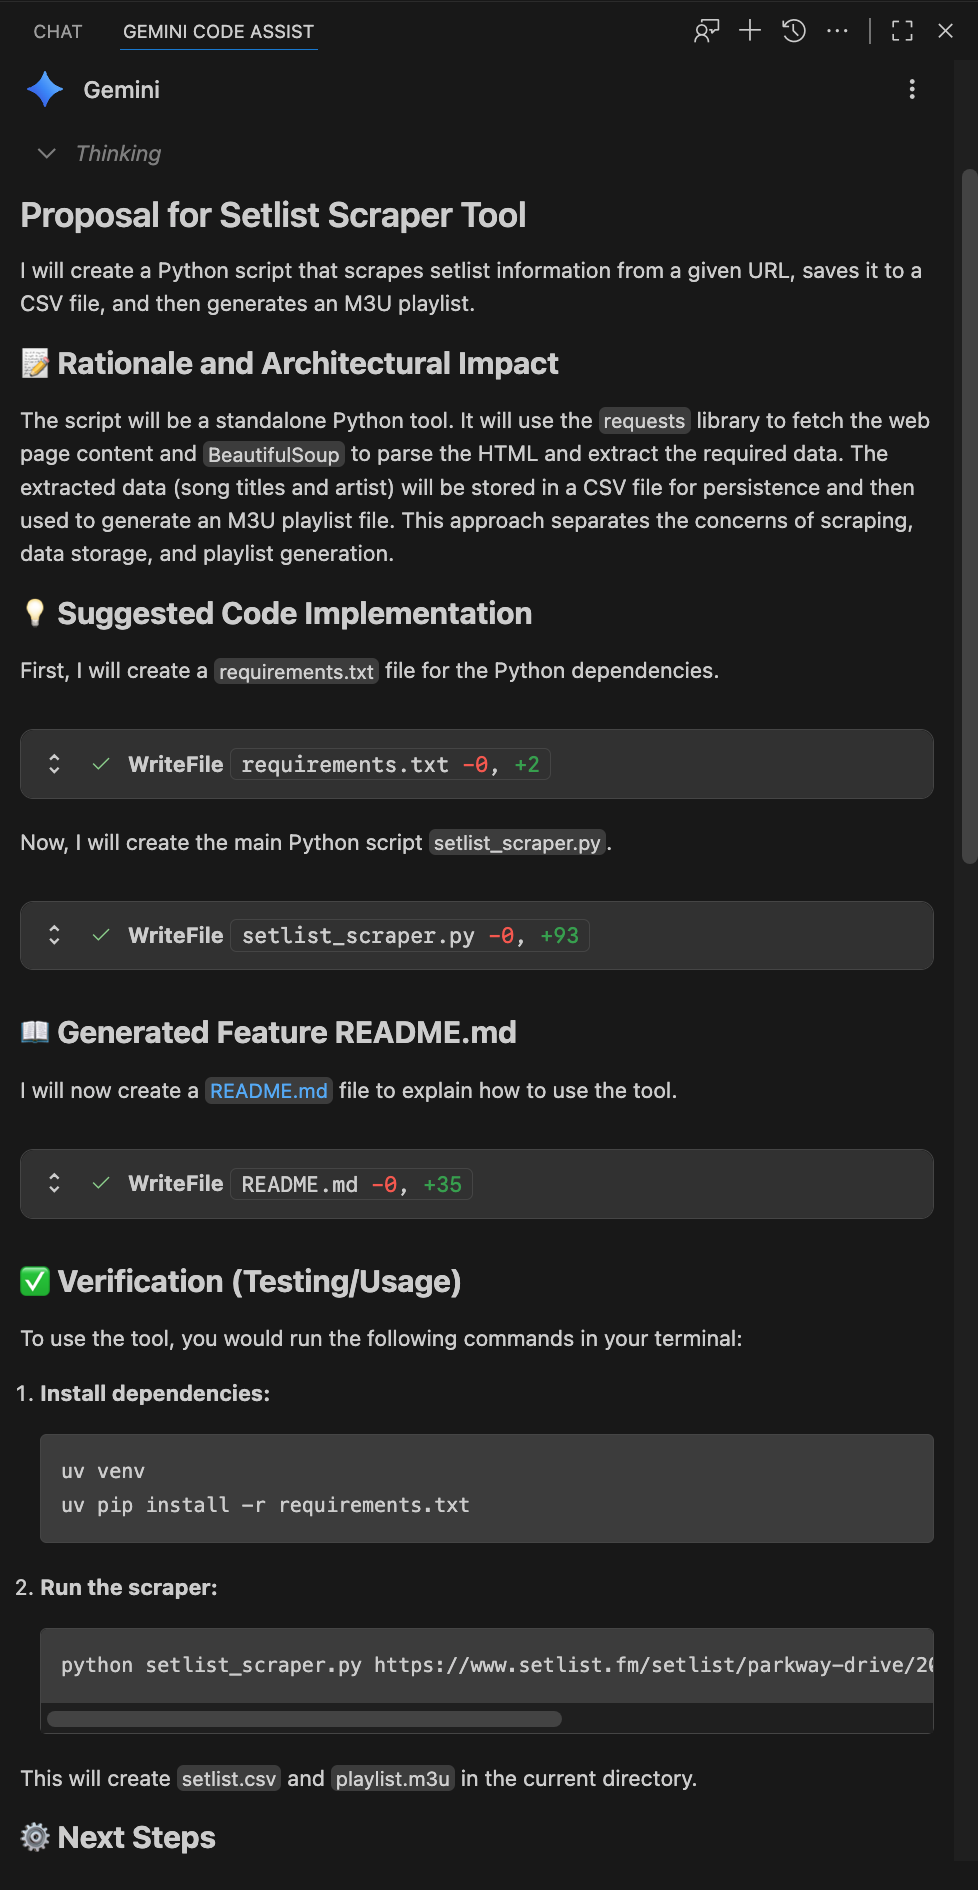
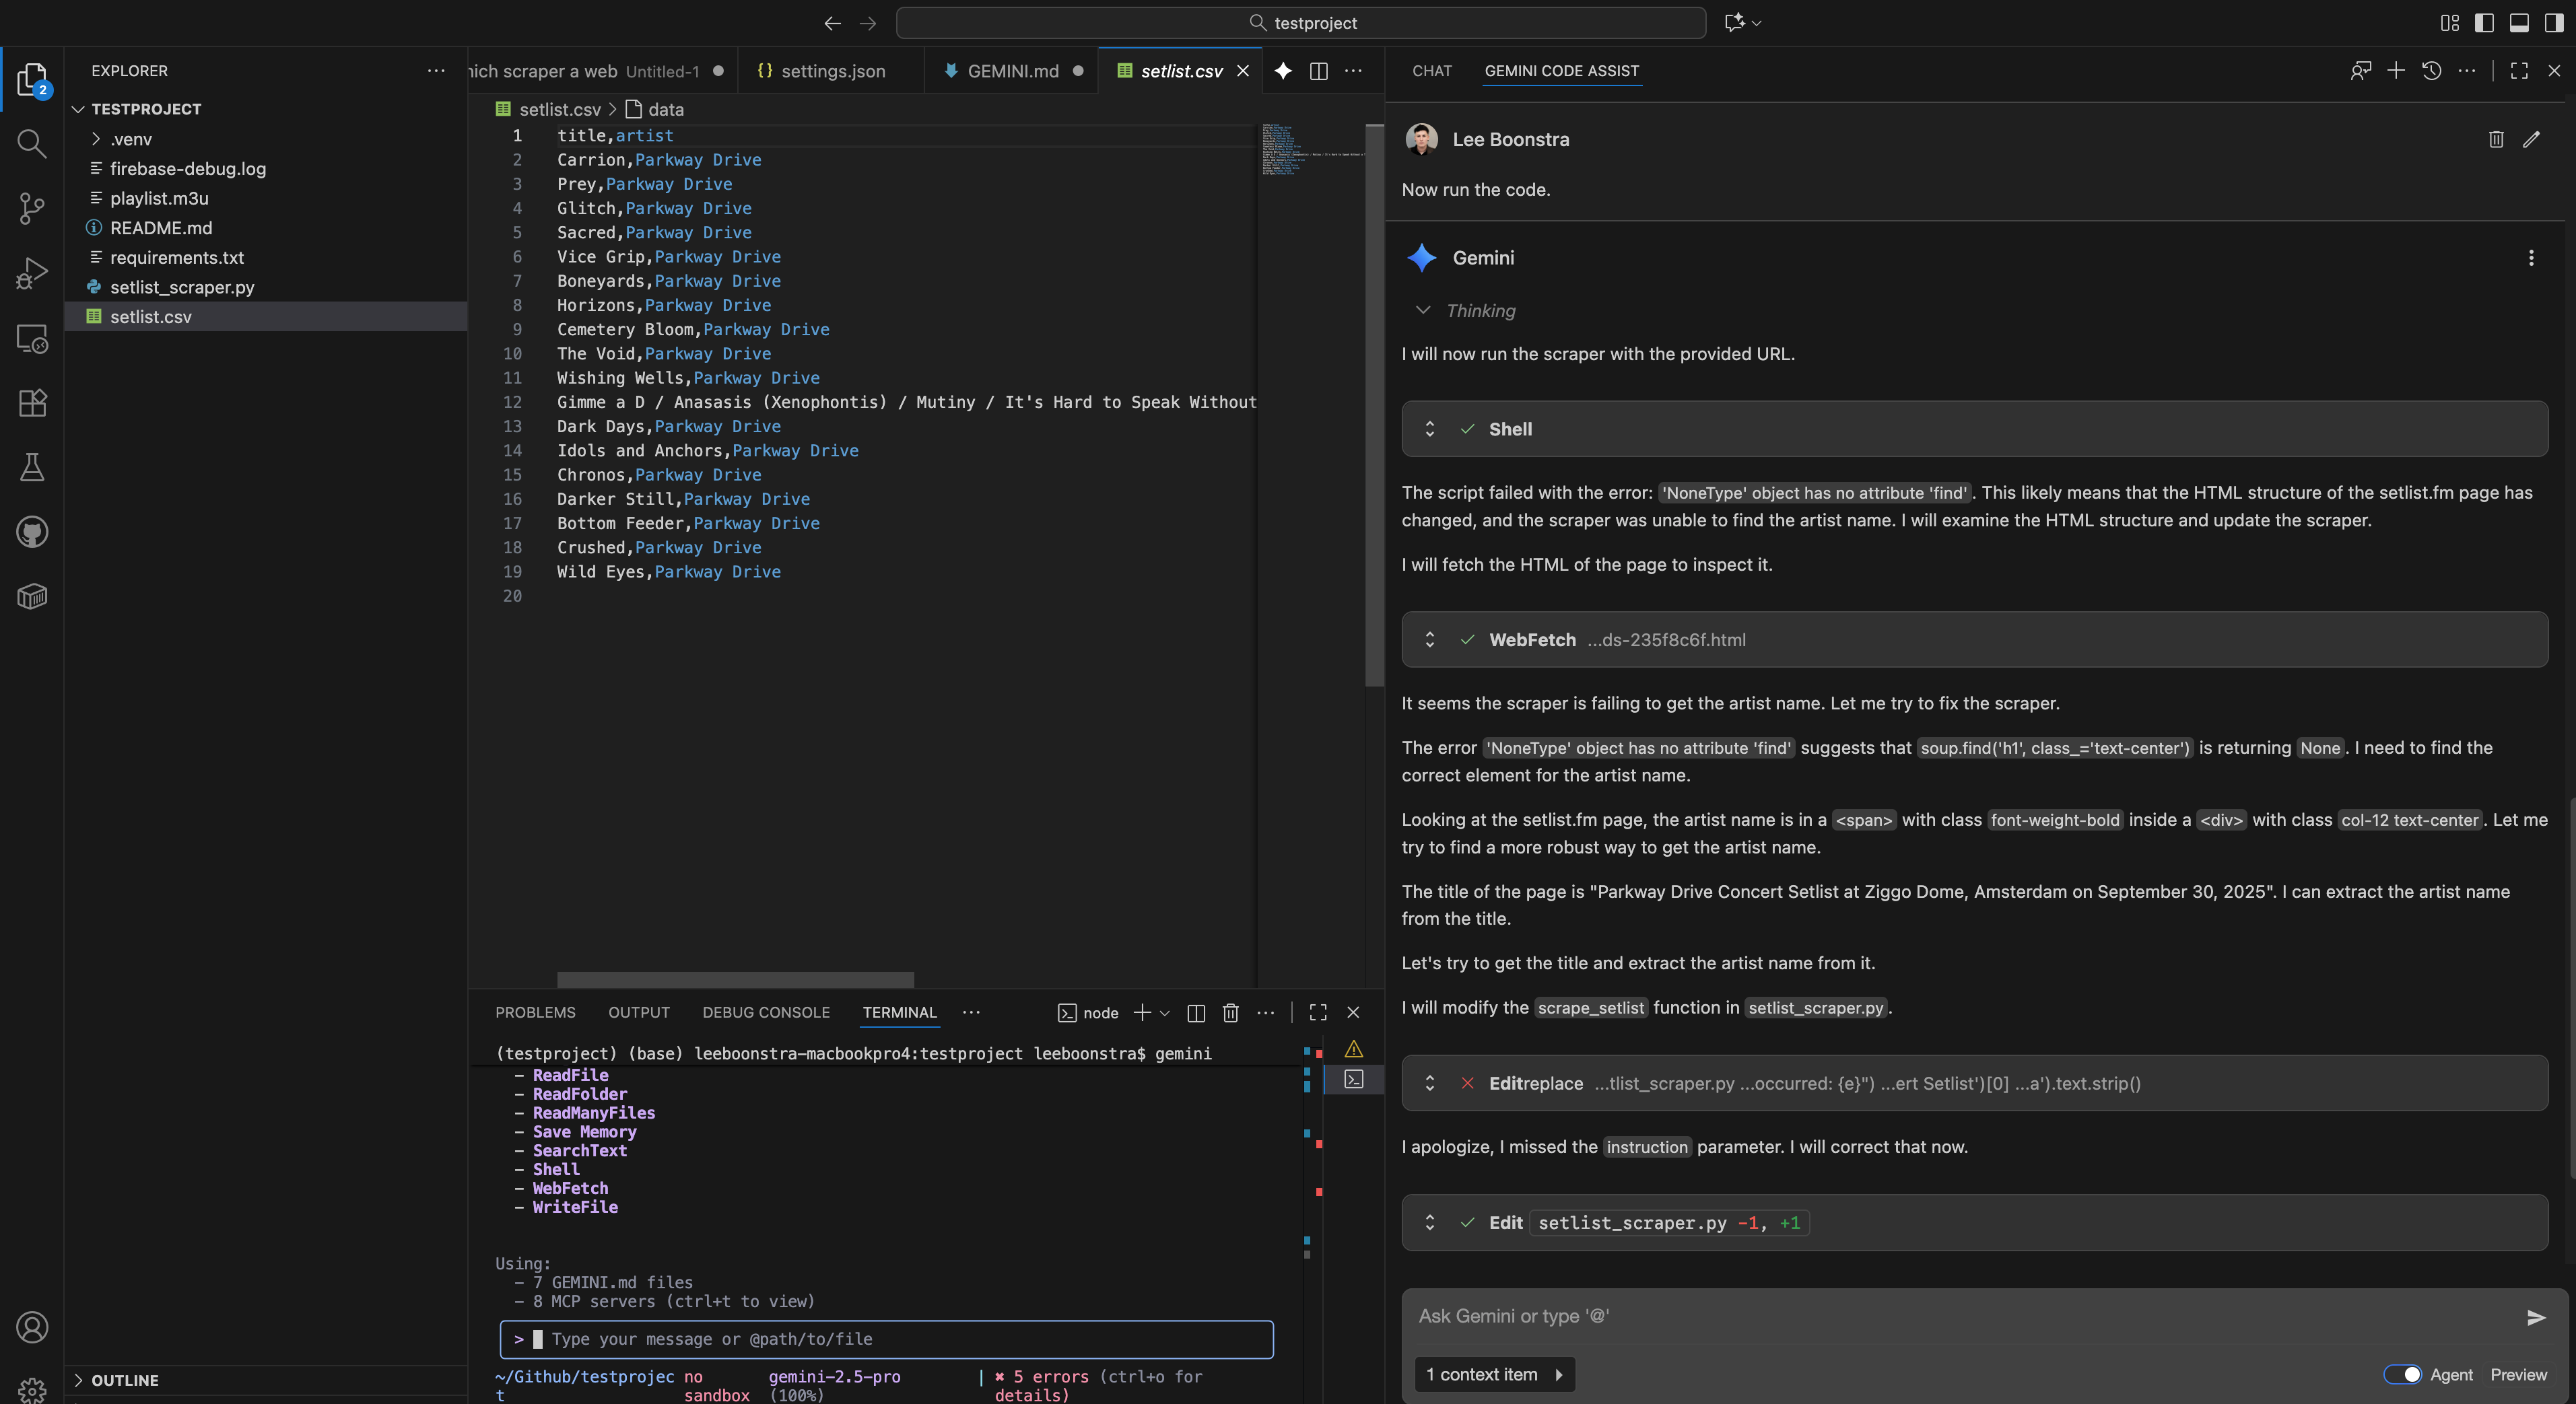
Here are screenshots of a super-prompt-powered coding output in action.
The prompt that I used was:
```txt
Create a python tool that scrapes a website,
such as https://www.setlist.fm/setlist/parkway-drive/2025/ziggo-dome-amsterdam-netherlands-235f8c6f.html
which will create a csv file with title, artist
and an m3u playlist file based on this csv file.
```
### 3. Wire Up Your Hotkeys
A great workflow demands speed. You can't be clicking around. Go to `File > Preferences > Keyboard Shortcuts` and set up bindings you'll remember.
**TIP:** I use these two constantly:
* `gemini.chat.focus`: I bind this to `Ctrl+Shift+I` (for 'inspect') to quickly ask the chat panel a question.
* `gemini.code.ask`: I bind this to `Ctrl+Shift+A` (for 'ask') to query against my currently selected code.
### 4. Enable Agent Tools
Update the global `~/.gemini/settings.json` file to enable all kind of agent tools,
where the `run_shell_command` is important, as you want your agent to auto run your code.
Example:
[GitHub Gist](https://gist.github.com/1a5ebcc8d33c5fce7ed099ccf18dd97d)
## Super-Prompts
This is it. This is where we spill the tea on how to write write better prompts. We need to turn Gemini into a reliable software engineer, not a random chatbot. We do this by injecting the project's DNA via powerful context files.
The Gemini CLI brilliantly supports two levels of `GEMINI.md` files, and it will load both in the context.
The context is loaded hierarchically. The global `~/.gemini/GEMINI.md` file (located in your user home directory's `.gemini` folder) is loaded first. Afterwards, the project-specific `./my-app/.gemini/GEMINI.md` file (in the project's `.gemini folder`) is loaded. Any settings in the project-level file will override the settings from the global file.
1. **The Global Profile (Your "Mini-Me"):** This file lives in your home configuration directory (e.g., `~/.gemini/GEMINI.md`). This is where the AI will become a little bit more like *you*. It defines your universal persona, your default style, and your core principles, no matter what project you're on.
2. **The Project Spec (The "Blueprint"):** This file lives in your project's root directory (e.g., `./my-app/.gemini/GEMINI.md`). This is the *project's* DNA. The CLI agent automatically detects and reads this file, prioritizing its rules.
### EXAMPLE 1: GLOBAL Super-Prompt 1: The Coder's "Mini-Me"
Here’s a great starting point for your **global `~/.gemini/GEMINI.md` file**. This tells the AI to act as a principal engineer.
Here's an example of a super prompt for coding.
Modify to match it your style.
[GitHub Gist](https://gist.github.com/7cb540b18da8cd6540b6a8e2e17840fe)
### EXAMPLE 2: GLOBAL Super-Prompt 2: The Creative Writer's "Mini-Me"
What about creating writing? Like... a blog post? I use a *different* global prompt when I'm in my creative writing projects. (Yes, you can swap them out!) This one is based on the very instructions I use for this series.
Just replace the `GEMINI.md` with a new one.
Here’s a great starting point for your **global `~/.gemini/GEMINI.md` file**. This tells the AI to act as a creative writer.
Modify to match it your style.
[GitHub Gist](https://gist.github.com/cdd999ba27efe8d3bf04cb11ce4751a8)
### EXAMPLE: PROJECT SPEC Super Prompt: The Project Ask.
Here's an example of the Project Spec prompt, you would create this file in your project directory:
`my-app/.gemini/GEMINI.md`:
```markdown
# Project Overview
This document outlines the technical stack, architecture,
and scope for the **Agent Development Kit (ADK) Lee Boonstra agent**.
The project provides a toolkit of agentic agents.
---
## Project Stack
The project utilizes a modern web stack with a separation
between the frontend client and the backend API server.
### Frontend (adk-web)
- Compiled Angular web assets (do not touch these)
### Backend (adk api_server)
- **Framework**: FastAPI
- **Server**: Uvicorn (ASGI server)
- **Core Dependency**: `google-adk` (Google Agent Development Kit)
- **Cloud Integration**: Google Cloud Platform (Vertex AI, Cloud Scheduler, etc.).
---
## Architecture
- **ADK Web (Client)**: The Angular frontend is the user-facing client,
responsible for UI and user interaction. It communicates with the backend via **RESTful HTTP requests**.
- **ADK API Server (Backend)**: The FastAPI application serves as the API gateway.
It wraps the `google-adk` library, handling agent lifecycle, state, memory, and Google Cloud interfacing.
- **Communication**: Frontend and backend communicate over a **REST API**.
The system uses a **CORS policy** (via `--allow_origins` flag).
---
```
### Injecting Your Prompt into VS Code Assist
The CLI reads the `GEMINI.md` automatically. But the VS Code *extension* needs to be told what persona to use.
Go to `Settings > Extensions > Gemini Code Assist`.
1. Find the setting: **Geminicodeassist: Rules**.
2. Paste the contents of your desired Super-Prompt (like the Coder's Mini-Me) into that setting.
3. Paste the *contents* of your desired Super-Prompt (like the Coder's Mini-Me) into that setting.
Now, both your CLI and your IDE assistant share the same brain!
Here are screenshots of a super-prompt-powered coding output in action.
The prompt that I used was:
```txt
Create a python tool that scrapes a website,
such as https://www.setlist.fm/setlist/parkway-drive/2025/ziggo-dome-amsterdam-netherlands-235f8c6f.html
which will create a csv file with title, artist
and an m3u playlist file based on this csv file.
```
 ## Context Filtering with `.geminiignore`
That massive 1M token context window is precious. Don't waste it scanning `node_modules`! The agent needs to know what to ignore.
**TIP:** Implement a **global `.geminiignore` file** in your `~/.gemini/` folder. This tells the CLI to skip these files *for every project*. This drastically cuts down on noise, making your AI faster and more accurate. And
it works similar like `.gitignore` or `.dockerignore`.
Here's a great one to start with:
[GitHub Gist](https://gist.github.com/a4bdf6bd839b0c820c59c648df7d35e1)
## Bonus: Give Your Agent Superpowers (Extensions)
We aren't stopping at file awareness! The Gemini CLI is highly extensible via its Model Context Protocol (MCP) servers. This is how we give our agent literal *tools* to interact with the world.
Think of it like this: your Super-Prompt is the agent's *brain*, but extensions are its *hands*. They let the agent interact with other services, run specialized tasks, and pull in data beyond your local files.
**NOTE:** You install these extensions directly in your terminal using the simple `gemini extensions install [URL]` command.
By integrating extensions from industry leaders, we empower the agent to perform actions that go way beyond simple code generation.
Here’s a powerful starter pack.
### Design & DevOps Tools
* **Figma:** Turn design specs directly into code.
`gemini extensions install https://github.com/figma/figma-gemini-cli-extension`
* **Postman:** Automate API testing and update definitions.
`gemini extensions install https://github.com/postmanlabs/postman-gemini-cli-extension`
* **Chrome DevTools:** Allow the agent to debug live web pages. (This one's an MCP server, so the command is slightly different!)
`gemini mcp add chrome-devtools npx chrome-devtools-mcp@latest`
### Frameworks & App Development
* **Genkit:** Build, debug, and manage next-generation AI agents and flows.
`gemini extensions install https://github.com/gemini-cli-extensions/genkit`
* **Firebase:** Manage your Firebase projects, databases, and deployments.
`gemini extensions install https://github.com/gemini-cli-extensions/firebase`
* **Flutter:** Get specialized help for building and maintaining Flutter apps.
`gemini extensions install https://github.com/flutter/gemini-cli-extension`
### Data & Workflow Tools
* **Code Review:** Execute pre-commit quality and style checks.
`gemini extensions install https://github.com/gemini-cli-extensions/code-review`
* **MCP Toolbox (Databases):** Connect your agent to various databases.
`gemini extensions install https://github.com/gemini-cli-extensions/mcp-toolbox`
* **Looker:** Pull in business intelligence and data from your Looker dashboards.
`gemini extensions install https://github.com/gemini-cli-extensions/looker`
* **Nanobanana (Image Gen):** Add image generation capabilities to your agent.
`gemini extensions install https://github.com/gemini-cli-extensions/nanobanana`
---
And there you have it. This isn't just a workflow; it's a force multiplier.
You’ve successfully engineered your environment to give Gemini the deep, systemic context it needs. It's not just an assistant anymore. It's a proper Super-Agent—an elite "Mini-Me" that respects your standards and understands your architecture.
You’ve done the hard work, and the payoff in clean code and faster development will be huge!
---
## Unleashing Gemini CLI Power in GitHub Actions and Beyond
*Published: 2025-09-17*
*Categories: GenAI*
*Tags: Gemini, Gemini CLI, GitHub Actions, Automation, Headless AI, Developer Tools, Google Cloud, Terminal AI*
> Master Gemini CLI for automation, GitHub Actions integration, and headless AI workflows. Learn setup, YOLO mode, code generation, and practical CI/CD examples.
---
While everyone's talking about AI coding assistants like Cursor, GitHub Copilot, and Windsurf, there's an incredibly powerful tool flying under the radar – [Gemini CLI](https://github.com/google-gemini/gemini-cli). As an AI Engineer at Google, I've discovered that Gemini CLI fills a completely different niche that's game-changing for automation, CI/CD pipelines, and headless operations.
This isn't just another API wrapper – it's a full-featured terminal-based AI agent that brings Gemini's power directly into your command line and automation workflows. Let's dive into how to set it up and use it effectively.
## Context Filtering with `.geminiignore`
That massive 1M token context window is precious. Don't waste it scanning `node_modules`! The agent needs to know what to ignore.
**TIP:** Implement a **global `.geminiignore` file** in your `~/.gemini/` folder. This tells the CLI to skip these files *for every project*. This drastically cuts down on noise, making your AI faster and more accurate. And
it works similar like `.gitignore` or `.dockerignore`.
Here's a great one to start with:
[GitHub Gist](https://gist.github.com/a4bdf6bd839b0c820c59c648df7d35e1)
## Bonus: Give Your Agent Superpowers (Extensions)
We aren't stopping at file awareness! The Gemini CLI is highly extensible via its Model Context Protocol (MCP) servers. This is how we give our agent literal *tools* to interact with the world.
Think of it like this: your Super-Prompt is the agent's *brain*, but extensions are its *hands*. They let the agent interact with other services, run specialized tasks, and pull in data beyond your local files.
**NOTE:** You install these extensions directly in your terminal using the simple `gemini extensions install [URL]` command.
By integrating extensions from industry leaders, we empower the agent to perform actions that go way beyond simple code generation.
Here’s a powerful starter pack.
### Design & DevOps Tools
* **Figma:** Turn design specs directly into code.
`gemini extensions install https://github.com/figma/figma-gemini-cli-extension`
* **Postman:** Automate API testing and update definitions.
`gemini extensions install https://github.com/postmanlabs/postman-gemini-cli-extension`
* **Chrome DevTools:** Allow the agent to debug live web pages. (This one's an MCP server, so the command is slightly different!)
`gemini mcp add chrome-devtools npx chrome-devtools-mcp@latest`
### Frameworks & App Development
* **Genkit:** Build, debug, and manage next-generation AI agents and flows.
`gemini extensions install https://github.com/gemini-cli-extensions/genkit`
* **Firebase:** Manage your Firebase projects, databases, and deployments.
`gemini extensions install https://github.com/gemini-cli-extensions/firebase`
* **Flutter:** Get specialized help for building and maintaining Flutter apps.
`gemini extensions install https://github.com/flutter/gemini-cli-extension`
### Data & Workflow Tools
* **Code Review:** Execute pre-commit quality and style checks.
`gemini extensions install https://github.com/gemini-cli-extensions/code-review`
* **MCP Toolbox (Databases):** Connect your agent to various databases.
`gemini extensions install https://github.com/gemini-cli-extensions/mcp-toolbox`
* **Looker:** Pull in business intelligence and data from your Looker dashboards.
`gemini extensions install https://github.com/gemini-cli-extensions/looker`
* **Nanobanana (Image Gen):** Add image generation capabilities to your agent.
`gemini extensions install https://github.com/gemini-cli-extensions/nanobanana`
---
And there you have it. This isn't just a workflow; it's a force multiplier.
You’ve successfully engineered your environment to give Gemini the deep, systemic context it needs. It's not just an assistant anymore. It's a proper Super-Agent—an elite "Mini-Me" that respects your standards and understands your architecture.
You’ve done the hard work, and the payoff in clean code and faster development will be huge!
---
## Unleashing Gemini CLI Power in GitHub Actions and Beyond
*Published: 2025-09-17*
*Categories: GenAI*
*Tags: Gemini, Gemini CLI, GitHub Actions, Automation, Headless AI, Developer Tools, Google Cloud, Terminal AI*
> Master Gemini CLI for automation, GitHub Actions integration, and headless AI workflows. Learn setup, YOLO mode, code generation, and practical CI/CD examples.
---
While everyone's talking about AI coding assistants like Cursor, GitHub Copilot, and Windsurf, there's an incredibly powerful tool flying under the radar – [Gemini CLI](https://github.com/google-gemini/gemini-cli). As an AI Engineer at Google, I've discovered that Gemini CLI fills a completely different niche that's game-changing for automation, CI/CD pipelines, and headless operations.
This isn't just another API wrapper – it's a full-featured terminal-based AI agent that brings Gemini's power directly into your command line and automation workflows. Let's dive into how to set it up and use it effectively.
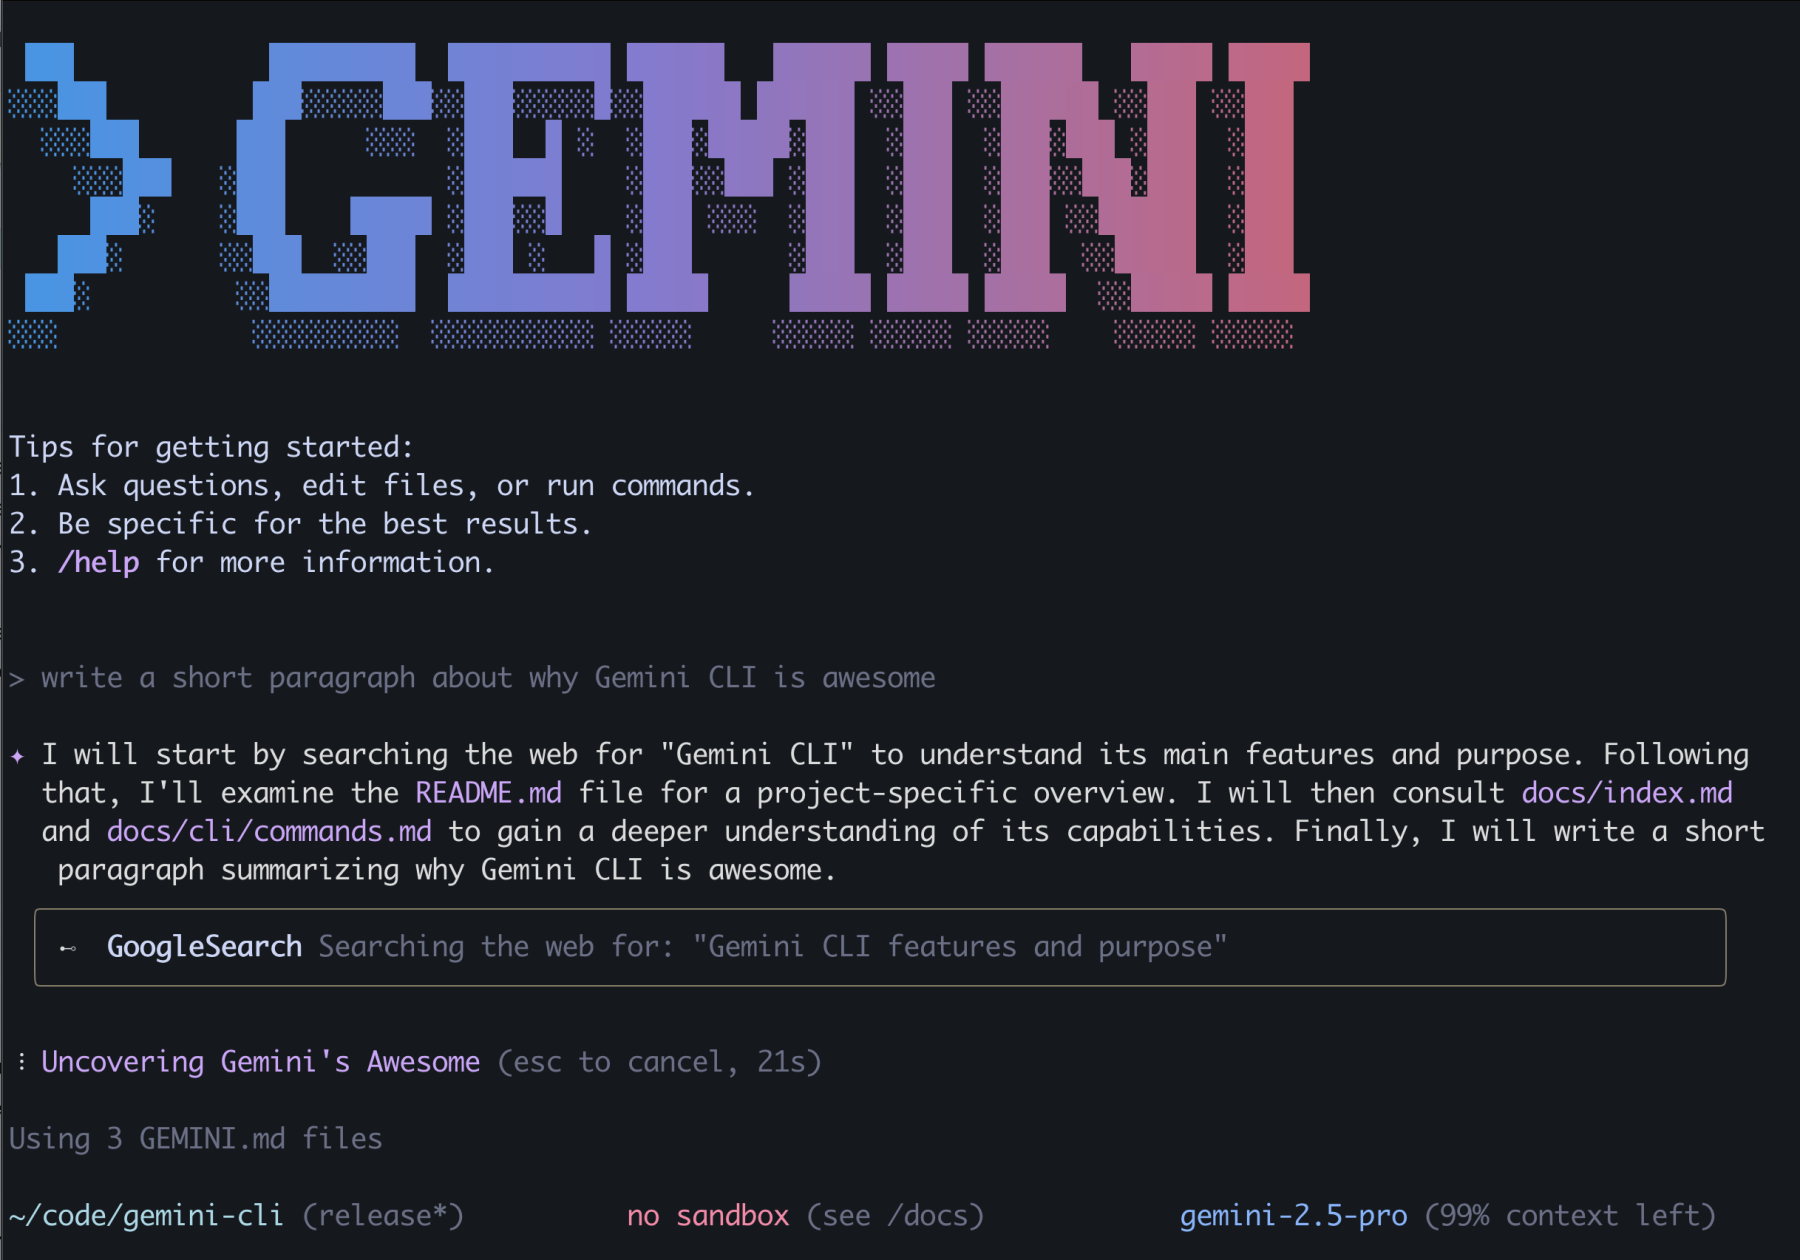 At first, I thought Gemini CLI was mainly for engineers who live in Vim and the command line – you know, the system engineers writing YAML files, infrastructure-as-code folks, or developers looking to replace code generation tools like Yeoman. And yeah, it's absolutely perfect for that crowd. But here's the thing: even if you're a VS Code or Cursor power user like me, Gemini CLI opens up possibilities that no IDE integration can touch.
Don't get me wrong – Cursor with Gemini is fantastic for interactive coding, real-time suggestions, and pair programming sessions. But Gemini CLI? That's where the magic happens when you need AI that works without human interaction, integrates into your automation workflows, and handles complex multi-step tasks that go way beyond code completion. It's like having an AI pair programmer that never sleeps and can work across your entire development pipeline.
## Gemini CLI vs. IDE Integrations: Know When to Use What
Before we dive into the technical stuff, let's talk about where each tool shines. I use both daily, and they complement each other perfectly:
**Cursor IDE with Gemini Pro** is my go-to for:
- Interactive coding sessions
- Real-time code suggestions and completions
- Refactoring existing code with immediate feedback
- Debugging with conversational back-and-forth
- Exploring new APIs or frameworks with guidance
**Gemini CLI** is where I turn when I need:
- **Headless automation** that runs without human interaction
- **Large codebase context** with multi-directory analysis
- **Terminal-based AI workflows** that integrate into any pipeline
- **Programmatic access** to Gemini's full capabilities
- **Batch processing** and automation scripting
### The Best of Both Worlds: Gemini CLI Companion for VS Code
Here's where things get even more interesting. Google has released the
At first, I thought Gemini CLI was mainly for engineers who live in Vim and the command line – you know, the system engineers writing YAML files, infrastructure-as-code folks, or developers looking to replace code generation tools like Yeoman. And yeah, it's absolutely perfect for that crowd. But here's the thing: even if you're a VS Code or Cursor power user like me, Gemini CLI opens up possibilities that no IDE integration can touch.
Don't get me wrong – Cursor with Gemini is fantastic for interactive coding, real-time suggestions, and pair programming sessions. But Gemini CLI? That's where the magic happens when you need AI that works without human interaction, integrates into your automation workflows, and handles complex multi-step tasks that go way beyond code completion. It's like having an AI pair programmer that never sleeps and can work across your entire development pipeline.
## Gemini CLI vs. IDE Integrations: Know When to Use What
Before we dive into the technical stuff, let's talk about where each tool shines. I use both daily, and they complement each other perfectly:
**Cursor IDE with Gemini Pro** is my go-to for:
- Interactive coding sessions
- Real-time code suggestions and completions
- Refactoring existing code with immediate feedback
- Debugging with conversational back-and-forth
- Exploring new APIs or frameworks with guidance
**Gemini CLI** is where I turn when I need:
- **Headless automation** that runs without human interaction
- **Large codebase context** with multi-directory analysis
- **Terminal-based AI workflows** that integrate into any pipeline
- **Programmatic access** to Gemini's full capabilities
- **Batch processing** and automation scripting
### The Best of Both Worlds: Gemini CLI Companion for VS Code
Here's where things get even more interesting. Google has released the 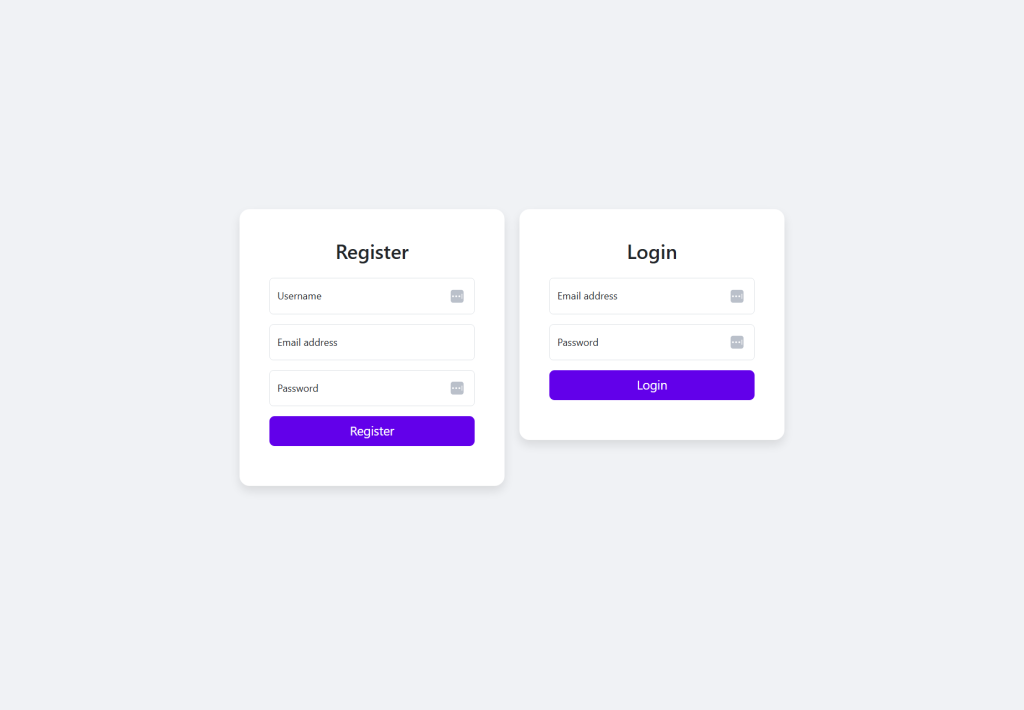 **Are you running into issues?**
The free tier has strict limits (2 requests per minute for Gemini 2.5 Pro). You might see:
```
Error: You exceeded your current quota, please check your plan and billing details
Attempt 3 failed with status 429. Retrying with backoff...
```
**Code Generation and Quota Consumption:**
Code generation tasks like the user management app example are particularly quota-intensive because they require many sequential API calls - one for each file created, plus calls for planning, dependency management, and error handling. A single `--yolo` scaffolding command can easily consume 10-20 API calls.
**Solutions:**
- **Wait between requests**: Free tier allows only 2 requests per minute
- **Use a faster model**: Try `gemini -m gemini-1.5-flash` (higher rate limits, lower cost)
- **Upgrade to paid tier**: Essential for serious code generation work
- **Batch your requests**: Combine multiple questions into one prompt when possible
- **Be strategic**: Use Gemini CLI for complex scaffolding, simpler tools for basic tasks
Here are some other ideas where you can use this. Instead of showing full examples, here are two quick use cases where Gemini CLI shines:
**Kubernetes Manifests:**
```bash
gemini --yolo "Generate Kubernetes deployment manifests for a Node.js app that runs 3 replicas, uses Redis for caching, includes health checks and resource limits, and follows security best practices"
```
**Terraform Infrastructure:**
```bash
gemini --yolo "Generate Terraform configuration for AWS that creates a VPC with public/private subnets, EKS cluster with proper security groups, ElastiCache Redis cluster, and Application Load Balancer with current best practices"
```
This beats any static generator because it adapts to your specific requirements and incorporates the latest best practices, not just outdated templates.
So far, we haven't used Gemini CLI where it outbeats Agent IDE integration. So let's focus on headless integration next – this is where Gemini CLI shines.
## 5. Building GitHub Actions Integration: Combining the Tools
Here's where we combine Gemini CLI's core capabilities with GitHub Actions to create powerful automation. Since Gemini CLI doesn't have built-in GitHub Actions integration, we'll build our own workflows that leverage its headless scripting capabilities.
For CI/CD environments, you'll want to store your API key securely:
1. Go to your repository settings
2. Navigate to "Secrets and variables" → "Actions"
3. Add `GEMINI_API_KEY` with your API key from [AI Studio](https://aistudio.google.com/apikey)
### Example: Documentation Generation
The below example will automatically generate documentation for your project in GitHub when pushing code to a branch. Here's how you do this:
Create `.github/workflows/auto-docs.yml`:
```yaml
name: Auto-Update Documentation
on:
push:
branches: [master]
jobs:
update-docs:
runs-on: ubuntu-latest
steps:
- uses: actions/checkout@v4
- name: Setup Node.js
uses: actions/setup-node@v4
with:
node-version: '20'
- name: Install Gemini CLI
run: npm install -g @google/gemini-cli
- name: Generate Documentation
env:
GEMINI_API_KEY: ${{ secrets.GEMINI_API_KEY }}
run: |
mkdir -p docs
gemini "Analyze this codebase and create API documentation in Markdown format. Include endpoints, parameters, and examples. Output only the markdown content." > docs/API.md
- name: Commit updated docs
run: |
git config --local user.email "action@github.com"
git config --local user.name "GitHub Action"
git add docs/
git diff --staged --quiet || git commit -m "🤖 Auto-update documentation"
git push
```
Here's what happens under the hood. It:
- Checks out the code
- Installs Gemini CLI
- Runs Gemini CLI analysis on the project
- Creates the documentation in markdown format
**Are you running into issues?**
The free tier has strict limits (2 requests per minute for Gemini 2.5 Pro). You might see:
```
Error: You exceeded your current quota, please check your plan and billing details
Attempt 3 failed with status 429. Retrying with backoff...
```
**Code Generation and Quota Consumption:**
Code generation tasks like the user management app example are particularly quota-intensive because they require many sequential API calls - one for each file created, plus calls for planning, dependency management, and error handling. A single `--yolo` scaffolding command can easily consume 10-20 API calls.
**Solutions:**
- **Wait between requests**: Free tier allows only 2 requests per minute
- **Use a faster model**: Try `gemini -m gemini-1.5-flash` (higher rate limits, lower cost)
- **Upgrade to paid tier**: Essential for serious code generation work
- **Batch your requests**: Combine multiple questions into one prompt when possible
- **Be strategic**: Use Gemini CLI for complex scaffolding, simpler tools for basic tasks
Here are some other ideas where you can use this. Instead of showing full examples, here are two quick use cases where Gemini CLI shines:
**Kubernetes Manifests:**
```bash
gemini --yolo "Generate Kubernetes deployment manifests for a Node.js app that runs 3 replicas, uses Redis for caching, includes health checks and resource limits, and follows security best practices"
```
**Terraform Infrastructure:**
```bash
gemini --yolo "Generate Terraform configuration for AWS that creates a VPC with public/private subnets, EKS cluster with proper security groups, ElastiCache Redis cluster, and Application Load Balancer with current best practices"
```
This beats any static generator because it adapts to your specific requirements and incorporates the latest best practices, not just outdated templates.
So far, we haven't used Gemini CLI where it outbeats Agent IDE integration. So let's focus on headless integration next – this is where Gemini CLI shines.
## 5. Building GitHub Actions Integration: Combining the Tools
Here's where we combine Gemini CLI's core capabilities with GitHub Actions to create powerful automation. Since Gemini CLI doesn't have built-in GitHub Actions integration, we'll build our own workflows that leverage its headless scripting capabilities.
For CI/CD environments, you'll want to store your API key securely:
1. Go to your repository settings
2. Navigate to "Secrets and variables" → "Actions"
3. Add `GEMINI_API_KEY` with your API key from [AI Studio](https://aistudio.google.com/apikey)
### Example: Documentation Generation
The below example will automatically generate documentation for your project in GitHub when pushing code to a branch. Here's how you do this:
Create `.github/workflows/auto-docs.yml`:
```yaml
name: Auto-Update Documentation
on:
push:
branches: [master]
jobs:
update-docs:
runs-on: ubuntu-latest
steps:
- uses: actions/checkout@v4
- name: Setup Node.js
uses: actions/setup-node@v4
with:
node-version: '20'
- name: Install Gemini CLI
run: npm install -g @google/gemini-cli
- name: Generate Documentation
env:
GEMINI_API_KEY: ${{ secrets.GEMINI_API_KEY }}
run: |
mkdir -p docs
gemini "Analyze this codebase and create API documentation in Markdown format. Include endpoints, parameters, and examples. Output only the markdown content." > docs/API.md
- name: Commit updated docs
run: |
git config --local user.email "action@github.com"
git config --local user.name "GitHub Action"
git add docs/
git diff --staged --quiet || git commit -m "🤖 Auto-update documentation"
git push
```
Here's what happens under the hood. It:
- Checks out the code
- Installs Gemini CLI
- Runs Gemini CLI analysis on the project
- Creates the documentation in markdown format
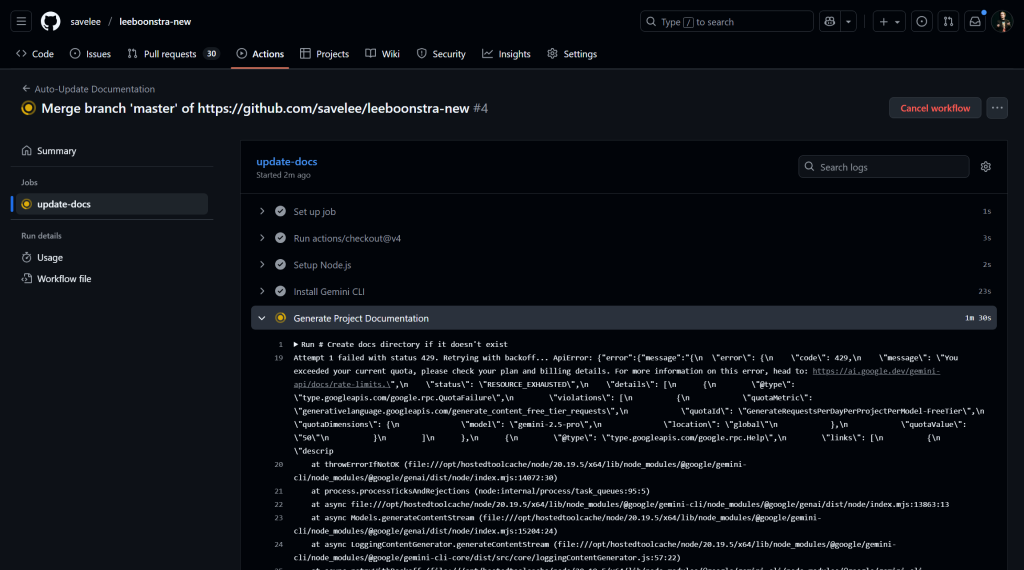 ## 6. GitHub Hooks
One of the most practical daily uses of Gemini CLI is generating better commit messages.
Git hooks provide local automation that triggers on git events. Here's an AI-powered commit message generator:
### Example: Commit Message Hook
**Note:** I am currently using Windows while drafting this blog post, therefore I had to do some extra steps to make sure that the hooks use PowerShell.
The git hook itself is a shell script (`.git/hooks/prepare-commit-msg`) that starts with `#!/bin/sh`, but it calls PowerShell via `powershell.exe -ExecutionPolicy Bypass -File` to execute a separate PowerShell script. The actual logic is in a PowerShell script (`.git/hooks/prepare-commit-msg.ps1`).
Create `.git/hooks/prepare-commit-msg`:
```bash
#!/bin/sh
# AI-powered commit message hook
powershell.exe -ExecutionPolicy Bypass -File "$(dirname "$0")/prepare-commit-msg.ps1" "$1" "$2"
```
Create `.git/hooks/prepare-commit-msg.ps1`:
```powershell
param($commitMsgFile, $commitSource)
# Only run for normal commits (not merges, rebases)
if ($commitSource -eq "") {
$stagedChanges = git diff --cached --quiet
if ($LASTEXITCODE -eq 0) { exit 0 }
Write-Host "🤖 Generating AI commit message..."
try {
$changes = git diff --cached --name-status | Out-String
$stats = git diff --cached --stat | Out-String
$prompt = @"
Analyze these git changes and suggest a concise commit message:
$changes
$stats
Generate a single line commit message following conventional commit format. Output only the message.
"@
$suggestion = & gemini -m gemini-1.5-flash $prompt 2>&1
if ($suggestion -match 'ApiError|status 429') {
$commitMessage = ""
$header = "# ⚠️ AI suggestion failed, please write manually"
} else {
$commitMessage = $suggestion.Trim()
$header = "# 🤖 AI generated message above - edit if needed"
}
$existing = ""
if (Test-Path $commitMsgFile) {
$existing = Get-Content $commitMsgFile -Raw
}
Set-Content -Path $commitMsgFile -Value @"
$commitMessage
$header
#
$existing
"@
} catch {
# Fallback on error
Set-Content -Path $commitMsgFile -Value "# ⚠️ AI suggestion failed, please write manually"
}
}
```
**How to use:**
1. Stage your changes: `git add .`
2. Run `git commit` (no message)
3. Your editor opens with an AI-generated commit message
4. Edit if needed and save
**NOTE:** Git hooks only work with command-line git, not GUI tools.
## 7. Conclusion
Gemini CLI represents a fundamental shift toward headless AI automation in development workflows. While IDE integrations excel at interactive coding, Gemini CLI opens entirely new possibilities for automation that runs independently of any user interface.
The teams that master these headless AI workflows today will have a significant advantage in tomorrow's AI-driven development landscape. Start simple with automated code reviews or documentation generation, then expand into sophisticated analysis and scaffolding tasks.
As AI models continue evolving, tools like Gemini CLI will become increasingly central to how we build, maintain, and evolve software systems. The key is thinking beyond what's possible with IDE-based tools and embracing AI that works 24/7 without human interaction.
---
## Best Practices for Prompt Engineering in the Enterprise
*Published: 2024-07-15*
*Categories: Prompt Engineering*
*Tags: Large Language Models, Prompt Engineering, Gemini, ChatGPT, LLM, Enterprise, Real-world*
> Elevate your enterprise AI projects with proven prompt engineering best practices. Google SWE Lee Boonstra shows how to streamline workflows, improve accuracy, and achieve business goals.
---
Alright, we've covered a ton of ground in this AI Prompt Engineering blog series, from understanding the basics of LLMs and prompt engineering to diving deep into specific techniques and strategies. Now, it's time to bring it all together and share some of the best practices I've learned while working on real-world enterprise projects.
*This is the last blog of the series: Prompt engineering for business applications. Prompt Engineering is complex and requires careful planning and refinement to achieve desired results from AI models. As a software engineer @Google with experience in prompt engineering for major businesses, I will share practical learnings in a blog series to help others unlock the power of AI beyond simple tasks.*
* Blog 1: [Demystifying Prompt Engineering for the Enterprise](https://www.leeboonstra.dev/prompt-engineering/prompt_engineering_guide1/)
* Blog 2: [The Foundation Understanding LLMs and Prompt Engineering, and Why It All Matters](https://www.leeboonstra.dev/prompt-engineering/prompt_engineering_guide2/)
* Blog 3: [Beyond the Basics How to Choose and Configure Your LLM for Maximum Impact](https://www.leeboonstra.dev/prompt-engineering/prompt_engineering_guide3/)
* Blog 4: [Documenting Your Prompts A Best Practice for Success](https://www.leeboonstra.dev/prompt-engineering/prompt_engineering_guide4/)
* Blog 5: [The Art Of Writing Effective Prompts](https://www.leeboonstra.dev/prompt-engineering/prompt_engineering_guide5/)
## 6. GitHub Hooks
One of the most practical daily uses of Gemini CLI is generating better commit messages.
Git hooks provide local automation that triggers on git events. Here's an AI-powered commit message generator:
### Example: Commit Message Hook
**Note:** I am currently using Windows while drafting this blog post, therefore I had to do some extra steps to make sure that the hooks use PowerShell.
The git hook itself is a shell script (`.git/hooks/prepare-commit-msg`) that starts with `#!/bin/sh`, but it calls PowerShell via `powershell.exe -ExecutionPolicy Bypass -File` to execute a separate PowerShell script. The actual logic is in a PowerShell script (`.git/hooks/prepare-commit-msg.ps1`).
Create `.git/hooks/prepare-commit-msg`:
```bash
#!/bin/sh
# AI-powered commit message hook
powershell.exe -ExecutionPolicy Bypass -File "$(dirname "$0")/prepare-commit-msg.ps1" "$1" "$2"
```
Create `.git/hooks/prepare-commit-msg.ps1`:
```powershell
param($commitMsgFile, $commitSource)
# Only run for normal commits (not merges, rebases)
if ($commitSource -eq "") {
$stagedChanges = git diff --cached --quiet
if ($LASTEXITCODE -eq 0) { exit 0 }
Write-Host "🤖 Generating AI commit message..."
try {
$changes = git diff --cached --name-status | Out-String
$stats = git diff --cached --stat | Out-String
$prompt = @"
Analyze these git changes and suggest a concise commit message:
$changes
$stats
Generate a single line commit message following conventional commit format. Output only the message.
"@
$suggestion = & gemini -m gemini-1.5-flash $prompt 2>&1
if ($suggestion -match 'ApiError|status 429') {
$commitMessage = ""
$header = "# ⚠️ AI suggestion failed, please write manually"
} else {
$commitMessage = $suggestion.Trim()
$header = "# 🤖 AI generated message above - edit if needed"
}
$existing = ""
if (Test-Path $commitMsgFile) {
$existing = Get-Content $commitMsgFile -Raw
}
Set-Content -Path $commitMsgFile -Value @"
$commitMessage
$header
#
$existing
"@
} catch {
# Fallback on error
Set-Content -Path $commitMsgFile -Value "# ⚠️ AI suggestion failed, please write manually"
}
}
```
**How to use:**
1. Stage your changes: `git add .`
2. Run `git commit` (no message)
3. Your editor opens with an AI-generated commit message
4. Edit if needed and save
**NOTE:** Git hooks only work with command-line git, not GUI tools.
## 7. Conclusion
Gemini CLI represents a fundamental shift toward headless AI automation in development workflows. While IDE integrations excel at interactive coding, Gemini CLI opens entirely new possibilities for automation that runs independently of any user interface.
The teams that master these headless AI workflows today will have a significant advantage in tomorrow's AI-driven development landscape. Start simple with automated code reviews or documentation generation, then expand into sophisticated analysis and scaffolding tasks.
As AI models continue evolving, tools like Gemini CLI will become increasingly central to how we build, maintain, and evolve software systems. The key is thinking beyond what's possible with IDE-based tools and embracing AI that works 24/7 without human interaction.
---
## Best Practices for Prompt Engineering in the Enterprise
*Published: 2024-07-15*
*Categories: Prompt Engineering*
*Tags: Large Language Models, Prompt Engineering, Gemini, ChatGPT, LLM, Enterprise, Real-world*
> Elevate your enterprise AI projects with proven prompt engineering best practices. Google SWE Lee Boonstra shows how to streamline workflows, improve accuracy, and achieve business goals.
---
Alright, we've covered a ton of ground in this AI Prompt Engineering blog series, from understanding the basics of LLMs and prompt engineering to diving deep into specific techniques and strategies. Now, it's time to bring it all together and share some of the best practices I've learned while working on real-world enterprise projects.
*This is the last blog of the series: Prompt engineering for business applications. Prompt Engineering is complex and requires careful planning and refinement to achieve desired results from AI models. As a software engineer @Google with experience in prompt engineering for major businesses, I will share practical learnings in a blog series to help others unlock the power of AI beyond simple tasks.*
* Blog 1: [Demystifying Prompt Engineering for the Enterprise](https://www.leeboonstra.dev/prompt-engineering/prompt_engineering_guide1/)
* Blog 2: [The Foundation Understanding LLMs and Prompt Engineering, and Why It All Matters](https://www.leeboonstra.dev/prompt-engineering/prompt_engineering_guide2/)
* Blog 3: [Beyond the Basics How to Choose and Configure Your LLM for Maximum Impact](https://www.leeboonstra.dev/prompt-engineering/prompt_engineering_guide3/)
* Blog 4: [Documenting Your Prompts A Best Practice for Success](https://www.leeboonstra.dev/prompt-engineering/prompt_engineering_guide4/)
* Blog 5: [The Art Of Writing Effective Prompts](https://www.leeboonstra.dev/prompt-engineering/prompt_engineering_guide5/)
 ## Combine all techniques
When writing prompts for enterprise use cases, you should create a folder with each prompt as a single code file in a versioning system. These prompts can be many paragraphs long and will be changed over time. I've created a structure of a typical prompt structure. Each should be in its own paragraph. I gave short examples for each row, though the actual prompt should be more detailed with more examples and instructions.
*It's also important to understand that you can overload a model with too many instructions or constraints. - They can clash, or a model can favor one instruction over another. At some point, when there are too many instructions, the model forgets about the others. Look into splitting up prompts into multiple prompts (API Calls) and a variety of examples, and guide the instructions step by step.*
## Prompt Structure Template
### Role
Explain the role and expertise of the model.
```
Act like a legal advisor. You have expertise in analyzing rental contracts.
```
### TASK
Explain the task. Specify the task, concise in a few lines.
```
## Combine all techniques
When writing prompts for enterprise use cases, you should create a folder with each prompt as a single code file in a versioning system. These prompts can be many paragraphs long and will be changed over time. I've created a structure of a typical prompt structure. Each should be in its own paragraph. I gave short examples for each row, though the actual prompt should be more detailed with more examples and instructions.
*It's also important to understand that you can overload a model with too many instructions or constraints. - They can clash, or a model can favor one instruction over another. At some point, when there are too many instructions, the model forgets about the others. Look into splitting up prompts into multiple prompts (API Calls) and a variety of examples, and guide the instructions step by step.*
## Prompt Structure Template
### Role
Explain the role and expertise of the model.
```
Act like a legal advisor. You have expertise in analyzing rental contracts.
```
### TASK
Explain the task. Specify the task, concise in a few lines.
```
 TIP: This chapter will share various techniques in a prompt written for an enterprise use case; it's the trick to combine multiple methods but still be concise enough. You can easily overload the model with too many tasks and instructions. When this happens, the model will ignore particular instructions or favor specific examples and instructions over others. Think about how you design your prompt. Is splitting the prompt into multiple prompts (API calls) better? Can you guide the model better with numbering? Did you provide enough examples?
## Providing Instructions and Constraints
Instructions and constraints are used in prompting to guide the output of a LLM.
* An **instruction** provides explicit instructions on the desired format, style, or content of the response. It guides the model on what the model should do or produce.
* A **constraint** is a set of limitations or boundaries on the response. It limits what the model should not do or avoid.
When we as humans receive feedback, often we don't like to hear whole lists of things not to do. Similar to humans, machines prefer positive feedback also more than the negative.
Growing research suggests that focusing on positive instructions in prompting can be more effective than relying heavily on constraints.
Instructions directly communicate the desired outcome, whereas constraints might leave the model guessing about what is allowed. It gives flexibility and encourages creativity within the defined boundaries, while constraints can limit the model's potential. Also, a list of constraints can clash with each other.
Of course, constraints still have their place, especially when you need to prevent harmful or biased content or when you have strict output requirements.
Here's a quick example for instructions:
```
TIP: This chapter will share various techniques in a prompt written for an enterprise use case; it's the trick to combine multiple methods but still be concise enough. You can easily overload the model with too many tasks and instructions. When this happens, the model will ignore particular instructions or favor specific examples and instructions over others. Think about how you design your prompt. Is splitting the prompt into multiple prompts (API calls) better? Can you guide the model better with numbering? Did you provide enough examples?
## Providing Instructions and Constraints
Instructions and constraints are used in prompting to guide the output of a LLM.
* An **instruction** provides explicit instructions on the desired format, style, or content of the response. It guides the model on what the model should do or produce.
* A **constraint** is a set of limitations or boundaries on the response. It limits what the model should not do or avoid.
When we as humans receive feedback, often we don't like to hear whole lists of things not to do. Similar to humans, machines prefer positive feedback also more than the negative.
Growing research suggests that focusing on positive instructions in prompting can be more effective than relying heavily on constraints.
Instructions directly communicate the desired outcome, whereas constraints might leave the model guessing about what is allowed. It gives flexibility and encourages creativity within the defined boundaries, while constraints can limit the model's potential. Also, a list of constraints can clash with each other.
Of course, constraints still have their place, especially when you need to prevent harmful or biased content or when you have strict output requirements.
Here's a quick example for instructions:
```
 Given how much prompt outputs can change across different models, sampling settings, and even different versions of the same model, it's super important to document everything. You might get a response with slightly different wording or formatting, even with the exact same prompt, so keeping good records is key for future work.
I recommend using a Google Sheet, with a table like the one presented below on each tab, to track your prompts. This way, you have a complete history when you need to revisit old work, test how prompts perform on new model versions, or troubleshoot issues.
Feedback is a cornerstone of prompt engineering, providing valuable insights for improvement. If you're fortunate enough to use Vertex AI Studio (Model Garden), save your prompts (using the same name and version as listed in your documentation) and track the hyperlink to the saved prompt in the table. This way, you're always one click away from re-running your prompts and incorporating valuable feedback into your iterations.
TIP: If you're working with a Retrieval Augmented Generation (RAG) system, also note down the specific RAG settings that affect the content inserted into the prompt (such as query, chunk settings, output, etc.).
[GitHub Gist](https://gist.github.com/8fd292dbcf1fb887c29f55ee4df68655)
Once you feel the prompt is close to perfect, please take it to your project codebase. In the codebase, save prompts in a separate file from the code so they're easier to maintain. Finally, ideally, your prompts are part of an operationalized system, and as a prompt engineer, you should rely on automated tests and evaluation procedures to understand how well your prompt generalizes to a task.
Remember, prompt engineering is all about continuous improvement. You'll need to create and test different prompts, analyze and document the results, tweak your prompts based on how the model performs, and keep experimenting until you get the results you want. If you change the model or its configuration, go back and test your old prompts again. This iterative process is key to refining and optimizing your prompts for the best possible performance.
In the next blog post, we'll dive deeper into the art of crafting effective prompts. We'll explore different techniques like role prompting, contextual prompting, and few-shot prompting, and we'll share tips on how to write prompts that are clear, concise, and effective. Stay tuned!
---
## Beyond the Basics How to Choose and Configure Your LLM for Maximum Impact
*Published: 2024-06-24*
*Categories: Prompt Engineering*
*Tags: Large Language Models, Prompt Engineering, Gemini, ChatGPT, LLM, Enterprise, Real-world*
> LLM selection and configuration for business. Expert tips on model choice, output length, sampling, and safety settings. Boost your AI performance.
---
When it comes to AI prompt engineering, the choice of language model (LLM) is crucial. Each prompt should be carefully optimized for the specific LLM you're using, whether it's one of the Gemini language models in Vertex AI, GPT, Claude, or an open-source model like LLaMA. It's important to note that a prompt that was optimized for TextBison won't necessarily work in Gemini. This principle holds true not just across different models but also between different versions of the same model.
*This is the 3rd blog of the series: Prompt engineering for business applications. Prompt Engineering is complex and requires careful planning and refinement to achieve desired results from AI models. As a software engineer @Google with experience in prompt engineering for major businesses, I will share practical learnings in a blog series to help others unlock the power of AI beyond simple tasks.*
* Blog 1: [Demystifying Prompt Engineering for the Enterprise](https://www.leeboonstra.dev/prompt-engineering/prompt_engineering_guide1/)
* Blog 2: [The Foundation Understanding LLMs and Prompt Engineering, and Why It All Matters](https://www.leeboonstra.dev/prompt-engineering/prompt_engineering_guide2/)
Given how much prompt outputs can change across different models, sampling settings, and even different versions of the same model, it's super important to document everything. You might get a response with slightly different wording or formatting, even with the exact same prompt, so keeping good records is key for future work.
I recommend using a Google Sheet, with a table like the one presented below on each tab, to track your prompts. This way, you have a complete history when you need to revisit old work, test how prompts perform on new model versions, or troubleshoot issues.
Feedback is a cornerstone of prompt engineering, providing valuable insights for improvement. If you're fortunate enough to use Vertex AI Studio (Model Garden), save your prompts (using the same name and version as listed in your documentation) and track the hyperlink to the saved prompt in the table. This way, you're always one click away from re-running your prompts and incorporating valuable feedback into your iterations.
TIP: If you're working with a Retrieval Augmented Generation (RAG) system, also note down the specific RAG settings that affect the content inserted into the prompt (such as query, chunk settings, output, etc.).
[GitHub Gist](https://gist.github.com/8fd292dbcf1fb887c29f55ee4df68655)
Once you feel the prompt is close to perfect, please take it to your project codebase. In the codebase, save prompts in a separate file from the code so they're easier to maintain. Finally, ideally, your prompts are part of an operationalized system, and as a prompt engineer, you should rely on automated tests and evaluation procedures to understand how well your prompt generalizes to a task.
Remember, prompt engineering is all about continuous improvement. You'll need to create and test different prompts, analyze and document the results, tweak your prompts based on how the model performs, and keep experimenting until you get the results you want. If you change the model or its configuration, go back and test your old prompts again. This iterative process is key to refining and optimizing your prompts for the best possible performance.
In the next blog post, we'll dive deeper into the art of crafting effective prompts. We'll explore different techniques like role prompting, contextual prompting, and few-shot prompting, and we'll share tips on how to write prompts that are clear, concise, and effective. Stay tuned!
---
## Beyond the Basics How to Choose and Configure Your LLM for Maximum Impact
*Published: 2024-06-24*
*Categories: Prompt Engineering*
*Tags: Large Language Models, Prompt Engineering, Gemini, ChatGPT, LLM, Enterprise, Real-world*
> LLM selection and configuration for business. Expert tips on model choice, output length, sampling, and safety settings. Boost your AI performance.
---
When it comes to AI prompt engineering, the choice of language model (LLM) is crucial. Each prompt should be carefully optimized for the specific LLM you're using, whether it's one of the Gemini language models in Vertex AI, GPT, Claude, or an open-source model like LLaMA. It's important to note that a prompt that was optimized for TextBison won't necessarily work in Gemini. This principle holds true not just across different models but also between different versions of the same model.
*This is the 3rd blog of the series: Prompt engineering for business applications. Prompt Engineering is complex and requires careful planning and refinement to achieve desired results from AI models. As a software engineer @Google with experience in prompt engineering for major businesses, I will share practical learnings in a blog series to help others unlock the power of AI beyond simple tasks.*
* Blog 1: [Demystifying Prompt Engineering for the Enterprise](https://www.leeboonstra.dev/prompt-engineering/prompt_engineering_guide1/)
* Blog 2: [The Foundation Understanding LLMs and Prompt Engineering, and Why It All Matters](https://www.leeboonstra.dev/prompt-engineering/prompt_engineering_guide2/)
 Here are some considerations for choosing a model that fits with your use-case:
* **Small vs. Large Model:** The model's size can significantly impact its performance and the quality of its responses. Smaller models may be faster and more cost-effective, but they lack the complexity and nuance of larger models. For instance, a smaller model could be sufficient for basic text classification tasks, while a larger model might be necessary for complex question answering or creative text generation.
* **Industry-Specific Models:** In some cases, specialized models trained on domain-specific data can offer superior performance. For example, Med-PaLM and Sec-PaLM are tailored for medical and cybersecurity applications. If your use case falls within a specific industry, it's worth considering whether a specialized model could provide more accurate and relevant results.
* **Open-Source (e.g., Gemma) vs. Vertex AI:** The decision between open-source models and those available on Vertex AI should be based on factors such as customization needs, model size, architecture, access to computational resources, library usage and cost. Open-source models offer flexibility and potential cost savings but may (or may not) require more setup and fine-tuning. On the other hand, Vertex AI provides a managed environment with pre-trained models and seamless integration with other Google Cloud services.
* **Context Window Size & Output Token Limit:** The context window refers to the maximum amount of text the model can use when generating a response. The output token limit determines the response length the model can produce. The limits on these parameters are essential to consider, especially when working with long documents or complex prompts. For instance, if you need to summarize a lengthy legal contract, you'll need a model with a large enough context window to process the entire document. When you choose JSON as an output format, the JSON format itself might eat up half of your output tokens, so the output token limit is equally important.
## Fine-Tuning Your LLM: It's Not Just About the Model
Once you pick the correct model for your use case, you must tinker with the various configurations of an LLM, such as the output length and sampling controls, such as temperature or Top-K/Top-P. Most LLMs come with multiple configuration options that control the LLM's output. Effective, prompt engineering requires setting these configurations optimally for your task.
## Output Token Length
One of the key settings is the output token length. This controls how many tokens (roughly words) your LLM spits out in its response. Now, here's the thing: more tokens mean more computing power, which translates to higher costs and potentially slower response times. And guess what? Making the output shorter doesn't magically make your LLM more concise. It just causes the LLM to stop predicting more tokens once the limit is reached.
TIP: If you're dealing with JSON output, be extra careful with the token limit. The JSON formatting itself can eat up a lot of tokens, so you don't want to end up with a broken response, which makes the JSON invalid (and therefore, you can't chain API calls).
## Sampling Controls: Let's Get Creative (or Not)
LLMs don't just predict one word at a time. They actually calculate probabilities for all the words in their vocabulary and then sample from those probabilities to choose the next word. This is where things like temperature, Top-K, and Top-P come in. They control how random and creative (or not) your LLM gets.
## Temperature
Temperature controls the degree of randomness in token selection. Higher temperature means more random and unexpected results, while lower temperature makes your LLM stick closer to the expected output. Think of it like this: crank up the temperature if you want your LLM to write a wild marketing blog post. But if you need it to extract medical info from a patient report, keep it low and factual.
NOTE: Don't go overboard with the temperature. Above 1, things start to get weird and nonsensical. As the temperature increases, all tokens become equally likely to be the next predicted token.
## Top-K and Top-P
Top-K and Top-P (also known as nucleus sampling) are two sampling settings used in LLMs to restrict the predicted next token from tokens with the top predicted probabilities. Like temperature, these sampling settings control the randomness and diversity of generated text.
Top-K picks the top (K) most likely words, while Top-P picks the words whose combined probability doesn't exceed a certain value (P).
The best way to choose between Top-K and Top-P is to experiment with both methods (or both together) and see which one produces the results you are looking for. A low temperature (e.g., 0.1, works best with a high Top-P: 0.95)
## Safety Settings
Many large language models have safety settings or content-filtering controls. For instance, Gemini comes equipped with safety settings designed to filter model output, preventing the generation of harmful, unsafe, biased, or unfair content. These settings can be configured to align with your specific requirements and risk tolerance. They can be turned off so no filtering is applied, they can be set to moderate to mostly remove unsafe content, but potentially harmful content might still be present, or strict, which filters rigorously to minimize the risk of unsafe content.
NOTE: Safety settings depend on the model, are not foolproof, and might not catch all instances of unsafe content. Human oversight and additional safeguards are still necessary.
Coming up next in our series, we're diving into a topic that's often overlooked but very important: documenting your prompts. I know, it might not sound as exciting as playing around with LLMs, but trust me, it's a total game-changer. So stay tuned for our next post where I'll spill all the details to save yourself from future headaches!
---
## The Foundation Understanding LLMs and Prompt Engineering, And Why It All Matters
*Published: 2024-06-16*
*Categories: Prompt Engineering*
*Tags: Large Language Models, Prompt Engineering, Gemini, ChatGPT, LLM, Enterprise, Real-world*
> Build a strong foundation in LLMs and prompt engineering for business success. Learn the core concepts and how to apply them to real-world use cases.
---
Let's get down to basics and talk about how Large Language Models (LLMs) actually work. Think of them like prediction machines. There's nothing factual; everything is statistical. It generates text, one word after another (well, technically it's not a word, but it's a token; multiple tokens may form a word), and then tries to guess what the next word should be. They're trained on massive amounts of data, so they get pretty good at figuring out how words relate to each other.
*This is the 2nd blog of the series: Prompt engineering for business applications. Prompt Engineering is complex and requires careful planning and refinement to achieve desired results from AI models. As a software engineer @Google with experience in prompt engineering for major businesses, I will share practical learnings in a blog series to help others unlock the power of AI beyond simple tasks.*
* Blog 1: [Demystifying Prompt Engineering for the Enterprise](https://www.leeboonstra.dev/prompt-engineering/prompt_engineering_guide1/)
Here are some considerations for choosing a model that fits with your use-case:
* **Small vs. Large Model:** The model's size can significantly impact its performance and the quality of its responses. Smaller models may be faster and more cost-effective, but they lack the complexity and nuance of larger models. For instance, a smaller model could be sufficient for basic text classification tasks, while a larger model might be necessary for complex question answering or creative text generation.
* **Industry-Specific Models:** In some cases, specialized models trained on domain-specific data can offer superior performance. For example, Med-PaLM and Sec-PaLM are tailored for medical and cybersecurity applications. If your use case falls within a specific industry, it's worth considering whether a specialized model could provide more accurate and relevant results.
* **Open-Source (e.g., Gemma) vs. Vertex AI:** The decision between open-source models and those available on Vertex AI should be based on factors such as customization needs, model size, architecture, access to computational resources, library usage and cost. Open-source models offer flexibility and potential cost savings but may (or may not) require more setup and fine-tuning. On the other hand, Vertex AI provides a managed environment with pre-trained models and seamless integration with other Google Cloud services.
* **Context Window Size & Output Token Limit:** The context window refers to the maximum amount of text the model can use when generating a response. The output token limit determines the response length the model can produce. The limits on these parameters are essential to consider, especially when working with long documents or complex prompts. For instance, if you need to summarize a lengthy legal contract, you'll need a model with a large enough context window to process the entire document. When you choose JSON as an output format, the JSON format itself might eat up half of your output tokens, so the output token limit is equally important.
## Fine-Tuning Your LLM: It's Not Just About the Model
Once you pick the correct model for your use case, you must tinker with the various configurations of an LLM, such as the output length and sampling controls, such as temperature or Top-K/Top-P. Most LLMs come with multiple configuration options that control the LLM's output. Effective, prompt engineering requires setting these configurations optimally for your task.
## Output Token Length
One of the key settings is the output token length. This controls how many tokens (roughly words) your LLM spits out in its response. Now, here's the thing: more tokens mean more computing power, which translates to higher costs and potentially slower response times. And guess what? Making the output shorter doesn't magically make your LLM more concise. It just causes the LLM to stop predicting more tokens once the limit is reached.
TIP: If you're dealing with JSON output, be extra careful with the token limit. The JSON formatting itself can eat up a lot of tokens, so you don't want to end up with a broken response, which makes the JSON invalid (and therefore, you can't chain API calls).
## Sampling Controls: Let's Get Creative (or Not)
LLMs don't just predict one word at a time. They actually calculate probabilities for all the words in their vocabulary and then sample from those probabilities to choose the next word. This is where things like temperature, Top-K, and Top-P come in. They control how random and creative (or not) your LLM gets.
## Temperature
Temperature controls the degree of randomness in token selection. Higher temperature means more random and unexpected results, while lower temperature makes your LLM stick closer to the expected output. Think of it like this: crank up the temperature if you want your LLM to write a wild marketing blog post. But if you need it to extract medical info from a patient report, keep it low and factual.
NOTE: Don't go overboard with the temperature. Above 1, things start to get weird and nonsensical. As the temperature increases, all tokens become equally likely to be the next predicted token.
## Top-K and Top-P
Top-K and Top-P (also known as nucleus sampling) are two sampling settings used in LLMs to restrict the predicted next token from tokens with the top predicted probabilities. Like temperature, these sampling settings control the randomness and diversity of generated text.
Top-K picks the top (K) most likely words, while Top-P picks the words whose combined probability doesn't exceed a certain value (P).
The best way to choose between Top-K and Top-P is to experiment with both methods (or both together) and see which one produces the results you are looking for. A low temperature (e.g., 0.1, works best with a high Top-P: 0.95)
## Safety Settings
Many large language models have safety settings or content-filtering controls. For instance, Gemini comes equipped with safety settings designed to filter model output, preventing the generation of harmful, unsafe, biased, or unfair content. These settings can be configured to align with your specific requirements and risk tolerance. They can be turned off so no filtering is applied, they can be set to moderate to mostly remove unsafe content, but potentially harmful content might still be present, or strict, which filters rigorously to minimize the risk of unsafe content.
NOTE: Safety settings depend on the model, are not foolproof, and might not catch all instances of unsafe content. Human oversight and additional safeguards are still necessary.
Coming up next in our series, we're diving into a topic that's often overlooked but very important: documenting your prompts. I know, it might not sound as exciting as playing around with LLMs, but trust me, it's a total game-changer. So stay tuned for our next post where I'll spill all the details to save yourself from future headaches!
---
## The Foundation Understanding LLMs and Prompt Engineering, And Why It All Matters
*Published: 2024-06-16*
*Categories: Prompt Engineering*
*Tags: Large Language Models, Prompt Engineering, Gemini, ChatGPT, LLM, Enterprise, Real-world*
> Build a strong foundation in LLMs and prompt engineering for business success. Learn the core concepts and how to apply them to real-world use cases.
---
Let's get down to basics and talk about how Large Language Models (LLMs) actually work. Think of them like prediction machines. There's nothing factual; everything is statistical. It generates text, one word after another (well, technically it's not a word, but it's a token; multiple tokens may form a word), and then tries to guess what the next word should be. They're trained on massive amounts of data, so they get pretty good at figuring out how words relate to each other.
*This is the 2nd blog of the series: Prompt engineering for business applications. Prompt Engineering is complex and requires careful planning and refinement to achieve desired results from AI models. As a software engineer @Google with experience in prompt engineering for major businesses, I will share practical learnings in a blog series to help others unlock the power of AI beyond simple tasks.*
* Blog 1: [Demystifying Prompt Engineering for the Enterprise](https://www.leeboonstra.dev/prompt-engineering/prompt_engineering_guide1/)
 When you give an LLM or AI Agent a prompt, you're basically giving it instructions on how to do this word prediction thing. Good prompt engineering is all about crafting those instructions really well. It's like giving someone directions - the more precise and more specific you are, the better the chances they'll end up where you want them to.
In the world of GenAI and natural language processing, a prompt is the input you give to the model to get a response. You can use these prompts to make the LLM do all sorts of actions:
* Summarizing large documents
* Extracting key information from a speech
* Answering and reasoning your questions from a contract
* Classifying stuff (like, is this email spam or not?)
* Translating languages of a document
* Generating code or explaining code
## The Challenges: It's Not Always Simple
Anyone can write a prompt, but writing a good prompt? That's where things get tricky. You've gotta consider a bunch of factors to get a top-notch response from your model:
1. **Teamwork:** Get a subject matter expert on board. They know the ins and outs of your topic and can help you evaluate and rate generated answers or provide examples of what "perfect" looks like.
2. **Make configurations:** You need to pick the right AI model and tweak its settings. Things like how creative (Temperature) it should be, how safe its answers need to be (Safety an filtering Settings), and how it samples which words to use (Top-K / Top-P), it all plays a role.
3. **Prompt Perfection:** The way you write your prompt matters - the words you choose, the order you put them in, how you phrase things, how you provide instructions, the role and style that you take, the context you pass in, the examples you give and the constraints and output expectations that you set. It influences the LLM response.
**Plus, even with the same prompt**, the response can sometimes be different. It's different from a calculator, where you always get the same answer. So, you can't just string compare the text of two responses to see if they're the same.
**And let's not forget the technical challenges.**
* Sometimes, the LLM's answer is too long and, therefore, breaks up the formatting. (This happens a lot when you work with an output format like JSON)
* Responses might get blocked if they try to say something harmful, copyrighted, or inappropriate.
* You can run into quota issues.
* And all kinds of security challenges!
So yeah, there are many reasons why your output isn't what you expected. For a consumer using a chat interface like Gemini or ChatGPT, that's fine; they just type another single line question. For a business application, this can be a severe issue. A food ordering bot that takes your order wrong likely won't be used a 2nd time. Worse, a medical summary wrongly summarized or a legal contract wrongly explained has serious consequences.
And this is why it's super important to keep track of your prompts, test them thoroughly, and get feedback from real people like subject matter experts, other prompt engineers in your team or even another automated LLM.
Don't worry; it's not all doom and gloom. You can fine-tune your AI model, tweak your prompts, or even try a different model altogether. This guide is all about helping you master the art of prompt engineering, so stick around, and we'll dive into the nitty-gritty details!
---
## Demystifying Prompt Engineering for the Enterprise
*Published: 2024-06-10*
*Categories: Prompt Engineering*
*Tags: Large Language Models, Prompt Engineering, Gemini, ChatGPT, LLM, Enterprise, Real-world*
> Solve complex business problems with effective prompt engineering. This blog post explores the challenges and key learnings from Google software engineer Lee Boonstra.
---
Prompt engineering for AI business applications isn't as simple as asking a question. It's a complex process that requires careful planning and continuous refinement, especially when you want your model to do things like summarize reports, extract insights from conversations, or answer questions based on a large knowledge base. Over the past couple of years, as a Software Engineer for the innovation factory within Google Cloud Office of the CTO, I've been knee-deep in prompt engineering, AI and Machine Learning for major business use cases, working on large innovation projects for a selection of clients, including automating drive-thru orders at Wendy's.
When you give an LLM or AI Agent a prompt, you're basically giving it instructions on how to do this word prediction thing. Good prompt engineering is all about crafting those instructions really well. It's like giving someone directions - the more precise and more specific you are, the better the chances they'll end up where you want them to.
In the world of GenAI and natural language processing, a prompt is the input you give to the model to get a response. You can use these prompts to make the LLM do all sorts of actions:
* Summarizing large documents
* Extracting key information from a speech
* Answering and reasoning your questions from a contract
* Classifying stuff (like, is this email spam or not?)
* Translating languages of a document
* Generating code or explaining code
## The Challenges: It's Not Always Simple
Anyone can write a prompt, but writing a good prompt? That's where things get tricky. You've gotta consider a bunch of factors to get a top-notch response from your model:
1. **Teamwork:** Get a subject matter expert on board. They know the ins and outs of your topic and can help you evaluate and rate generated answers or provide examples of what "perfect" looks like.
2. **Make configurations:** You need to pick the right AI model and tweak its settings. Things like how creative (Temperature) it should be, how safe its answers need to be (Safety an filtering Settings), and how it samples which words to use (Top-K / Top-P), it all plays a role.
3. **Prompt Perfection:** The way you write your prompt matters - the words you choose, the order you put them in, how you phrase things, how you provide instructions, the role and style that you take, the context you pass in, the examples you give and the constraints and output expectations that you set. It influences the LLM response.
**Plus, even with the same prompt**, the response can sometimes be different. It's different from a calculator, where you always get the same answer. So, you can't just string compare the text of two responses to see if they're the same.
**And let's not forget the technical challenges.**
* Sometimes, the LLM's answer is too long and, therefore, breaks up the formatting. (This happens a lot when you work with an output format like JSON)
* Responses might get blocked if they try to say something harmful, copyrighted, or inappropriate.
* You can run into quota issues.
* And all kinds of security challenges!
So yeah, there are many reasons why your output isn't what you expected. For a consumer using a chat interface like Gemini or ChatGPT, that's fine; they just type another single line question. For a business application, this can be a severe issue. A food ordering bot that takes your order wrong likely won't be used a 2nd time. Worse, a medical summary wrongly summarized or a legal contract wrongly explained has serious consequences.
And this is why it's super important to keep track of your prompts, test them thoroughly, and get feedback from real people like subject matter experts, other prompt engineers in your team or even another automated LLM.
Don't worry; it's not all doom and gloom. You can fine-tune your AI model, tweak your prompts, or even try a different model altogether. This guide is all about helping you master the art of prompt engineering, so stick around, and we'll dive into the nitty-gritty details!
---
## Demystifying Prompt Engineering for the Enterprise
*Published: 2024-06-10*
*Categories: Prompt Engineering*
*Tags: Large Language Models, Prompt Engineering, Gemini, ChatGPT, LLM, Enterprise, Real-world*
> Solve complex business problems with effective prompt engineering. This blog post explores the challenges and key learnings from Google software engineer Lee Boonstra.
---
Prompt engineering for AI business applications isn't as simple as asking a question. It's a complex process that requires careful planning and continuous refinement, especially when you want your model to do things like summarize reports, extract insights from conversations, or answer questions based on a large knowledge base. Over the past couple of years, as a Software Engineer for the innovation factory within Google Cloud Office of the CTO, I've been knee-deep in prompt engineering, AI and Machine Learning for major business use cases, working on large innovation projects for a selection of clients, including automating drive-thru orders at Wendy's.
 Through these projects, I've learned that crafting effective prompts is an iterative journey, not a one-and-done task. Writing instructions and constraints that work together seamlessly takes time and effort, especially when dealing with unexpected scenarios. But the payoff is huge. In this blog series, I'm sharing my practical learnings with you. We'll dive into the challenges of prompt engineering, explore different models and configurations, and learn how to write prompts that get the job done. Whether you're a seasoned pro or just starting out, I hope this guide helps you unlock the power of AI for a use case beyond the generation of a to-do list.
## It's Way More Than Just Asking a Question!
Alright, let's spill the tea about prompt engineering. There's this misconception floating around that it's a piece of cake, just like asking your LLM a simple question. If you're chatting with Gemini or ChatGPT through their public interfaces for fun, yeah, then maybe that's true. But when it comes to serious business applications, like summarizing hefty reports, extracting insights from conversations, or getting answers from massive knowledge bases, prompt engineering gets complex. Seriously!
We are not generating ideas for your next trip or a to-do list. One prompt, reused in a business application, needs to handle many different inputs, and a single wrong answer could cause real problems. We're talking here about generated answers in specific formats, chained JSON outputs, and the potential for errors like hallucinations (when the model makes stuff up) or misinterpretations. That's a whole different ball game than casual GenAI use. And when something goes wrong, like hallucinations, incorrect reasoning, style issues, false precision, API errors, or formatting mistakes, it can seriously do damage to your business or brand.
## What Large Enterprise Prompting Projects Taught Me
In my last two years as a software engineer, I've been neck-deep in prompt engineering for major business projects at Google. From automating drive-thru orders at Wendy's to generating medical summaries or Q&A on large legal documents, I've learned that crafting effective prompts is an ongoing process. It takes time, effort, and a lot of tweaking to get those instructions and constraints working together smoothly.
All these projects had the same things in common:
* Constantly evolving prompts
* Growing prompt size and complexity
* Defining output formats (like JSON)
* Using examples to guide the LLM
* Carefully balancing instructions and constraints
* Documenting everything
So, if you're working with clients, helping them use GenAI effectively, or just curious about how I use LLMs in the real world, this guide is for you. Over the next 6 weeks, I'm sharing my practical learnings, not just generating creative poems stuff. Remember, what works for one project might not work for another - it's all about adapting and experimenting.
Read the next blog post in this series: [The Foundation Understanding LLMs and Prompt Engineering, and Why It All Matters](https://www.leeboonstra.dev/prompt-engineering/prompt_engineering_guide2/)
---
## Podcast Shaping the future Generative AI and Large Language Models
*Published: 2023-06-07*
*Categories: Chatbots*
*Tags: Generative AI, LLM, Large Language Models, PaLM, Bard, ChatGPT*
> Podcast Shaping the future Generative AI and Large Language Models (LLMs), such as ChatGPT and Bard. None other than Lee Boonstra (Software Engineer Tech Lead & Advocate at Google) and Saskia Nijs (Chief Human & Technology Officer) led by Jimmy de Vreede (Springbok Agency and DDMA Committee DDE) discussed what the technology means and will mean for the market and the work of marketers.
---
Podcast Shaping the future Generative AI and Large Language Models (LLMs), such as ChatGPT and Bard.
In this interview, I discussed with Saskia Nijs (Chief Human & Technology Officer) and Jimmy de Vreede (Springbok Agency and DDMA Committee) how LLMs like ChatGPT and Bard work, the benefits and drawbacks of this new technology, and the future for marketeers.


Read more
---
## Dialogflow CX Competition — Learn Dialogflow CX & design open-source components
*Published: 2021-12-01*
*Categories: Chatbots*
*Tags: Dialogflow CX, Dialogflow CX for beginners, Dialogflow CX vs. Dialogflow Essentials, Dialogflow CX vs. Dialogflow ES, Dialogflow Customer Experience, Contest, Dialogflow Competition, Developer Competition, Hackathon, Dialogflow t-shirt, Dialogflow Merchandise, Dialogflow training course, Qwiklabs Dialogflow*
> Who doesn't love a contest? Join the Dialogflow CX competition to win cool prizes! Enroll to a free Dialogflow training course and get a free Dialogflow t-shirt.
---
Since we can't run any Dialogflow community in-person events this year, we came up with another great community activity! A designer & developer (learning) competition! Get trained in Dialogflow CX, get a free t-shirt and work on open-source components.
Google Cloud recently released Dialogflow CX, a bot-building platform for building chatbots and telephony agents. It empowers your team to accelerate creating enterprise-level conversational experiences through a visual bot builder and an advanced NLU.
To have a reason to play around with the tool, you can join the competition. Developers and UX Designers can register from July the 12th, by visiting the event website:
[https://events.withgoogle.com/dialogflow-cx-competition-global/](https://events.withgoogle.com/dialogflow-cx-competition-global/?utm_source=leeboonstra_blog&utm_medium=site&utm_campaign=cx_competition)
## Free Dialogflow CX Training Course
Everyone that signs up, will be enrolled in a free Dialogflow CX Qwiklabs course. You will be able to learn how to design conversational flows and how you can build integrations. This online course has been developed by Google, and is highly recommended as a training resource.
## Competition
From the 27th of July, you will be invited back to the event website, here you will be able to enter your registration details. The first 200 participants that enter their information will receive a free Dialogflow CX t-shirt!
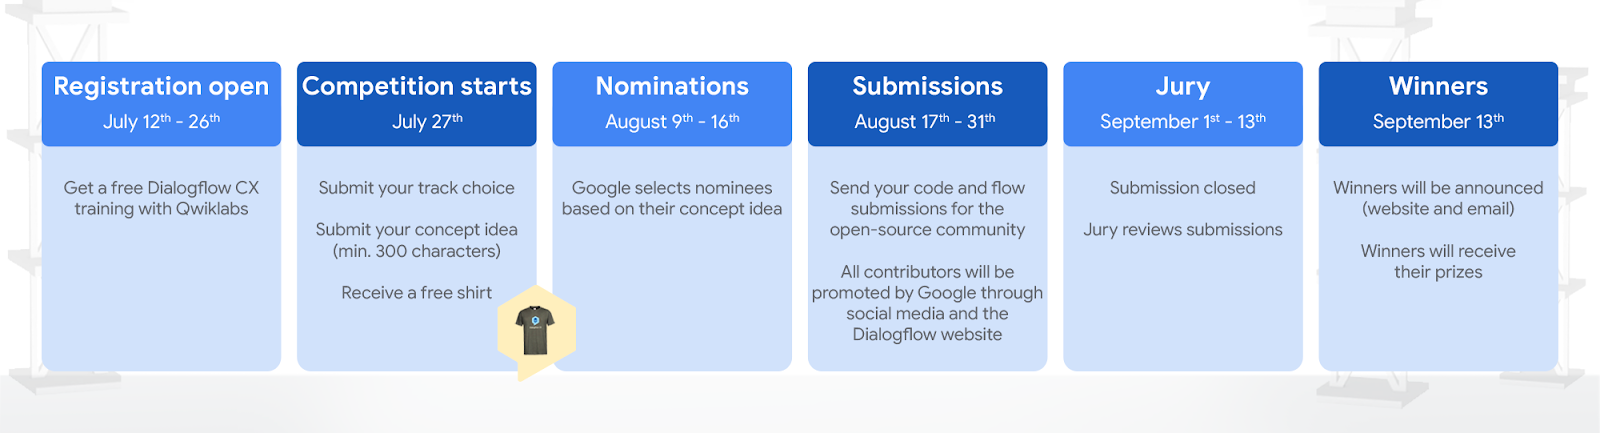
As part of the competition, you will pick one of the following tracks:
Through these projects, I've learned that crafting effective prompts is an iterative journey, not a one-and-done task. Writing instructions and constraints that work together seamlessly takes time and effort, especially when dealing with unexpected scenarios. But the payoff is huge. In this blog series, I'm sharing my practical learnings with you. We'll dive into the challenges of prompt engineering, explore different models and configurations, and learn how to write prompts that get the job done. Whether you're a seasoned pro or just starting out, I hope this guide helps you unlock the power of AI for a use case beyond the generation of a to-do list.
## It's Way More Than Just Asking a Question!
Alright, let's spill the tea about prompt engineering. There's this misconception floating around that it's a piece of cake, just like asking your LLM a simple question. If you're chatting with Gemini or ChatGPT through their public interfaces for fun, yeah, then maybe that's true. But when it comes to serious business applications, like summarizing hefty reports, extracting insights from conversations, or getting answers from massive knowledge bases, prompt engineering gets complex. Seriously!
We are not generating ideas for your next trip or a to-do list. One prompt, reused in a business application, needs to handle many different inputs, and a single wrong answer could cause real problems. We're talking here about generated answers in specific formats, chained JSON outputs, and the potential for errors like hallucinations (when the model makes stuff up) or misinterpretations. That's a whole different ball game than casual GenAI use. And when something goes wrong, like hallucinations, incorrect reasoning, style issues, false precision, API errors, or formatting mistakes, it can seriously do damage to your business or brand.
## What Large Enterprise Prompting Projects Taught Me
In my last two years as a software engineer, I've been neck-deep in prompt engineering for major business projects at Google. From automating drive-thru orders at Wendy's to generating medical summaries or Q&A on large legal documents, I've learned that crafting effective prompts is an ongoing process. It takes time, effort, and a lot of tweaking to get those instructions and constraints working together smoothly.
All these projects had the same things in common:
* Constantly evolving prompts
* Growing prompt size and complexity
* Defining output formats (like JSON)
* Using examples to guide the LLM
* Carefully balancing instructions and constraints
* Documenting everything
So, if you're working with clients, helping them use GenAI effectively, or just curious about how I use LLMs in the real world, this guide is for you. Over the next 6 weeks, I'm sharing my practical learnings, not just generating creative poems stuff. Remember, what works for one project might not work for another - it's all about adapting and experimenting.
Read the next blog post in this series: [The Foundation Understanding LLMs and Prompt Engineering, and Why It All Matters](https://www.leeboonstra.dev/prompt-engineering/prompt_engineering_guide2/)
---
## Podcast Shaping the future Generative AI and Large Language Models
*Published: 2023-06-07*
*Categories: Chatbots*
*Tags: Generative AI, LLM, Large Language Models, PaLM, Bard, ChatGPT*
> Podcast Shaping the future Generative AI and Large Language Models (LLMs), such as ChatGPT and Bard. None other than Lee Boonstra (Software Engineer Tech Lead & Advocate at Google) and Saskia Nijs (Chief Human & Technology Officer) led by Jimmy de Vreede (Springbok Agency and DDMA Committee DDE) discussed what the technology means and will mean for the market and the work of marketers.
---
Podcast Shaping the future Generative AI and Large Language Models (LLMs), such as ChatGPT and Bard.
In this interview, I discussed with Saskia Nijs (Chief Human & Technology Officer) and Jimmy de Vreede (Springbok Agency and DDMA Committee) how LLMs like ChatGPT and Bard work, the benefits and drawbacks of this new technology, and the future for marketeers.


Read more
---
## Dialogflow CX Competition — Learn Dialogflow CX & design open-source components
*Published: 2021-12-01*
*Categories: Chatbots*
*Tags: Dialogflow CX, Dialogflow CX for beginners, Dialogflow CX vs. Dialogflow Essentials, Dialogflow CX vs. Dialogflow ES, Dialogflow Customer Experience, Contest, Dialogflow Competition, Developer Competition, Hackathon, Dialogflow t-shirt, Dialogflow Merchandise, Dialogflow training course, Qwiklabs Dialogflow*
> Who doesn't love a contest? Join the Dialogflow CX competition to win cool prizes! Enroll to a free Dialogflow training course and get a free Dialogflow t-shirt.
---
Since we can't run any Dialogflow community in-person events this year, we came up with another great community activity! A designer & developer (learning) competition! Get trained in Dialogflow CX, get a free t-shirt and work on open-source components.
Google Cloud recently released Dialogflow CX, a bot-building platform for building chatbots and telephony agents. It empowers your team to accelerate creating enterprise-level conversational experiences through a visual bot builder and an advanced NLU.
To have a reason to play around with the tool, you can join the competition. Developers and UX Designers can register from July the 12th, by visiting the event website:
[https://events.withgoogle.com/dialogflow-cx-competition-global/](https://events.withgoogle.com/dialogflow-cx-competition-global/?utm_source=leeboonstra_blog&utm_medium=site&utm_campaign=cx_competition)
## Free Dialogflow CX Training Course
Everyone that signs up, will be enrolled in a free Dialogflow CX Qwiklabs course. You will be able to learn how to design conversational flows and how you can build integrations. This online course has been developed by Google, and is highly recommended as a training resource.
## Competition
From the 27th of July, you will be invited back to the event website, here you will be able to enter your registration details. The first 200 participants that enter their information will receive a free Dialogflow CX t-shirt!

As part of the competition, you will pick one of the following tracks:
-
UX Designers: Design a conversational flow
Design a Dialogflow CX flow/conversation for building a text chatbot for COVID-19. It could be a vaccination scheduler, could be an FAQ, Could be a bot on where you are allowed to travel to, etc.
-
Bot Developers: Build an integration
Use the Dialogflow CX API (REST, gRPC, or Client libraries) to build a cool integration. For example, to integrate a chatbot in a website or Blog, WhatsApp, CRM, CMS, Mobile, etc...
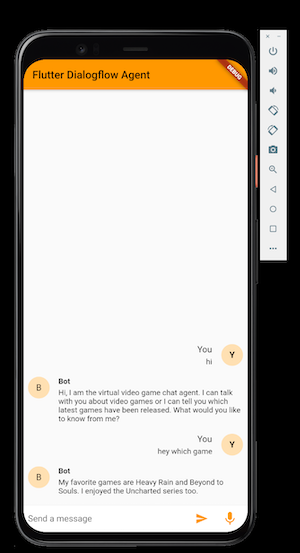 Let me explain to you how you can build your own integrations with gRPC on Google Cloud.
## About gRPC
In gRPC, a client application can directly call a method on a server application on a different machine as if it were a local object, making it easier for you to create distributed applications and services. In my case, the mobile Flutter app is the client, and Google Cloud the server.
As in many RPC systems, gRPC is based on defining a service, specifying the methods that can be called remotely with their parameters and return types. Google Cloud (Dialogflow) implements this interface and runs a gRPC server to handle client calls. On the client-side, the client has a stub that provides the same methods as the server.

By default, gRPC uses [Protocol Buffers](https://developers.google.com/protocol-buffers/docs/overview), Google’s mature open source mechanism for serializing structured data (although it can be used with other data formats such as JSON).
When working with protocol buffers, the first step is to define the structure for the data you want to serialize in a _proto file_: this is an ordinary text file with a .proto extension.
[GoogleApis](https://github.com/googleapis/googleapis) provides proto files for all the Google and Google Cloud APIs. Protocol buffer data is structured as _messages_. Each message is a small logical record of information containing a series of name-value pairs called _fields_, which contain a field name (Dialogflow property) and a tag number. Let’s have a look at the Dialogflow [session.proto](https://github.com/googleapis/googleapis/blob/master/google/cloud/dialogflow/v2/session.proto) file to understand:
```
// The message returned from the DetectIntent method.
message DetectIntentResponse {
string response_id = 1;
QueryResult query_result = 2;
google.rpc.Status webhook_status = 3;
bytes output_audio = 4;
OutputAudioConfig output_audio_config = 6;
}
```
With a .proto file, you can use a protocol buffer compiler called: **protoc** to generate data access classes in your preferred language(s) from your proto definition. These provide simple properties like queryResult and methods to retrieve the value .getField(int tagNumber) or to serialize/parse the whole structure to/from raw bytes. .toProto3Json();
So for my Flutter app, I will need to compile the Dialogflow protos to .dart files. Let’s give it a try!
## Working with gRPC and Dart/Flutter in Google Cloud
Create a folder **_proto** on your hard drive, in this folder, clone the following repositories. These are the repositories you will use each time you generate code:
```
git clone https://github.com/googleapis/googleapis
git clone https://github.com/protocolbuffers/protobuf
```
Also, create a **lib/src/generated** folder inside the **_proto** folder.
### **Install the tools**
For this example, you will obviously need Dart & Flutter on your machine.
I am using Flutter 2. and Dart 2.12.1
And as explained before, you will need the **protoc protobuf compiler**.
Follow the steps from [https://grpc.io/docs/protoc-installation/](https://grpc.io/docs/protoc-installation/)
**Note: On macOS, this will install protoc to /usr/local/bin/protoc. Make sure you have version 3.15 or higher installed. (run protoc --version). Else remove protoc and re-install.**
```
brew reinstall protobuf
```
By default this will work for Java, Python, JS, PHP, Ruby, C#, and Objective C.
To do this for Dart, you will need an additional plugin (**[protoc-gen-dart)](https://pub.dev/packages/protoc_plugin)**, which you can install using the following command:
```
$ pub global activate protoc_plugin
```
Make sure you are downloading version 20.0.0 or higher.
Update your PATH so that the protoc compiler can find the plugin:
```
$ export PATH="$PATH":"$HOME/.pub-cache/bin"
```
## Making use of the Dialogflow gRPC APIs
First, make sure you have the Dialogflow API enabled:
```
gcloud services enable dialogflow.googleapis.com
```
We will compile the Dialogflow protos to Dart files, from the googleapis repo.
Therefore, first set the following environment variables, where you point to the location on the two cloned repositories:
```
export PROTOBUF="$HOME/Documents/GitHub/_proto/protobuf"
export GOOGLEAPIS="$HOME/Documents/GitHub/_proto/googleapis"
```
Then save the below **generate-protos.sh** bash script in the **_proto** folder:
[GitHub Gist](https://gist.github.com/19fcdc735ecd613faaaf13e5a2a5864e)
and execute it:
```
. generate-protos.sh
```
Then copy the **generated**folder to your Dart/Flutter projects **src/lib folder.**
Once the generated files are in your Android project. You can start using the RPC API. You can find the RPC reference documentation online:
[https://cloud.google.com/dialogflow/es/docs/reference/rpc/google.cloud.dialogflow.v2#google.cloud.dialogflow.v2.Sessions](https://cloud.google.com/dialogflow/es/docs/reference/rpc/google.cloud.dialogflow.v2#google.cloud.dialogflow.v2.Sessions)
For example, it's possible now to make use of SessionsClient(), it will import the following dart files:
```
import 'package:flutter_dialogflow_agent/generated/google/cloud/dialogflow/v2/audio_config.pb.dart';
import 'package:flutter_dialogflow_agent/generated/google/cloud/dialogflow/v2/session.pb.dart'
```
When you get started, you will probably be pleased just to see text messages going back and forth. But eventually, you will probably want to add rich responses such as buttons, clickable hyperlinks, cards, and other such rich responses.
The general approach for detecting intents in Dialogflow is a follows:
1. You will need a service account, which the Dialogflow gRPC API will need so your application can access APIs on behalf of a user or using a service account.
2. Choose which version of the API you want to make use of, V2, V2beta1, CX, or CX beta.
3. The Dialogflow [SessionClient](https://cloud.google.com/dialogflow/es/docs/reference/rpc/google.cloud.dialogflow.v2#google.cloud.dialogflow.v2.Sessions) lets you detectIntents, so you will need to create a SessionClient, which contains a sessionPath, containing the Dialogflow Project Id (so it talks to your chatbot) and a unique session string for each session. (This is also important when you want to log and find chats per session at some point.)
4. Make the [detectIntent](https://cloud.google.com/dialogflow/es/docs/reference/rpc/google.cloud.dialogflow.v2#google.cloud.dialogflow.v2.DetectIntentRequest) calls; it needs at least the session path and the query input, such as text and a language code.
5. You can get the fulfillment text out of the queryResult from the [detectIntentResponse](https://cloud.google.com/dialogflow/es/docs/reference/rpc/google.cloud.dialogflow.v2#google.cloud.dialogflow.v2.DetectIntentResponse).
## Conclusion: when to use the client-side library vs. REST. vs. gRPC?
You can access the Google Cloud APIs via REST, gRPC, or one of the provided client libraries (built on gRPC).
### **Client-side library**
If the client libraries support your desired programming language (see the ones listed above), you should use this option. These libraries are maintained by Google, have built-in authentication and retries, and make efficient HTTP request bodies.
Else, you have to choose between REST or gRPC.
### **REST**
The advantage of **REST** is that you can create a simple JSON interface. Rest stands for “Representational State Transfer”. It is a set of rules that developers follow when they create their API. One of these rules states that you should be able to get a response when making a request. A request is made up of four things: the endpoint, the method (GET, POST, PUT, PATCH or DELETE), the headers, and the data (body). The language of your choice might already have a [googleapis](https://github.com/dart-lang/googleapis/tree/master/generated/googleapis) package, which can be used to make request requests.
Here’s an example that I have created to make detectIntent calls with the googleapis package, which is making use of REST under the hood:
[https://gist.github.com/savelee/7068e6cea695088bcf06031d9e435b48](https://gist.github.com/savelee/7068e6cea695088bcf06031d9e435b48) I’ve used the [googleapis_auth](https://pub.dev/packages/googleapis_auth) package to do the authentication.
### **gRPC**
gRPC is faster than REST, and as you have seen in my example, if the choice is between REST and gRPC, gRPC is the only streaming solution. But you will have to generate your own client from the Google-supplied protocol buffers, and you will also need to implement authentication.
I’ve built my own Dialogflow gRPC Dart / Flutter package this way.
When you want to build native Android or iOS applications, you can start using my package too!
[https://pub.dev/packages/dialogflow_grpc](https://pub.dev/packages/dialogflow_grpc)
---
## An introduction to bot builder platform Dialogflow CX
*Published: 2021-02-26*
*Categories: Chatbots*
*Tags: Dialogflow CX, Dialogflow CX for beginners, Dialogflow CX vs. Dialogflow Essentials, Dialogflow CX vs. Dialogflow ES, Dialogflow Customer Experience, Dialogflow CX pricing, Bot builder, Chatbot development suite*
> Dialogflow CX is a separate product that will coexist with Dialogflow Essentials. Developers and businesses can choose which bot building platform is the right tool for them. Dialogflow CX addresses the need for businesses to build more complex chat & contact center voice bots. Dialogflow Essentials is often chosen for its simplicity.
---
According to Gartner, this is the year that 50% of the enterprises will spend more money on bot development than traditional mobile app development! At Google, we have made a similar observation. Through Google Cloud, we work a lot with enterprise customers, we get lots of questions about our conversational AI tools for building chatbots and voice bots, and we help companies build these. This includes bots for the apparent channels such as websites, iOS, Android mobile apps, and social media like Facebook Messenger, Twitter, Slack, Whatsapp, Line etc. but also: building virtual agents in contact centers!
Dialogflow recently had a name change; it's now called **Dialogflow Essentials** (**Dialogflow ES**) to make room for a new Google Cloud Conversational AI tool: **Dialogflow Customer Experience** (**Dialogflow CX**). Dialogflow CX will be an alternative development suite for building conversational UIs and will exist next Dialogflow ES. Google will continue to support Dialogflow ES, as we have a huge user base. To understand why Google created another bot builder, let's first understand how Dialogflow ES works.
Let me explain to you how you can build your own integrations with gRPC on Google Cloud.
## About gRPC
In gRPC, a client application can directly call a method on a server application on a different machine as if it were a local object, making it easier for you to create distributed applications and services. In my case, the mobile Flutter app is the client, and Google Cloud the server.
As in many RPC systems, gRPC is based on defining a service, specifying the methods that can be called remotely with their parameters and return types. Google Cloud (Dialogflow) implements this interface and runs a gRPC server to handle client calls. On the client-side, the client has a stub that provides the same methods as the server.

By default, gRPC uses [Protocol Buffers](https://developers.google.com/protocol-buffers/docs/overview), Google’s mature open source mechanism for serializing structured data (although it can be used with other data formats such as JSON).
When working with protocol buffers, the first step is to define the structure for the data you want to serialize in a _proto file_: this is an ordinary text file with a .proto extension.
[GoogleApis](https://github.com/googleapis/googleapis) provides proto files for all the Google and Google Cloud APIs. Protocol buffer data is structured as _messages_. Each message is a small logical record of information containing a series of name-value pairs called _fields_, which contain a field name (Dialogflow property) and a tag number. Let’s have a look at the Dialogflow [session.proto](https://github.com/googleapis/googleapis/blob/master/google/cloud/dialogflow/v2/session.proto) file to understand:
```
// The message returned from the DetectIntent method.
message DetectIntentResponse {
string response_id = 1;
QueryResult query_result = 2;
google.rpc.Status webhook_status = 3;
bytes output_audio = 4;
OutputAudioConfig output_audio_config = 6;
}
```
With a .proto file, you can use a protocol buffer compiler called: **protoc** to generate data access classes in your preferred language(s) from your proto definition. These provide simple properties like queryResult and methods to retrieve the value .getField(int tagNumber) or to serialize/parse the whole structure to/from raw bytes. .toProto3Json();
So for my Flutter app, I will need to compile the Dialogflow protos to .dart files. Let’s give it a try!
## Working with gRPC and Dart/Flutter in Google Cloud
Create a folder **_proto** on your hard drive, in this folder, clone the following repositories. These are the repositories you will use each time you generate code:
```
git clone https://github.com/googleapis/googleapis
git clone https://github.com/protocolbuffers/protobuf
```
Also, create a **lib/src/generated** folder inside the **_proto** folder.
### **Install the tools**
For this example, you will obviously need Dart & Flutter on your machine.
I am using Flutter 2. and Dart 2.12.1
And as explained before, you will need the **protoc protobuf compiler**.
Follow the steps from [https://grpc.io/docs/protoc-installation/](https://grpc.io/docs/protoc-installation/)
**Note: On macOS, this will install protoc to /usr/local/bin/protoc. Make sure you have version 3.15 or higher installed. (run protoc --version). Else remove protoc and re-install.**
```
brew reinstall protobuf
```
By default this will work for Java, Python, JS, PHP, Ruby, C#, and Objective C.
To do this for Dart, you will need an additional plugin (**[protoc-gen-dart)](https://pub.dev/packages/protoc_plugin)**, which you can install using the following command:
```
$ pub global activate protoc_plugin
```
Make sure you are downloading version 20.0.0 or higher.
Update your PATH so that the protoc compiler can find the plugin:
```
$ export PATH="$PATH":"$HOME/.pub-cache/bin"
```
## Making use of the Dialogflow gRPC APIs
First, make sure you have the Dialogflow API enabled:
```
gcloud services enable dialogflow.googleapis.com
```
We will compile the Dialogflow protos to Dart files, from the googleapis repo.
Therefore, first set the following environment variables, where you point to the location on the two cloned repositories:
```
export PROTOBUF="$HOME/Documents/GitHub/_proto/protobuf"
export GOOGLEAPIS="$HOME/Documents/GitHub/_proto/googleapis"
```
Then save the below **generate-protos.sh** bash script in the **_proto** folder:
[GitHub Gist](https://gist.github.com/19fcdc735ecd613faaaf13e5a2a5864e)
and execute it:
```
. generate-protos.sh
```
Then copy the **generated**folder to your Dart/Flutter projects **src/lib folder.**
Once the generated files are in your Android project. You can start using the RPC API. You can find the RPC reference documentation online:
[https://cloud.google.com/dialogflow/es/docs/reference/rpc/google.cloud.dialogflow.v2#google.cloud.dialogflow.v2.Sessions](https://cloud.google.com/dialogflow/es/docs/reference/rpc/google.cloud.dialogflow.v2#google.cloud.dialogflow.v2.Sessions)
For example, it's possible now to make use of SessionsClient(), it will import the following dart files:
```
import 'package:flutter_dialogflow_agent/generated/google/cloud/dialogflow/v2/audio_config.pb.dart';
import 'package:flutter_dialogflow_agent/generated/google/cloud/dialogflow/v2/session.pb.dart'
```
When you get started, you will probably be pleased just to see text messages going back and forth. But eventually, you will probably want to add rich responses such as buttons, clickable hyperlinks, cards, and other such rich responses.
The general approach for detecting intents in Dialogflow is a follows:
1. You will need a service account, which the Dialogflow gRPC API will need so your application can access APIs on behalf of a user or using a service account.
2. Choose which version of the API you want to make use of, V2, V2beta1, CX, or CX beta.
3. The Dialogflow [SessionClient](https://cloud.google.com/dialogflow/es/docs/reference/rpc/google.cloud.dialogflow.v2#google.cloud.dialogflow.v2.Sessions) lets you detectIntents, so you will need to create a SessionClient, which contains a sessionPath, containing the Dialogflow Project Id (so it talks to your chatbot) and a unique session string for each session. (This is also important when you want to log and find chats per session at some point.)
4. Make the [detectIntent](https://cloud.google.com/dialogflow/es/docs/reference/rpc/google.cloud.dialogflow.v2#google.cloud.dialogflow.v2.DetectIntentRequest) calls; it needs at least the session path and the query input, such as text and a language code.
5. You can get the fulfillment text out of the queryResult from the [detectIntentResponse](https://cloud.google.com/dialogflow/es/docs/reference/rpc/google.cloud.dialogflow.v2#google.cloud.dialogflow.v2.DetectIntentResponse).
## Conclusion: when to use the client-side library vs. REST. vs. gRPC?
You can access the Google Cloud APIs via REST, gRPC, or one of the provided client libraries (built on gRPC).
### **Client-side library**
If the client libraries support your desired programming language (see the ones listed above), you should use this option. These libraries are maintained by Google, have built-in authentication and retries, and make efficient HTTP request bodies.
Else, you have to choose between REST or gRPC.
### **REST**
The advantage of **REST** is that you can create a simple JSON interface. Rest stands for “Representational State Transfer”. It is a set of rules that developers follow when they create their API. One of these rules states that you should be able to get a response when making a request. A request is made up of four things: the endpoint, the method (GET, POST, PUT, PATCH or DELETE), the headers, and the data (body). The language of your choice might already have a [googleapis](https://github.com/dart-lang/googleapis/tree/master/generated/googleapis) package, which can be used to make request requests.
Here’s an example that I have created to make detectIntent calls with the googleapis package, which is making use of REST under the hood:
[https://gist.github.com/savelee/7068e6cea695088bcf06031d9e435b48](https://gist.github.com/savelee/7068e6cea695088bcf06031d9e435b48) I’ve used the [googleapis_auth](https://pub.dev/packages/googleapis_auth) package to do the authentication.
### **gRPC**
gRPC is faster than REST, and as you have seen in my example, if the choice is between REST and gRPC, gRPC is the only streaming solution. But you will have to generate your own client from the Google-supplied protocol buffers, and you will also need to implement authentication.
I’ve built my own Dialogflow gRPC Dart / Flutter package this way.
When you want to build native Android or iOS applications, you can start using my package too!
[https://pub.dev/packages/dialogflow_grpc](https://pub.dev/packages/dialogflow_grpc)
---
## An introduction to bot builder platform Dialogflow CX
*Published: 2021-02-26*
*Categories: Chatbots*
*Tags: Dialogflow CX, Dialogflow CX for beginners, Dialogflow CX vs. Dialogflow Essentials, Dialogflow CX vs. Dialogflow ES, Dialogflow Customer Experience, Dialogflow CX pricing, Bot builder, Chatbot development suite*
> Dialogflow CX is a separate product that will coexist with Dialogflow Essentials. Developers and businesses can choose which bot building platform is the right tool for them. Dialogflow CX addresses the need for businesses to build more complex chat & contact center voice bots. Dialogflow Essentials is often chosen for its simplicity.
---
According to Gartner, this is the year that 50% of the enterprises will spend more money on bot development than traditional mobile app development! At Google, we have made a similar observation. Through Google Cloud, we work a lot with enterprise customers, we get lots of questions about our conversational AI tools for building chatbots and voice bots, and we help companies build these. This includes bots for the apparent channels such as websites, iOS, Android mobile apps, and social media like Facebook Messenger, Twitter, Slack, Whatsapp, Line etc. but also: building virtual agents in contact centers!
Dialogflow recently had a name change; it's now called **Dialogflow Essentials** (**Dialogflow ES**) to make room for a new Google Cloud Conversational AI tool: **Dialogflow Customer Experience** (**Dialogflow CX**). Dialogflow CX will be an alternative development suite for building conversational UIs and will exist next Dialogflow ES. Google will continue to support Dialogflow ES, as we have a huge user base. To understand why Google created another bot builder, let's first understand how Dialogflow ES works.
50% of enterprises will spend more on bots than traditional mobile app development by 2021
—Gartner
- How Dialogflow Essentials works
- How the industry is changing its complexity and how Google acts on top of this
- Where Dialogflow CX fits in
- Dialogflow CX product explained
- Dialogflow pricing explained
- Dialogflow CX vs. Dialogflow ES, biggest differences to expect
- Conclusion
Note this figure, you will see how popular the bot builder platform Dialogflow Essentials is. It has a user base of more than 1.6M, stated at the beginning of 2021. Dialogflow was previously called API.AI; Google acquired API.AI in September 2016 and renamed it to Dialogflow, making it part of Google Cloud. Dialogflow became so popular because of the outstanding underlying NLU machine learning models (like Natural Language Understanding, intent classification, and entity extraction) similar to the Google Assistant.
How Dialogflow Essentials works
Dialogflow Essentials is a development suite for building conversational UIs. Thus chatbots, voice bots, phone gateways. You can all build it with the same tool, and you can even support multiple channels in over 20 different languages. Dialogflow UX designers (agent modelers, linguists) or developers create intents by specifying training phrases to train an underlying machine learning model. An **intent** categorizes a user's intention. For each Dialogflow ES agent, you can define many intents, where your combined intents can handle a complete conversation. Each intent can contain parameters and responses. Matching an intent is also known as **intent classification** or **intent matching**. This is the main concept in Dialogflow ES. Once an intent is matched it can return a response, gather parameters (entity extraction) or trigger webhook code (fulfillment), for example, to fetch data from a database. When an end-user writes or says something in a chatbot, referred to as a **user expression** or **utterance**, Dialogflow ES matches the expression to your Dialogflow agent's best intent, based on the training phrases. The under the hood Dialogflow ES Machine Learning model was trained on those training phrases. Dialogflow ES works with a concept called **context**. Just like a human, Dialogflow ES can remember the context in a 2nd and 3rd turn-taking turn. This is how it can keep track of previous user utterances.How the industry is changing its complexity
Large enterprises have been using Dialogflow ES over the past years. Here's an observation I see at Google: At the beginning (2016), most conversational AIs were simple chatbots. (voice assistant bots, FAQ bots…), for web or voice bots, like the Google Assistant. It typically uses 1 or 2 turn-taking turns. For example: "Hey Google, what's currently playing on ABC?" - "The Bachelor started at 8 p.m, an episode you have never seen before!" As we all know, building conversational UIs is an ongoing process. When you capture the right chatbot insights, you will see what your customers are asking for. When you continue to build conversations on top of an existing agent, that bot becomes more complex over the years. So **conversation complexity** is one observation. The other perception I made is that **businesses want to be where their customers are**. And thus, their chatbots will need to connect to more channels to create **omnichannel** experiences. Instead of building a single chatbot, companies now want to develop complete conversational platforms fed by a data lake and automate processes with RPA. Think of complex use cases such as replacing your customer care or HR department by robots. Having overloaded call centers and employees burned out by undervalued monotonous tasks, automation through chatbots and virtual (voice) agents can trim huge business costs. Through conversational AI in contact centers, businesses can reduce call time, on-hold time and offer 24/7 availability while improving our processes by capturing analytics.Chatbots are expected to help cut business costs by more than $8 billion per year by the year 2022
—Juniper Research
Where Dialogflow CX fits in
Dialogflow Essentials has been praised for its simplicity. You can build a chatbot or voice bot quickly. These are chat and voice applications, where a short utterance matches one intent, with a few turn-taking turns. For example, a retail chat or voice app, where you can say: "_Put milk on my shopping list._" Now imagine you are building a voice robot for the telephony helpdesk of a grocery store. This time, customers are not speaking a few sentences, no instead they speak with whole stories: "_Yesterday, right at opening time, I bought milk at So-And-So Store together with my 4-month-old baby, and when I came home, and I wanted to put the milk in the refrigerator, I noticed that the date is past the expiration date. I opened the carton and noticed the odd smell, but the taste was fine_." Suddenly it becomes much more tricky to match the intent. For a human, it can become challenging to understand the intention; for an AI, this is difficult too! Because are we talking about _buying milk_, _bad products_, or _requesting a refund_? The conversation is long-running, the dialogue is large and can have many turn-taking turns, where we need to remember the context—branched off in hundreds of possible outcomes. And look, I am not even mentioning the technical complexity of dealing with multiple speakers, interruptions, background noises, etc.  Creating a virtual (voice) agent for a contact center or creating an automated bot platform is far more complicated where it reaches the borders of Dialogflow Essentials. Sure, when you have a large team of developers, they can tailor-made a solution on top of Dialogflow ES, as users have been doing so in the past. But that means that you have to develop and maintain additional software rather than focussing on designing conversations. Until now... ...with the release of Dialogflow CX.Dialogflow CX product explained
Dialogflow CX empowers your team to accelerate creating enterprise-level conversational experiences through visual bot builders, reusable intents, and the ability to address multi-turn conversations. It allows you to quickly create agents with: * Large and complex flows. Think of giant agent implementations with hundreds or thousands of intents. * More than three turn-taking turns (keeping context) and conversations that branch off from each other in various outcomes. * Repeatable dialogue parts in the flow (Think of a login feature, saying yes/no to questions, etc.) * Understanding the intent and context of a long utterances. * Working with teams collaborating on large implementations. * Native Contact Center features such as DTMF, one-click telephony partner integration, barge-in, live agent hand-off. * Agents were additional languages, and regionalization (for example GDPR) are important. * Flows with various outcomes and repeatable parts. For example, filing taxes. Usually this requires you to fill out lots of forms, where questions jump to each other. - If you would build a chatbot for this use-case, Dialogflow CX would be great for this, because of the reusable flows, intents and branching of answers.  Dialogflow CX has advanced their NLU. Even though Dialogflow ES is popular because of the outstanding NLU results, we saw a notable quality improvement by basing our NLU on the BERT language model. It introduces new concepts such as **Pages** and **Flows** for creating reusable flows and branching, and on top of that, it comes with a **visual flow builder** to quickly preview and understand the flow of dialogues.Dialogflow pricing explained
The [Dialogflow pricing page explains the pricing between both products Essentials vs. Customer Experience](https://cloud.google.com/dialogflow/pricing?utm\_source=blog&utm\_medium=partner&utm\_campaign=CDR\_lee\_aiml\_leedialogflowblog\_personal\_). Dialogflow Essentials has a **free trial**. The **pay-as-you-go version is based on the number of requests** you make, and you will have to pay extra for additional features such as sentiment analysis, knowledge bases, phone gateways, etc. A request is defined as any call to the Dialogflow service, whether direct with API usage or indirect with integration or console usage. With Dialogflow CX, you **pay per session**. A session is a conversation between an end-user and a Dialogflow agent. A session remains active, and its data is stored for 30 minutes after the last request is sent for the session. A session can be either a chat session or a voice session. The pricing seems expensive, but if you consider that you don't need a team of developers solving complex problems in fulfillment webhooks to facilitate large enterprise-scale bots plus, you don't need to pay extra for all additional features; Enterprise customers actually might be better off by using Dialogflow CX. Besides, each new user will receive a **$600 credit for a free** trial of Dialogflow CX. This credit is automatically activated upon using Dialogflow CX for the first time and expires after 12 months. This is a Dialogflow-specific extension of the Google Cloud [free trial](https://cloud.google.com/free/docs/gcp-free-tier#free-trial?utm\_source=blog&utm\_medium=partner&utm\_campaign=CDR\_lee\_aiml\_leedialogflowblog\_personal\_); this should be more than enough to play around with the tool and get started!Conclusion
Dialogflow CX is a separate product that will coexist with Dialogflow Essentials. Developers and businesses can choose which bot building suite is the right tool for them.Dialogflow CX vs. Dialogflow Essentials: when to use which tool
When you are a freelancer, start-up, or small business, when you are building a single chat or voice bot, for example, for the Google Assistant or building an FAQ bot, Dialogflow Essentials might be a better choice for you. **This tool is often chosen for its simplicity**. When you are an enterprise customer building a large & complex chatbot platform or contact center customer experience, when data regionalization is crucial for you (for example because of GDPR) or your conversation requires lots of turn-taking turns and dialogue branches, Dialogflow CX is the tool to use. **This tool addresses the need for businesses to build more complex chat & contact center voice bots.**Try out the new Dialogflow CX Console
- Here’s the
playOutputfunction, which takes thearrayBufferthat I retrieved from the back-end code that calls the Text to Speech API. Here, I can create a newAudioContextobject. The AudioContext interface represents an audio-processing graph built from audio modules linked together, each represented by an AudioNode. An audio context controls both the creation of audio nodes it contains and the execution of the audio processing, or decoding. - Now, let’s create an audio source for Web Audio API from an ArrayBuffer. The decoded AudioBuffer is resampled to the AudioContext’s sampling rate, then passed to a callback.
- A user agent could block autoplay, hence why I run
audioContext.resumeas a trick first. Afterwards, create a new AudioBufferSourceNode to connect to the audioContext destination, which are in our case the device speakers. Thebufferproperty of the AudioBufferSourceNode interface provides the ability to play back audio using an AudioBuffer as the source of the sound data. Finally, let’s play the audio.
npm install @google-cloud/text-to-speech to install the latest package in your project. Once you downloaded the package, you can require the package in the top of your code:
const textToSpeech = require(‘@google-cloud/text-to-speech’);
First, I instantiate the **TextToSpeechClient()** from the textToSpeech npm package. Then create a request object, which contains settings such as the voice language, voice gender and the audioEncoding. [Here’s an overview of all the settings](https://cloud.google.com/text-to-speech/docs/reference/rest/v1/text/synthesize?utm_source=blog&utm_medium=partner&utm_campaign=CDR_lee_aiml_leedialogflowblog_personal_).
``` JavaScript
let ttsClient, requestTTS;
ttsClient = new textToSpeech.TextToSpeechClient();
requestTTS = {
voice: {
languageCode: 'en-US', //https://www.rfc-editor.org/rfc/bcp/bcp47.txt
ssmlGender: 'NEUTRAL' // ‘MALE|FEMALE|NEUTRAL’
},
audioConfig: {
audioEncoding: encoding, //’LINEAR16|MP3|AUDIO_ENCODING_UNSPECIFIED/OGG_OPUS’
}
};
```
This part finally makes the **synthesizeSpeech** call, which is asynchronous, the await operator is used to wait for a Promise, from the response, I return the audioContent that contains the audio buffer:
``` JavaScript
async function textToAudioBuffer(text) {
requestTTS.input = { text: text }; // text or SSML
const response = await ttsClient.synthesizeSpeech(requestTTS);
return response[0].audioContent;
}
```
## TTS in Dialogflow
Dialogflow, the tool to create chat agents, can also return AudioBuffers once it detected the intent. You would only need to specify an **outputAudioConfig** in the Dialogflow [DetectIntentRequest](https://cloud.google.com/dialogflow/docs/reference/rpc/google.cloud.dialogflow.v2?utm_source=blog&utm_medium=partner&utm_campaign=CDR_lee_aiml_leedialogflowblog_personal_#detectintentrequest), in order to also get an AudioBuffer as part of the response:
``` JavaScript
outputAudioConfig: {
audioEncoding: 'OUTPUT_AUDIO_ENCODING_LINEAR_16',
},
```
[You can follow this guide, for the full code.](https://cloud.google.com/dialogflow/docs/detect-intent-tts?utm_source=blog&utm_medium=partner&utm_campaign=CDR_lee_aiml_leedialogflowblog_personal_) To play it in the browser, you can use the same instructions as I showed, when working with the Text to Speech API directly.
The back-end listens to the ‘tts’ event, which was fired from the client-side.
You can find the full creation of the [Express server code here](https://github.com/dialogflow/selfservicekiosk-audio-streaming/blob/master/examples/simpleserver.js). In case you want to run this yourself. Call the method: **textToAudioBuffer**() it will pass the string text as a parameter, and it returns a Promise to chain a function that passes the response (which eventually will be the AudioBuffer), to the client-side via Socket.IO emit:
``` JavaScript
ss(client).on('tts', function(text) {
textToAudioBuffer(text).then(function(results){
console.log(results);
client.emit('results', results);
}).catch(function(e){
console.log(e);
});
});
```
**Caution**: Be aware of using Dialogflow detect intent on streaming audio. When you use simple detectIntent calls without streaming, you stop the microphone and you will play the TTS audio buffer. However, when you do streaming, you keep your microphone open. You don’t want to end-up in an endless loop, where the speech synthesizer records new streams based on the TTS response, through your microphone. :-)
The [AudioBufferSourceNode](https://developer.mozilla.org/en-US/docs/Web/API/AudioBufferSourceNode) has an onended event handler. Which will run once the AudioBufferSourceNode stopped playing the audio. In case you want to solve the above problem, you could set a **boolean flag; isPlaying**, which should block the recorder from sending the stream to the back-end when it’s set to true.
Congratulations! By reading this blog series, you now know how to build an end-to-end solution for streaming audio from a microphone to a server, and stream & play the audio results back in the browser!
Do you want to play around with these examples? I am [hosting a web demo online](http://selfservicedesk.appspot.com/). Also I’ve [a video recording of one of my conference talks](https://youtu.be/6JD8WC1LV7g)!

---
## Building your own conversational voice AI which streams audio from a browser microphone to a server (part III)
*Published: 2021-01-03*
*Categories: Chatbots*
*Tags: Dialogflow ES, Dialogflow, Voice AI, Google Speech to Text, Google Assistant, Chatbots, Best practice, STT, Speech to Text*
> A best practice for streaming audio from a browser microphone to Dialogflow & Speech To Text. Your own conversational voice AI in a web application.
---
This is the third blog in the series:
A best practice for streaming audio from a browser microphone to Dialogflow & Google Cloud Speech To Text.
In case you haven’t read the other blogs, I recommend to browse back to these blogs:
* Blog 1: [Introduction to the GCP conversational AI components, and integrating your own voice AI in a web app](https://www.leeboonstra.dev/Chatbots/building-your-own-voice-ai-1/).
* Blog 2: [Building a client-side web application which streams audio from a browser microphone to a server.](https://www.leeboonstra.dev/Chatbots/building-your-own-voice-ai-2/)
In the next blog of this series, I will receive the audio bytes from the browser microphone on the server-side, so I can use this to make Dialogflow Detect Intent or Speech to Text transcribe calls!
These blogs [contain simple code snippets](https://github.com/dialogflow/selfservicekiosk-audio-streaming/tree/master/examples), and a demo application; [the Airport Self Service Kiosk](https://github.com/dialogflow/selfservicekiosk-audio-streaming), which will be used as a reference architecture.
## Server-side Implementation

Below are the steps for creating a Node.js Express application which integrates with the Google APIs such as Dialogflow, Speech to Text and Text to Speech.
You will need a working front-end application as described in the previous blog, in order to get AudioBuffers live from an HTML5 microphone. Make sure you have read Blog 2, before you continue.
Before writing any Node.js server code, let’s quickly preview the configuration and the NPM libraries that I am using:
### My application configuration: .env
In my code base; for the simple examples, and for the end-to-end Airport Self Service Kiosk, I’m storing all my speech configurations outside the project. So it will be easy to play around with settings, without browsing through all the code. This is why I’ve created an **.env** system environments file.
Later in my application code, I can make use of the npm library [dotenv](https://www.npmjs.com/package/dotenv). It loads environment variables from a .env file into [process.env](https://nodejs.org/docs/latest/api/process.html#process_process_env). In case I deploy my application later in a container, or with App Engine Flexible Environments, I can specify these environment variables in a **GKE configmap** or in the **app.yaml.**
Here’s how my **.env** file looks like:
```
PROJECT_ID=gcp-project-id
LANGUAGE_CODE=en-US
ENCODING=AUDIO_ENCODING_LINEAR_16
SAMPLE_RATE_HERZ=16000
SINGLE_UTTERANCE=false
SPEECH_ENCODING=LINEAR16
SSML_GENDER=FEMALE
```
For Dialogflow, an AudioConfig as part of the [DetectIntentRequest](https://cloud.google.com/dialogflow/docs/reference/rpc/google.cloud.dialogflow.v2beta1?utm_source=blog&utm_medium=partner&utm_campaign=CDR_lee_aiml_leedialogflowblog_personal_#detectintentrequest), is essential. It instructs the speech recognizer how to process the speech audio. Check the RPC reference for all the possible [configurations](https://cloud.google.com/dialogflow/docs/reference/rpc/google.cloud.dialogflow.v2?utm_source=blog&utm_medium=partner&utm_campaign=CDR_lee_aiml_leedialogflowblog_personal_#google.cloud.dialogflow.v2.InputAudioConfig).
For Speech to Text it’s important to pass an [RecognitionConfig](https://cloud.google.com/speech-to-text/docs/reference/rpc/google.cloud.speech.v1#google.cloud.speech.v1.RecognitionConfig) and [RecognitionAudio](https://cloud.google.com/speech-to-text/docs/reference/rpc/google.cloud.speech.v1#google.cloud.speech.v1.RecognitionAudio) to the [RecognizeRequest](https://cloud.google.com/speech-to-text/docs/reference/rpc/google.cloud.speech.v1#google.cloud.speech.v1.RecognizeRequest).
**RecognitionAudio** contains audio data in the encoding specified in the **RecognitionConfig**. Either **content** or **uri** must be supplied.
The **RecognitionConfig** provides information to the recognizer that specifies how to process the request.
For Text to Speech the following configurations are important to make a [SynthesizeSpeechRequest](https://cloud.google.com/text-to-speech/docs/reference/rpc/google.cloud.texttospeech.v1#synthesizespeechrequest) call. [SynthesisInput](https://cloud.google.com/text-to-speech/docs/reference/rpc/google.cloud.texttospeech.v1?utm_source=blog&utm_medium=partner&utm_campaign=CDR_lee_aiml_leedialogflowblog_personal_#google.cloud.texttospeech.v1.SynthesisInput) (which can be text or SSML), [VoiceSelectionParams](https://cloud.google.com/text-to-speech/docs/reference/rpc/google.cloud.texttospeech.v1?utm_source=blog&utm_medium=partner&utm_campaign=CDR_lee_aiml_leedialogflowblog_personal_#google.cloud.texttospeech.v1.VoiceSelectionParams) (to describe which voice to use) and an [AudioConfig](https://cloud.google.com/text-to-speech/docs/reference/rpc/google.cloud.texttospeech.v1?utm_source=blog&utm_medium=partner&utm_campaign=CDR_lee_aiml_leedialogflowblog_personal_#google.cloud.texttospeech.v1.AudioConfig) (to describe the Audio data to be synthesized).
### The NPM libraries that I am using: package.json
Since my example application makes use of Node.js and NPM, I will need to download external Node libraries. Here you can find [my package.json](https://github.com/dialogflow/selfservicekiosk-audio-streaming/blob/master/examples/package.json).
The npm packages which are important to build speech integration:
* [dialogflow](https://www.npmjs.com/package/dialogflow): to interact with Dialogflow and do intent matching (on speech)
* [@google-cloud/speech](https://www.npmjs.com/package/@google-cloud/speech): to interact with STT and to transcribe speech
* [@google-cloud/text-to-speech](https://www.npmjs.com/package/@google-cloud/text-to-speech): to interact with TTS and to synthesize text
The following packages came in handy too:
* [pb-util](https://www.npmjs.com/package/pb-util): Utilities for working with common protobuf types. It can be used with the Dialogflow intent response.
* [stream](https://www.npmjs.com/package/stream), [util](https://www.npmjs.com/package/util), [through2](https://www.npmjs.com/package/through2): For working with streams. To pipe streams together and destroy all of them if one of them closes.
* [recordrtc](https://www.npmjs.com/package/recordrtc): WebRTC JavaScript Library for Audio+Video+Screen+Canvas Recording. I don’t need it on the server-side, but it’s in my package.json file, so I can host the library locally (instead from a CDN).
* [socket.io](https://www.npmjs.com/package/socket.io): Socket.IO enables real-time bidirectional event-based communication.
* [socket.io-stream](https://www.npmjs.com/package/socket.io-stream): This is the module for bidirectional binary data transfer with Stream API through Socket.io
* [uuid](https://www.npmjs.com/package/uuid): to generate Universally Unique IDentifiers
### Setup Dialogflow
Navigate to: [http://console.dialogflow.com](http://console.dialogflow.com/?utm_source=blog&utm_medium=partner&utm_campaign=CDR_lee_aiml_leedialogflowblog_personal_) and create a new agent. Make sure you have enabled **Beta features** in settings, because we will make use of **Knowledge Base connectors** to import web-based FAQs and this feature is currently in beta.
Once, it’s enabled we can create a new **knowledge base FAQ**, with **text/html** as a **mime-type**. For the Airport Self Service Kiosk demo, I am loading San Francisco Airport Questions and answers into my agent from a live website: [https://www.flysfo.com/faqs](https://www.flysfo.com/faqs)
As soon as the FAQs are imported, you will see all the questions and answers listed in Dialogflow. We will now need to specify the answer to the Text and SSML response: **$Knowledge.Answer[1]**
Dialogflow will use this response (the first answer from the Knowledge Base Q and A) to synthesize as an AudioBuffer.

**Note:**
In my Airport Self Service Kiosk demo, I am also showing the Question and Answer as readable text in my Angular web app. How did I do that? By creating a **custom payload** next to the Text & SSML response:
``` JSON
{
"knowledgebase": true,
"QUESTION": "$Knowledge.Question[1]",
"ANSWER": "$Knowledge.Answer[1]"
}
```
### Writing the server code
Typically, the server-side code will exist of the following parts:
* Importing all the required libraries
* Loading the environment vars
* Setting up the Express server with Socket.IO listeners
* Google Cloud API Calls: Dialogflow Audio DetectIntent & DetectStream calls, Speech to Text Recognize & StreamingRecognize calls, Text to Speech synthesize calls
For demo purposes, I won’t discuss how to setup a Node.js application with an express server. But as a reference, you can have a look into my [simple server code](https://github.com/dialogflow/selfservicekiosk-audio-streaming/blob/master/examples/simpleserver.js), which has been used for the simple [client-side examples](https://github.com/dialogflow/selfservicekiosk-audio-streaming/tree/master/examples). And you can also have a look into [the code of the Airport Self Service Kiosk](https://github.com/dialogflow/selfservicekiosk-audio-streaming/tree/master/server), an end-to-end example. This example makes use of Cloud Speech to Text [StreamingRecognize](https://cloud.google.com/speech-to-text/docs/reference/rpc/google.cloud.speech.v1?utm_source=blog&utm_medium=partner&utm_campaign=CDR_lee_aiml_leedialogflowblog_personal_#google.cloud.speech.v1.Speech.StreamingRecognize), Dialogflow [DetectIntent](https://cloud.google.com/dialogflow/docs/reference/rpc/google.cloud.dialogflow.v2#google.cloud.dialogflow.v2.Sessions.DetectIntent), and Text to Speech [SynthesizeSpeech](https://cloud.google.com/text-to-speech/docs/reference/rpc/google.cloud.texttospeech.v1?utm_source=blog&utm_medium=partner&utm_campaign=CDR_lee_aiml_leedialogflowblog_personal_#google.cloud.texttospeech.v1.TextToSpeech.SynthesizeSpeech).
When you browse through these code snippets, you will be able to see the Express server. They all communicate via Socket.io like this:
[GitHub Gist](https://gist.github.com/ed39c217b8346a2eb67cff4b41fd3560)
1. With Socket.io instantiated, I can listen to the connect emit. As soon as a Socket.io client connects to the server, this code will execute.
2. When connected to a socket, and the ‘message’ event was fired by the client, execute this code. It will retrieve the data which was set when stopping the WebRTC recorder. To recall from my previous blog, I have created an object with a child object, which contains the mime-type (**audio/webm**), and the **audioDataURL**, which is the Base64 string containing the audio recording. Let’s take that Base64 string and convert it to a Node.js file Buffer.
3. With that **fileBuffer** I could call my custom Dialogflow **DetectIntent** implementation, explained later in this article:
``` JavaScript
const results = await detectIntent(fileBuffer);
client.emit('results', results);
```
Or I could call my custom Speech to Text Recognize implementation, explained later in this article:
``` JavaScript
const results = await transcribeAudio(fileBuffer);
client.emit('results', results);
```
Both calls are asynchronous and return a Promise with the results. These results will be sent to the client-side app.
The client could listen to the socket emit like this:
``` JavaScript
socketio.on('results', function (data) {
console.log(data);
});
```
4. Here’s an example of a 2nd event fired by the client. In this case a streaming event. Now, I will retrieve the data when the WebRTC recorder streams chunks of audio data in the **ondataavailable** listener. Note, that the client socket is wrapped with **socket.io-stream **for streaming binary data transfers.
I am retrieving the audio chunks, plus additional data, such as the stream name (a string). This can be used to store a temporary audio file on the server, in which I can pipe the incoming audio stream. It’s used as a holder, to activate my custom Dialogflow or Speech to Text implementations.
5. Like the DetectIntentStreaming implementation, explained later in this article:
``` JavaScript
detectIntentStream(stream, function(results){
client.emit('results', results);
});
```
Or the Speech to Text StreamingRecognize implementation, explained later in this article:
``` JavaScript
transcribeAudioStream(stream, function(results){
client.emit('results', results);
});
```
Both calls, pass in the stream, and a callback function to execute once the results are in. These results will be sent to the client-side app.
The client could listen to the socket emit like this:
``` JavaScript
socketio.on('results', function (data) {
console.log(data);
});
```
### API Calls to Dialogflow
Dialogflow is an AI-powered tool for building text and voice-based conversational interfaces such as chatbots and voice apps. It uses Machine Learning models such as Natural Language Understanding to detect the intentions of a conversation.
The way how Dialogflow intent detection works is, it first tries to understand the user utterance. Then, it will check the Dialogflow agent, which contains intents (chat flows), based on the training phrases. The intent with the best match (highest confidence score), will return the answer, which could be a text response, audio response or a response from a system through a fulfillment.
I will use the Dialogflow Node.js client SDK to manually detect the intent, based on finished audio buffers and incoming audio streams.
`const df = require(‘dialogflow’);`
Let’s first prepare the client and the request. Later I can modify the request by adding the audio input:
[GitHub Gist](https://gist.github.com/fcd1c22b55e2b64420a10938584dacba)
1. Dialogflow will need a session ID. Let’s use UUID to generate a random [https://www.ietf.org/rfc/rfc4122.txt](https://www.ietf.org/rfc/rfc4122.txt) RFC4122 id, in a format like: ‘1b9d6bcd-bbfd-4b2d-9b5d-ab8dfbbd4bed’.
2. Afterwards let’s create a Dialogflow Session Path. The session path can be created from a Dialogflow Session Client object. It needs a session ID to make each Dialogflow session unique. And it needs the GCP project id, which points to a GCP project that has a working Dialogflow agent. **Note: **Each Google Cloud Platform project can have only one Dialogflow agent. In case your Dialogflow Agent needs a test and development version. You either can make use of the [versions](https://cloud.google.com/dialogflow/docs/agents-versions?utm_source=blog&utm_medium=partner&utm_campaign=CDR_lee_aiml_leedialogflowblog_personal_) feature in Dialogflow. Or you could create more GCP projects, one for the test agent and one for the development agent.
3. Let’s already setup a request object, which will be used for each Dialogflow API call.In case this request will be used when streaming audio, this request will be used as the initial request. Which means it first connects to the SDK without the audio stream, but prepares the API with audio configurations it can use. Afterwards the chunks of audio will stream in. It needs to have a sessionPath (which now will point to a client session and a particular Dialogflow agent). Even without the audio input I can already setup the **queryInput**.
4. Since my application works with speech, I will need to set the [**audioConfig](https://cloud.google.com/dialogflow/docs/reference/rpc/google.cloud.dialogflow.v2?utm_source=blog&utm_medium=partner&utm_campaign=CDR_lee_aiml_leedialogflowblog_personal_#google.cloud.dialogflow.v2.InputAudioConfig)** object. The **audioConfig** object requires a sample rate hertz, (this number has to be the same as the **desiredSampleRateHerz** from your client-side code). It requires a languageCode which contains the language of the spoken text, and it should be a language that was set in Dialogflow. It will need to have an encoding, which also needs to be the same as the encoding used in the client. In my code demos, I am using the configurations from the **.env **file.
Now let’s have a look into both calls, [DetectIntent](https://cloud.google.com/dialogflow/docs/reference/rpc/google.cloud.dialogflow.v2?utm_source=blog&utm_medium=partner&utm_campaign=CDR_lee_aiml_leedialogflowblog_personal_#google.cloud.dialogflow.v2.Sessions.DetectIntent) and [StreamingDetectIntent](https://cloud.google.com/dialogflow/docs/reference/rpc/google.cloud.dialogflow.v2?utm_source=blog&utm_medium=partner&utm_campaign=CDR_lee_aiml_leedialogflowblog_personal_#google.cloud.dialogflow.v2.Sessions.StreamingDetectIntent).
### DetectIntent
DetectIntent it receives the intent match results after all audio has been sent and processed. I’m creating an asynchronous function, which takes the AudioBuffer and adds it to the request. Next I’m calling detectIntent, by passing in the request. It returns a promise, which will be chainable:
``` JavaScript
async function detectIntent(audio){
request.inputAudio = audio;
const responses = await sessionClient.detectIntent(request);
return responses;
}
```
Here’s how the response would look like: [DetectIntentResponse](https://cloud.google.com/dialogflow/docs/reference/rpc/google.cloud.dialogflow.v2?utm_source=blog&utm_medium=partner&utm_campaign=CDR_lee_aiml_leedialogflowblog_personal_#google.cloud.dialogflow.v2.DetectIntentResponse). You will likely be interested in the **queryResult**. In case you passed in the **DetectIntentRequest** an output audio config, you will be able to retrieve audio data bytes generated based on the values of the default platform text responses found in the **queryResult.fulfillmentMessages** field. If multiple default text responses exist, they will be concatenated when generating audio. If no default platform text responses exist, the generated audio content will be empty.
### StreamingDetectIntent
The StreamingDetectIntent performs bidirectional streaming intent detection: receive results while sending audio. This method is only available via the gRPC API (not REST).
[GitHub Gist](https://gist.github.com/4e8d03d74d6928daf8c52cd9703e5ece)
1. I’m creating an asynchronous function, which takes the AudioBuffer and adds it to the request, and the name of the callback function which will execute with the results once the API fetches the results.
2. Execute the **streamingDetectIntent()** call.
3. There’s an **on(‘data’)** event listener, which executes once audio chunks are streamed in. You could create some conditional logic here, in case there’s a **data.recognitionResult **in the response, then the intermediate transcript is recognized. Otherwise, likely the intent has been detected (or a fallback intent was triggered, in case there wasn’t a match). I’m returning the results by executing the callback function.
4. You could also listen to **error** events, when something went wrong with the request. Or you could listen to **end** events, when streaming to Dialogflow stopped.
5. The way how this works, is first we will let the Dialogflow API know that there will be a **streamingDetectIntent** call with all the **queryInput** and **audioConfigs** that can be retrieved from the requests. Afterwards, all the other messages that will come in, will contain the audio stream via **inputAudio**.
6. Let’s use a small node module called **pump**, which pipes the streams together and destroys all of them if one closes.
7. Here, I will transform the stream, so the request will now also contain **inputAudio** with the audioBuffer streaming in.
Here’s how the response would look like. [StreamingDetectIntentResponse](https://cloud.google.com/dialogflow/docs/reference/rpc/google.cloud.dialogflow.v2?utm_source=blog&utm_medium=partner&utm_campaign=CDR_lee_aiml_leedialogflowblog_personal_#google.cloud.dialogflow.v2.StreamingDetectIntentResponse). You will likely be interested in the queryResult. In case you passed in the **StreamingDetectIntentRequest** and output audio config, you will be able to retrieve audio data bytes generated based on the values of the default platform text responses found in the **queryResult.fulfillmentMessages** field. If multiple default text responses exist, they will be concatenated when generating audio. If no default platform text responses exist, the generated audio content will be empty.
Here’s how it would look like in a real production application, using TypeScript: [https://github.com/dialogflow/selfservicekiosk-audio-streaming/blob/master/server/dialogflow.ts](https://github.com/dialogflow/selfservicekiosk-audio-streaming/blob/master/server/dialogflow.ts)
## API Calls to Speech to Text
The Speech to Text API transcribes spoken words to written text. This is great for when you want to generate subtitles in a video, generate text transcripts from meetings, etc. You could also combine it with chatbots (detect intent from texts) to synthesize the chatbot answers.
Speech to Text is very powerful, as the API call response will return the written transcript with the highest confidence score, also return an array with alternative transcript options. It’s also possible to bias the recognizer, by sending phrase hints to the API.
Here, I will use the Speech Node.js client SDK to transcribe voices to written text.
const speech = require('@google-cloud/speech');
Let’s first prepare the client and the request. Later I can modify the request by adding the audio input:
[GitHub Gist](https://gist.github.com/7d78feb8f956cb981dfd034ab7acc151)
1. First, let’s instantiate the Speech Client.
2. Here I will describe the request object. Since our application works with speech, we will need to set the recognition [**config](https://cloud.google.com/speech-to-text/docs/reference/rpc/google.cloud.speech.v1?utm_source=blog&utm_medium=partner&utm_campaign=CDR_lee_aiml_leedialogflowblog_personal_#google.cloud.speech.v1.RecognitionConfig)** object. The **config** object requires a sample rate hertz, (this number has to be the same as the desiredSampleRateHerz from your client-side code). It requires a languageCode which contains the language of the spoken text. And it will need to have an encoding, which also needs to be the same as the encoding used in the client. In my code demos, I am using the configurations from the **.env **file.
Now let’s have a look into both calls, [Recognize](https://cloud.google.com/speech-to-text/docs/reference/rpc/google.cloud.speech.v1?utm_source=blog&utm_medium=partner&utm_campaign=CDR_lee_aiml_leedialogflowblog_personal_#google.cloud.speech.v1.Speech.Recognize) and [StreamingRecognize](https://cloud.google.com/speech-to-text/docs/reference/rpc/google.cloud.speech.v1?utm_source=blog&utm_medium=partner&utm_campaign=CDR_lee_aiml_leedialogflowblog_personal_#google.cloud.speech.v1.Speech.StreamingRecognize).
### Recognize
The Recognize call performs synchronous speech recognition. It receives results after all audio has been sent and processed.
I’m creating an asynchronous function, which takes the AudioBuffer and adds it to the [request](https://cloud.google.com/speech-to-text/docs/reference/rpc/google.cloud.speech.v1?utm_source=blog&utm_medium=partner&utm_campaign=CDR_lee_aiml_leedialogflowblog_personal_#google.cloud.speech.v1.RecognitionAudio). Next; I’m calling the **recognize** method from the speech client, by passing in the request. It returns a promise, which will be chainable:
``` JavaScript
async function transcribeAudio(audio){
request.audio = {
content: audio
};
const responses = await speechClient.recognize(request);
return responses;
}
```
Here’s how the response would look like: [RecognizeResponse](https://cloud.google.com/speech-to-text/docs/reference/rpc/google.cloud.speech.v1?utm_source=blog&utm_medium=partner&utm_campaign=CDR_lee_aiml_leedialogflowblog_personal_#google.cloud.speech.v1.RecognizeResponse). It will return [SpeechRecognitionResults](https://cloud.google.com/speech-to-text/docs/reference/rpc/google.cloud.speech.v1?utm_source=blog&utm_medium=partner&utm_campaign=CDR_lee_aiml_leedialogflowblog_personal_#google.cloud.speech.v1.SpeechRecognitionResult), which will contain an array with [alternatives](https://cloud.google.com/speech-to-text/docs/reference/rpc/google.cloud.speech.v1?utm_source=blog&utm_medium=partner&utm_campaign=CDR_lee_aiml_leedialogflowblog_personal_#google.cloud.speech.v1.SpeechRecognitionAlternative). Each alternative contains the transcript, confidence score (The confidence estimate between 0.0 and 1.0. A higher number indicates an estimated greater likelihood that the recognized words are correct.) and an array with all the words. Alternatives are sorted on confidence level, with the highest confidence first in the array.
### StreamingRecognize
StreamingRecognize performs bidirectional streaming speech recognition: receive results while sending audio. This method is only available via the gRPC API (not REST).
[GitHub Gist](https://gist.github.com/c8f5646ed3cf63ea397cc92f11ab052b)
1. I’m creating an asynchronous function, which takes the AudioBuffer and adds it to the request, and the name of the callback function which needs to return with the results.
2. Execute the streamingRecognize() call by passing in the speech request.
3. There’s an on(‘data’) event listener, which executes once audio chunks are streamed in. I’m returning the results by executing the callback function.
4. You could also listen to **error** events, when something went wrong with the request. Or you could listen to **end** events, when streaming to Dialogflow stopped.
5. Finally we pipe the recognizeStream together with the incoming audio.
Here’s how the response would look like: [StreamingRecognizeResponse](https://cloud.google.com/speech-to-text/docs/reference/rpc/google.cloud.speech.v1?utm_source=blog&utm_medium=partner&utm_campaign=CDR_lee_aiml_leedialogflowblog_personal_#google.cloud.speech.v1.StreamingRecognizeResponse). It will return [StreamingRecognitionResult](https://cloud.google.com/speech-to-text/docs/reference/rpc/google.cloud.speech.v1?utm_source=blog&utm_medium=partner&utm_campaign=CDR_lee_aiml_leedialogflowblog_personal_#google.cloud.speech.v1.StreamingRecognitionResult), which will contain an array with [alternatives](https://cloud.google.com/speech-to-text/docs/reference/rpc/google.cloud.speech.v1?utm_source=blog&utm_medium=partner&utm_campaign=CDR_lee_aiml_leedialogflowblog_personal_#google.cloud.speech.v1.SpeechRecognitionAlternative). Each alternative contains the transcript, confidence score (The confidence estimate between 0.0 and 1.0. A higher number indicates an estimated greater likelihood that the recognized words are correct.) and an array with all the words. Alternatives are sorted on confidence level, with the highest confidence first in the array.
By now, you have seen how to build a web application which streams audio from a microphone on your local device through your browser to a back-end application, and fetches results from Google Cloud Speech to Text or Dialogflow and displays it in the User Interface.
It would be even nicer, when the browser could play the audio streams. [This is what the next blog is all about!](https://www.leeboonstra.dev/Chatbots/building-your-own-voice-ai-3/)
---
## Building your own conversational voice AI which streams audio from a browser microphone to a server (part II)
*Published: 2021-01-02*
*Categories: Chatbots*
*Tags: Dialogflow ES, Dialogflow, Voice AI, Google Speech to Text, Google Assistant, Chatbots, Best practice*
> A best practice for streaming audio from a browser microphone to Dialogflow & Speech To Text. Your own conversational voice AI in a web application.
---
This is the second blog in the series:
A best practice for streaming audio from a browser microphone to Dialogflow & Google Cloud Speech To Text.
[In this first blog, I have introduced all the conversational components, and I addressed why customers would integrate their own conversational AI compared to building for the Google Assistant](https://www.leeboonstra.dev/Chatbots/building-your-own-voice-ai-1/).
Today, I will make a start by building a client-side web application which uses a HTML5 Microphone with WebRTC, streaming the audio bytes to a Node.js backend.
Later in this blog series, I will show you how to use the Google Cloud Conversational AI APIs to transcribe texts or to return answers with Text to Speech.
These blogs [contain simple code snippets](https://github.com/dialogflow/selfservicekiosk-audio-streaming/tree/master/examples), and a demo application; [the Airport Self Service Kiosk](https://github.com/dialogflow/selfservicekiosk-audio-streaming/), which will be used as a reference architecture.
Let’s start with the creation of the client-side HTML & JavaScript code. Whether you want to transcribe voice to written text (STT), or use voice to trigger a chatbot agent to answer (Dialogflow), the client-side code base is very similar.

## Client-side WebRTC Implementation
Here are some code snippets, which you can run to play around with this.
You can run these examples, by cloning this repository. [The instructions are written here](https://github.com/dialogflow/selfservicekiosk-audio-streaming/tree/master/examples).
* [Client-Side Code: DetectIntent](https://github.com/dialogflow/selfservicekiosk-audio-streaming/tree/master/examples/example1.html) — Dialogflow
* [Client-Side Code: Transcribe ](https://github.com/dialogflow/selfservicekiosk-audio-streaming/tree/master/examples/example4.html)— STT
These examples make use of the following JavaScript libraries:
* [Socket.io](https://www.npmjs.com/package/socket.io) — Socket.IO enables real-time bidirectional event-based communication.
* [Socket.io-Stream](https://www.npmjs.com/package/socket.io-stream) — for binary stream transfers through Socket.io
* [RecordRTC](https://github.com/muaz-khan/RecordRTC) — RecordRTC is WebRTC JavaScript library for audio/video as well as screen activity recording.
In these demos I am using 2 buttons, a start recording and a stop recording button.
Also I have created a textarea field, which later will display the results.
```
Video Intelligence API from Ladysign on Vimeo.
### Resources * [Cloud Functions Docs](https://cloud.google.com/functions/docs/reference) * [Video Intelligence Demo](https://cloud-ml-video.appspot.com/index_v1beta1.html) --- ## Analyzing data with BigQuery and Machine Learning APIs *Published: 2017-03-18* *Categories: Machine Learning* *Tags: BigQuery, NLP, NLU, Compute Engine, GCP, Natural Language API, Translate API* > Analyzing social media tweets with Natural Language Processing (NLP) about political parties. Storing it in BigQuery and publish data in Dashboards. --- ## Forecast the Dutch elections based on social media presence. Wednesday the 15th of March 2017, was a big day for the Netherlands, at that day it was the Dutch general election, where the Dutch elected members of the house of representatives. The House of Representatives (the Second Chamber) is composed of 150 seats elected by proportional representation in a single nationwide constituency. There are 28 political parties, where the Dutch can vote the members from. Since I recently started working with Google Cloud Platform, I thought it would be a great idea, to predict the winning political party based on social media presence and sentiment. This idea is based on the blog post of Sara Robinson: [Comparing tweets about Trump & Hillary with natural language processing.](https://medium.com/google-cloud/comparing-tweets-about-trump-hillary-with-natural-language-processing-a0064e949666) This blog post will contain the following technical pieces: * **Compute Engine** (1) - To deploy our data scraping script on a VM. * **Machine Learning APIs** - To use Natural Language API (4) to understand the context of the data, and since our data is in Dutch (and the Natural Language API doesn’t support the Dutch language yet), we will need the Translate API (2) to translate. * **BigQuery** (5) - To collect a lot of data. To analyze this data we use BigQuery and run some queries on it. * **DataStudio** - To visualize our result set, we will make use of Google’s Data Studio (6). We can use some nice charts! To do the social media data scraping, we use the **Twitter Streaming API**. The application code is written in JavaScript for Node.js. Let’s get started with this tutorial, and see if we can predict which Dutch political party will win the elections! 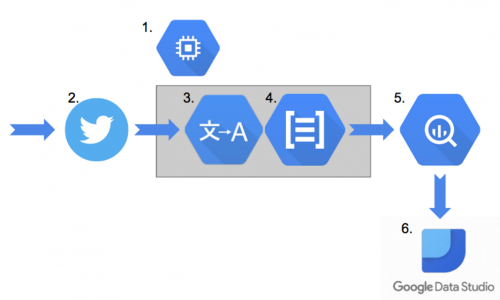 *NOTE: This blog post won’t contain any political opinions from me, neither from Google. This is a blog post to demonstrate the various solutions of the Google Cloud Platform, on how you can be creative with data. Please see the [disclaimer](#disclaimer), at the end of this article.* ### Prerequisites * [Node JS](https://nodejs.org/en/) * Node [Express](http://expressjs.com/) framework ( `$ npm install express --save `) * A GCP Account (or create a [free trial account](https://cloud.google.com/free-trial/)) ## Getting Started To get started, open the GCP console, and create a new project. Go to: [https://console.cloud.google.com](https://console.cloud.google.com?utm_source=blog&utm_medium=partner&utm_campaign=CDR_lee_aiml_leedialogflowblog_personal_) and click: [Create new project](https://cloud.google.com/resource-manager/docs/creating-managing-projects), and enter an easy to remember project name, which will be used as the project id. You will have to remember this. Next, on your local machine, generate an empty Node Express application: `$ express` *NOTE: Technically, for this demo, you don’t need Express, since Express is a Web framework for Node.js. I choose it though, since I prefer working from this folder structure. My code will be future proof, should I ever plan to port it to a web app.* Once, the generation is done, you can open the **package.json** file, and add the following lines of code dependencies: ```json "dotenv": "~4.0.0", "google-cloud": "~0.47.0", "user-stream": "~0.0.8", "nodemon": "~1.11.0", ``` After, you are done; run the following command in your terminal: `$ npm install` Go back to the [GCP console](https://console.cloud.google.com?utm_source=blog&utm_medium=partner&utm_campaign=CDR_lee_aiml_leedialogflowblog_personal_) and click the hamburger menu icon, and select: **IAM > Service Accounts > Create Service Account** Service account name: **nodeapp** Role: **Project > Owner** Click: **Create > Close** Click the **button with the 3 dots** next to nodeapp, to open an extra menu. Select: **Create key**. Choose **JSON**. Click **Create**. A key has been saved to your local machine. Rename this -.json file, as: **cloudkey.json**, and copy it into your freshly generated Express app, root folder. Also, create an **.env** file in the root of your Express app folder. It should have the following contents: `GCLOUD_PROJECT= GCLOUD_KEY_FILE=./cloudkey.json`. Later in this tutorial, you will also need to add the keys for the Twitter Streaming API in here. ## Twitter Streaming API The [Twitter Streaming APIs](https://dev.twitter.com/streaming/overview) give developers low latency access to Twitter’s global stream of Tweet data. A streaming client that pushes tweets, without any of the overhead associated with polling a REST endpoint. Exactly, what we need, to monitor the Twitter newsfeed during election day, so we can see which party is popular on Twitter. We will need to create a [Twitter API account](https://dev.twitter.com/resources/signup). (and if you don’t have Twitter, also a Twitter account). With the Twitter API account, you can create an application, and generate the tokens. These tokens, you will need to copy to the **.env** file in the root of your Node project. It has the following contents: `CONSUMER_KEY= CONSUMER_SECRET= ACCESS_TOKEN_KEY= ACCESS_TOKEN_SECRET=` Create a folder called: **lib** Create the following file in the **lib** folder: **twitter.js** The **twitter.js** file will contain the following content: [GitHub Gist](https://gist.github.com/bf0afb23c5a6606c8aa3b1afbe49f873) Now you can start testing your twitter stream. In your terminal run the following command from your Express root folder: `$ node bin/www` Now, look in your terminal, you should see the data based on your search terms streaming in. To close the data stream hit **CTRL + c**. ## Machine Learning APIs Nice all that data, but how will we know that people are talking good or bad about a certain political party? Just counting all the tweets, wouldn’t be the correct thing to do, we actually need to understand the context of the data. Hmm, how can we automate this? For this, you can actually use machine learning. Machine learning is not only for data scientists and experts, you and I can make use of it as well. The Google Cloud platform provides a bunch of APIs which are easy to use. Think about machine learning APIs such as: *Speech API* (which can convert speech to text), *Vision API* (which can get insights from pictures), *Translate API* (to translate text to a certain language), *Video Intelligence API* (to retrieve metadata from videos) and *[Natural Language API](https://cloud.google.com/natural-language/)* (to derive insights from unstructured text). Google is planning to release much more machine learning APIs to the cloud platform, and on top of that; if you are a data scientists you could write your own machine learning models. The last mentioned API is what we need to understand pieces of our Twitter data. However... Unfortunately, the NLP API won’t understand the Dutch language yet. So here’s the test case: Would it work if we translate the text from Dutch to English first? Afterall, the only thing we need to know is if the context of the tweet is positive or negative. Let’s give it a try. We make use of the [Translate API](https://cloud.google.com/translate/) first, afterwards the Natural Language API. Later, we will store in BigQuery the original tweet, but with a ranking total score column. Go to the [cloud console](https://console.cloud.google.com?utm_source=blog&utm_medium=partner&utm_campaign=CDR_lee_aiml_leedialogflowblog_personal_) and click on the **menu** (hamburger) button. Click **API Manager > Dashboard** and click **Enable APIs**. Click **Natural Language API** from the Google Cloud Machine Learning API section. Click **Enable**. Go back to the previous screen, and select **Translation API** and hit **Enable** again. In the **lib** folder, create the following file: **ml.js** which contains these contents: (see the comments in the JavaScript code for further explanation). [GitHub Gist](https://gist.github.com/fb2c637e981ae582aeae520d01c4a3d3) In **twitter.js**, add the following line somewhere in the top of the file: ``` JavaScript var path = require('path'); var machinelearning = require( path.resolve( __dirname, "ml.js" ) ); ``` You can test the MachineLearning APIs by adding the following example code lines to the end of the file: ``` JavaScript getSentiment('I love Milkshakes', function(results){ console.log(results.sentences); }); getTranslation('Ik houd van Milkshakes.', function(results){ console.log(results); }); ``` The sentiment score is a number between -1.0 (negative sentiment) and 1.0 (positive sentiment). The magnitude is a non-negative number in the [0, +inf) range, which represents the absolute magnitude of sentiment regardless of score (positive or negative). To change the language, change the `from` input parameter on line 11, to another language, such as `es` for Spanish, or `fr` for French. Feel free to play arround with it, and pass in different text strings, or language API settings. From the terminal run: `$ node bin/www` Now, you will have to add these pieces of code, within the `stream.on()` function, right after the `console.log` line. (let’s say line 42). This will be a callback, in a callback, in a callback... *pffff*. ...and we also need to bind to the original scope! So I solved it this way: [GitHub Gist](https://gist.github.com/89d57616b54474134106db24211f3ae5) Once done with it, start the node app again. You should see the Twitter lines, streaming in, with translations and sentiment detection. The next step will be to push these data into BigQuery! ## BigQuery The next challenge is to store this data in the BigQuery storage in the Google cloud. BigQuery is a fast, economical and fully-managed enterprise data warehouse for large-scale data analytics. BigQuery can query terabytes of data in seconds and petabytes in minutes! The code to save the data in BigQuery is not so difficult. Please have a look: [GitHub Gist](https://gist.github.com/11490d86a942f0b0acb83b55009cac95) In **twitter.js** you will need to require the file: ``` JavaScript var bigquery = require( path.resolve( __dirname, "bigQuery.js" ) ); ``` And within the most inner callback (on line 127), you can enable the `insertBq()` method: ``` JavaScript bigquery.insertInBq(row); ``` Run the node app for a while. This will load new content into BigQuery. We can now run a bunch of queries to analyze our data. Click **Compose Query**, write: ``` sql SELECT SUM(score) as totalscore, party, COUNT(party) as totalparties FROM dutchelectionstweets.dutchelections GROUP BY party ORDER BY totalscore DESC ``` This query, will sum the *total sentiment score* per party. Also, it counts and it groups the parties. Click **Run**, to run the query. You will see the results in the table below. When the results look ok to you, you can save the view. This will create a new view (which is like a table, but it includes the query). It contains the unique result set. We will need this later for Data Studio. Let’s create a few more views. Such as the 3 most positive parties: ``` sql SELECT SUM(score) as totalscore, party FROM dutchelectionstweets.dutchelections GROUP BY party ORDER BY totalscore DESC LIMIT 3 ``` The total amount of tweets per party: ``` sql SELECT party, COUNT(party) as totalparties FROM dutchelectionstweets.dutchelections GROUP BY party ORDER BY totalparties DESC ``` And the total amount of tweets: ``` sql SELECT COUNT(text) as totaltweets FROM dutchelectionstweets.dutchelections ``` In case you want to browse through all the tweets you can use: ``` sql SELECT text, party, score FROM dutchelectionstweets.dutchelections ``` ### Data Studio Instead of displaying the results in *"boring"* tables, we could very easily display the result sets in charts. I’ve used [Google Data Studio](https://datastudio.google.com) for this. 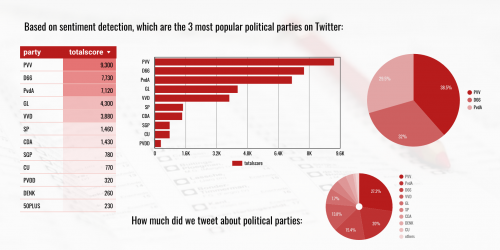 When you drop a chart on the stage, you will need to **Create a new Data Source**. Which you can set to **BigQuery Connector**. From there, you select your project, your dataset, and then your table set or table views. From that moment, you can start using all your data within the Studio. You can easily refresh the data, by clicking on the **Refresh Data** button:  With Google Data Studio you can drag and drop charts, images and visualizations on the stage. It turns your data into informative dashboards and reports which are easy to read and share. Google Data Studio is currently in beta. It’s not part of Google Cloud Platform, it’s a Google Analytics solution. You can read more about this tool on: [https://www.google.com/analytics/data-studio/] ## Compute Engine / Cloud Launcher Ok, so we’re done with writing the code to fetch and analyze our data! Although you could keep your terminal open on your local machine for a full day, it’s not ideal. At the end, this process will take some processing power. A better use case would be to move it to a virtual machine.  Let’s create a virtual machine. Open the [Cloud console](https://console.cloud.google.com/?utm_source=blog&utm_medium=partner&utm_campaign=CDR_lee_aiml_leedialogflowblog_personal_) in your browser. You could create a virtual machine, manually yourself by clicking the **Compute Engine** menu option. But since we need an image which requires Node.js installed, we will do it the easy way, instead make use of **Cloud Launcher**! 1. Click [Cloud Console Launcher](https://console.cloud.google.com/launcher/?utm_source=blog&utm_medium=partner&utm_campaign=CDR_lee_aiml_leedialogflowblog_personal_) 2. Search for **Node.js** 3. Choose the 2nd Node.js image, (the one from **Bitnami**.) 4. Click the **Launch on Compute Engine** button. 5. Specify a name, and a zone (I am in Europe, so I choose **europe-west-1b**) 6. Choose **micro machine** type. 7. Hit the **Deploy** button. Notice, how fast it will launch this virtual machine for you! After you deployed the Bitnami Node.js app, you will see the IP address where your VM will be available. There’s an **SSH** dropdown. Hit it, and click **View SSH command**. It will show you the command that you can paste in your local terminal. For example: `gcloud compute --project "myproject" ssh --zone "europe-west1-b" "nodejs-1-vm"` This will log you in on the virtual machine. When you run this command the first time, you will need to create a passphrase. It will automatically create a public key on your machine. Once you’re logged in, you can verify if nodejs was properly installed. Enter: `$ node -v` It should output the nodejs version number. The next step is to transfer our project on this virtual machine. You can use Github for this, or you can use Google Cloud Development repositories. (I choose Github, since I want to share my public Github repository, with you. When you have your own project running locally on your machine, you can follow the steps from the **Development** screen instead.) Pull the code, from some repository in the root of your vm: `$ git clone https://github.com/savelee/gcloud-bq-election-demo.git` Navigate into the folder: `$ cd gcloud-bq-election-demo/` Install all the nodejs packages: `$ npm install` We aren’t done yet! We need to have all our keys available on the virtual machine. That’s the **.env** file and the **cloudkeys.json** file. Obviously, I didn’t put these files in my public Github repo. Hmm, so how can we move these files to the VM? With AppEngine or ContainerEngine, you probably would work with Docker images, so you can easily put these keys in the Docker file. For this demo, we use Compute Engine, so we should make use of [Google Cloud Storage](https://cloud.google.com/storage/) instead. We can create a bucket, and upload our keys into it. Open the Cloud console in your browser. Click on **Storage > Create Bucket**. Give the bucket a name. (For example *-contents>*). Make sure this bucketname is unique, and remember it, because you will use it later. Select **Regional**, and select the same region as the VM you have choosen before. (so *europe-west1* in my case.) Click **Create**. Once the bucket is created, we upload the files from the command-line. In your terminal on your local development machine enter the following two commands: `$ gsutil cp .env gs://` `$ gsutil cp cloudkey.json gs://` Both files are now in the bucket. The next step will be to download it, from the bucket into your virtual machine. Open the terminal which runs on your VM. Enter the following command, to download everything from the bucket, into the root of your vm: `$ gsutil cp gs:///* .` If you want, you can remove your bucket in the console. (Although, it probably wouldn’t cost much, to save 2 small files.) And now you can start the Node.js service: `$ nodemon bin/www` And now you can start the Node.js service. You might have noticed, that when you start running nodemon, and you close the VM console, that your script stops as well. What you will need is a Node module, which can run your script “forever”. `$ npm install forever -g` And then start your script like: `$ sudo /opt/bitnami/nodejs/bin/forever start bin/www` (with `sudo forever stopall` you can stop the script again) You should see the Tweets coming by. When you query in BigQuery you will see the results! Awesome, now let’s keep this process running for a while! *TIP: In case you rather want to schedule your script to go on, on a certain time, you could use Cron for this.* *First create a symlink to the correct node folder:* `$ sudo ln -s /opt/bitnami/nodejs /usr/bin/node` *Then start a crontab* `$ crontab -e` *Inside the crontab you code probably would look something like:* `SHELL=/bin/shell` `0 0 15 3 * PATH=$PATH:/opt/bitnami/nodejs cd ~/gcloud-bq-election-demo/ && sudo /opt/bitnami/nodejs/bin/forever start bin/www` *This means, at 0:00:00 time, on the 15th of March, navigate to the gcloud-bq-election-demo directory, and start the nodemon script. You can request the VM time by running `date` in the console.* *You can check if it all worked out, by viewing the logs:* `$ tail -f /var/log/syslog` ## Conclusion By now, you have learned how to work with various Google Cloud services. We have been looking into: **Compute Engine** and **Cloud Launcher** to spin off a VM in the cloud, **Machine Learning APIs** like the **Natural Language API** and **Translation API** to understand the data, **BigQuery** to analyze the data and **Data Studio** to visualize the data in nice charts. Did I predict the Dutch elections well? Well, in some extend. The top 2 most positively spoken parties on Twitter, got the 2nd and 3rd place in the final results. So that was as expected. The PvdA didn’t do well at all, and the VVD got the first place in the elections, with the most votes. If I do random checks on the collected data, I can see that the sentiment detection has been calculated correctly. There is just no real direct relation between popularity on social media vs. the voting process. But mind you every person can only vote once, but can post unlimited positive or negative tweets. All my code will be in Github [https://github.com/savelee/gcloud-bq-election-demo]. Feel free to use my code, to run a similar case. I will put the instructions on how to setup, in the readme file. In case you are new to Google Cloud platform. You can create [a free trial account](https://cloud.google.com/free-trial/?utm_source=blog&utm_medium=partner&utm_campaign=CDR_lee_aiml_leedialogflowblog_personal_), which includes $300 dollars that can be used to spend on cloud services which expire after 12 months. That should be enough money to try out this demo. ### The costs To run this tutorial for one day in a Compute VM created by Cloud Launcher, with the use of machine learning APIs and streaming and querying within BigQuery, costed me about 14 dollars. This included the VM running for 5 days (which costed me a dollar). My data wasn’t that big, so I didn’t had any costs for executing BigQuery queries. I was worried about the amount of API calls that I would made, but by running the script for a large part of the election day, I managed to still stay mostly within the free Natural Language API call request tier. So most of my money has been used on the large amount of tweets that has been translated. Let’s drill a little more into the costs of GCP. BigQuery storage will cost, $0.02 per GB Streaming data in BigQuery: $0.05 per GB (loading data is free). To execute Queries, will cost you $5.00 per TB but the first TB per month is free. [BigQuery Pricing](https://cloud.google.com/bigquery/pricing). Note, that Data Studio makes use of a BigQuery connector, which basically fires queries in BigQuery. The price for a micro virtual machine will cost less than 5 dollar a month. But for a computing demo like this, you will probably only run it for a bit, and pay for your use. With Compute Engine, you will pay per minute, with a 10 minute minimum. The prices for translation and language detection is about 20 dollars for a million characters. It will become cheaper, once your amount is over the 1.5 billion characters. See [Translate API pricing](https://cloud.google.com/translate/pricing). The Natural Language API has a free tier, if the amount of text records stays under the 5k, for pricing info see: [Natural Language Pricing](https://cloud.google.com/natural-language/pricing). Another great way, for checking and estimating costs, is by making use of the [GCP Pricing calculators](https://cloud.google.com/pricing/calculators). In case you are concerned about the prices, you can setup a billing alert. Which can send an email to you once you reach your quota. From the Cloud console, you can enable this, by clicking: **Billing > Budgets & Alerts**. In this screen, you can select the project, and your quota. - You can get emails once you get closer to your quota. ## Disclaimer This blog post won’t contain any political opinions from me, neither from Google. This is a blog post to demonstrate the various solutions of the Google Cloud Platform, on how you can be creative with data. I have collected a large part of the day all the Dutch political tweets, posted on Twitter. Though, my results can not be considered as the ultimate truth. I use the Natural Language API in combination with the Translation API, translating first from Dutch to English before doing a sentiment analysis. Whether this always results, in the right score is the question. But based on some random tests, the majority of the tweets seem to have a reasonable score. At the end I only need to figure out if the score is positive or negative. Let’s look into an example: Here’s the translation of the `translate.translate()` call with the following text: `Partij XYZ is mijn favoriete partij. Met de meeste stellingen ben ik het eens.`. It will be translated to this: `Party XYZ is my favorite party. With most positions, I agree.` If I would have translated it myself, I probably would have said it a little different: "Party XYZ is my favorite party. I agree with most of the positions they take on issues." However, to detect the sentiment, it doesn’t really matter, the score seems to be positive and correct: `{ magnitude: 0.800000011920929, score: 0.800000011920929 }` There are certain tweets which I left out the *totalscore* calculation for sentiment analysis. For example, tweets which contain multiple opinions for multiple political parties in one single tweet: *Here’s the result of the `language.detectSentiment()` call with the following text: `I love Milkshakes.` : `{ magnitude: 0.699999988079071, score: 0.699999988079071 }`* Here’s the result of the `language.detectSentiment()` call with the following text: `I really hate Whipcream.` : `{ magnitude: 0.5, score: -0.5 }` Here’s the result for the `language.detectSentiment()` call with the following text: `I love Milkshakes but I really hate Whipcream.` : `{ magnitude: 0, score: 0 }` I’m sure there are ways on how you can calculate this more nicely, but for now it’s out of scope for this blog post. (I came to this conclusion after seeing tweets (in single sentences) were people tag 5 different parties, with good and bad opinions about those.) Then there are also tweets, which are very hard for a machine to detect; for example tweets that contain sarcasm: Here’s the result for the `language.detectSentiment()` call with the following text: `Such a great idea, yeah, and monkeys can fly!` : `{ magnitude: 0.5, score: 0.5 }` I left these tweets in my score calculation, assuming that people will use sarcasm for every political party, with both a positive and negative meaning. Last but not least, not everyone who votes, shares their thoughts on Twitter, and some people with strong political opinions might tweet more, to use it as a personal outlet. But in real-life, a person can obviously only vote once. It’s interesting anyway and I was curious to see, if my analysis results come close to the final scores of the Dutch elections. At the end, I had a lot of fun by writing the code, and I learned a lot about the Google Cloud Platform. BTW; do you want to receive more insights about the Dutch Elections? Google has a [Google Trends](https://trends.google.nl/trends/story/NL_cu_l5QQ-lkBAADe7M_en) page. ## Handy Links * [Create a free GCP trial account](https://cloud.google.com/free-trial/?utm_source=blog&utm_medium=partner&utm_campaign=CDR_lee_aiml_leedialogflowblog_personal_) * [Node JS](https://nodejs.org/en/) * [Express](http://expressjs.com/) * [Twitter Streaming APIs](https://dev.twitter.com/streaming/overview) * [Translate API](https://cloud.google.com/translate/) * [Translate API pricing](https://cloud.google.com/translate/pricing?utm_source=blog&utm_medium=partner&utm_campaign=CDR_lee_aiml_leedialogflowblog_personal_) * [Natural Language API](https://cloud.google.com/natural-language/?utm_source=blog&utm_medium=partner&utm_campaign=CDR_lee_aiml_leedialogflowblog_personal_) * [Natural Language Pricing](https://cloud.google.com/natural-language/pricing?utm_source=blog&utm_medium=partner&utm_campaign=CDR_lee_aiml_leedialogflowblog_personal_) * [BigQuery](https://cloud.google.com/bigquery/?utm_source=blog&utm_medium=partner&utm_campaign=CDR_lee_aiml_leedialogflowblog_personal_) * [BigQuery pricing](https://cloud.google.com/bigquery/pricing?utm_source=blog&utm_medium=partner&utm_campaign=CDR_lee_aiml_leedialogflowblog_personal_) * [Data Studio](https://www.google.com/analytics/data-studio/?utm_source=blog&utm_medium=partner&utm_campaign=CDR_lee_aiml_leedialogflowblog_personal_) * [Run Google Data Studio](https://datastudio.google.com?utm_source=blog&utm_medium=partner&utm_campaign=CDR_lee_aiml_leedialogflowblog_personal_) * [Cloud Launcher](https://cloud.google.com/launcher/?utm_source=blog&utm_medium=partner&utm_campaign=CDR_lee_aiml_leedialogflowblog_personal_) * [Cloud Storage](https://cloud.google.com/storage/?utm_source=blog&utm_medium=partner&utm_campaign=CDR_lee_aiml_leedialogflowblog_personal_) * [GCP Pricing calculators](https://cloud.google.com/pricing/calculators?utm_source=blog&utm_medium=partner&utm_campaign=CDR_lee_aiml_leedialogflowblog_personal_) * [Comparing tweets about Trump & Hillary with natural language processing.](https://medium.com/google-cloud/comparing-tweets-about-trump-hillary-with-natural-language-processing-a0064e949666?utm_source=blog&utm_medium=partner&utm_campaign=CDR_lee_aiml_leedialogflowblog_personal_) ---