Unleash the Super-Prompt: Mastering Your Coding AI Workflow With Gemini
Welcome back to the technical blog series! We’re diving deep into the developer toolchain today. If you’ve been relying on AI assistants, you know the frustration: context drift. You ask the tool to refactor a service, but it only sees the single file you’re in, or you ask it to summarize your text and it doesn’t return you the final summary you were hoping for.
It misses the bigger picture—the architectural patterns, the coding standards, the project rules or in the case of creative writing, it misses your style, what makes it “you”.
I’m gonna say it one more time. Your AI can’t grasp your intent without knowing the full story. And it won’t get that story without you crafting a really good prompt!
We can fix this: Mini-Me super agent.
We can build a customized, project-aware AI “Mini-me Super Agent” by writing what I call the “Super-Prompt”. This is a master instruction you inject with everything you do. We teach the AI: if you want to write code or blogs like me, you first have to become a little bit more like me.
It’s like giving your assistant a detailed company handbook and style guide before you give them their first task. In this article, we’ll set up the Gemini Command Line Interface (CLI) and the Gemini Code Assist VS Code extension, then build the Super-Prompts to tie it all together.
Trust me on this one! It’s going to be a lifesaver.

Using Gemini CLI and VS Code Assist together
You can get the best of both worlds by combining two different Gemini tools; Gemini CLI and VS Code Assist, to create a native-like experience like Cursor or CoPilot.
This is the Dual Power Strategy. Each tool has a unique strength.
| Tool | Its Superpower | Best For |
|---|---|---|
| Gemini CLI (in your VS Code Terminal) | Agentic Project Scope. It sees the entire codebase, can run terminal commands, and executes complex, multi-step actions. | Large refactors, finding cross-file errors, automating DevOps tasks, generating new components based on existing patterns. |
| Gemini Code Assist (VS Code Extension) | Real-Time IDE Integration. It knows your current selection, cursor position, and open tabs for immediate, in-place help. | Inline completion, generating functions, explaining selected code snippets, finding bugs in the current file. |
When you use them together, you get a seamless workflow that understands your high-level project architecture (CLI) and your low-level, in-the-moment coding (Assist).
The Essential Setup Steps
Before anything else, get the tools. If you haven’t already, check out my previous post on installing and authenticating the Gemini CLI. I’ll wait.
Got them? Perfect. Now, let’s configure VS Code for maximum efficiency.
1. Optimize Your View
Move that Gemini chat panel! By default, it takes up valuable space in your primary sidebar. Right-click its icon and select “Move to > Secondary Panel.” With the panel docked on the other side you know have easy browsing access to the project files, without it it’s gonna be a real pain, because you will likely add files to your context.

2. Activate “Super-Speed” Features
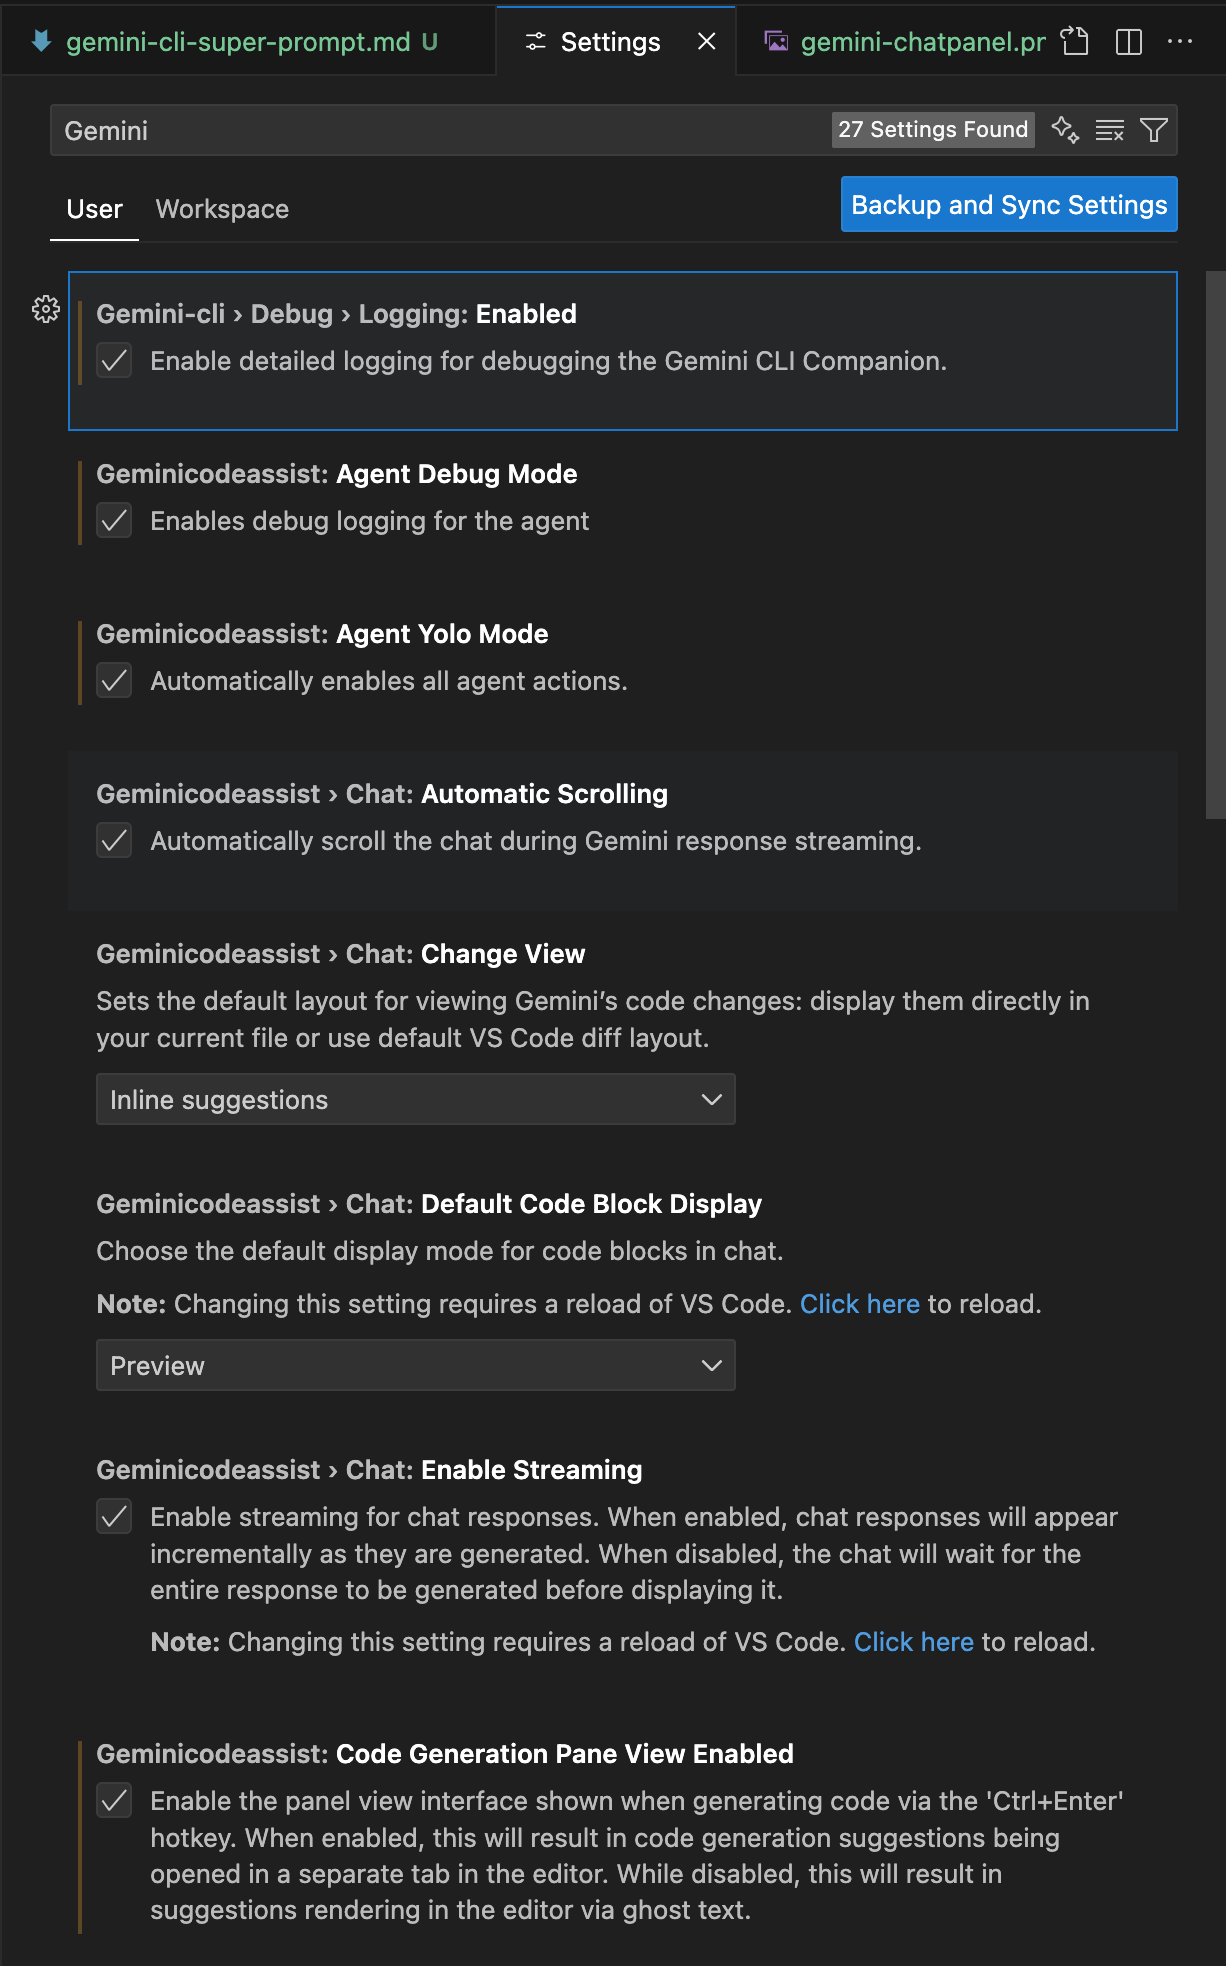
Dive into VS Code Settings > Extensions > Gemini Code Assist. You might want to toggle one or more of these game-changers ON:
Geminicodeassist: Agent Yolo Mode: Means it won’t interrupt, letting the agent power through multi-step tasks. With Agent Yolo Mode enabled you don’t need to approve the steps. It does require the Agent toggle to be on, in your chat interface. And do understand that you won’t be able to undo a certain step. When you are integrated with Git, you can see the changes though.
The Yolo mode let’s you also
automatically run tools in Gemini Agent Assist, so for example, when you create arequirements.txtlist with packages, it can run therun_shell_commandtool, to first auto install the dependencies and afterwards run yourpython main.pyscript. If it made coding mistakes it will loop until it finds
the working solution. Very handy!- Geminicodeassist: Inline suggestions Enable Auto: This gives you “ghost text” suggestions as you type. (See if you like it.)
- Geminicodeassist: Edit predictions Next Line: The AI will predict the next logical line of code, not just the one you’re on.
3. Wire Up Your Hotkeys
A great workflow demands speed. You can’t be clicking around. Go to File > Preferences > Keyboard Shortcuts and set up bindings you’ll remember.
TIP: I use these two constantly:
gemini.chat.focus: I bind this toCtrl+Shift+I(for ‘inspect’) to quickly ask the chat panel a question.gemini.code.ask: I bind this toCtrl+Shift+A(for ‘ask’) to query against my currently selected code.
4. Enable Agent Tools
Update the global ~/.gemini/settings.json file to enable all kind of agent tools,
where the run_shell_command is important, as you want your agent to auto run your code.
Example:
Super-Prompts
This is it. This is where we spill the tea on how to write write better prompts. We need to turn Gemini into a reliable software engineer, not a random chatbot. We do this by injecting the project’s DNA via powerful context files.
The Gemini CLI brilliantly supports two levels of GEMINI.md files, and it will load both in the context.
The context is loaded hierarchically. The global ~/.gemini/GEMINI.md file (located in your user home directory’s .gemini folder) is loaded first. Afterwards, the project-specific ./my-app/.gemini/GEMINI.md file (in the project’s .gemini folder) is loaded. Any settings in the project-level file will override the settings from the global file.
- The Global Profile (Your “Mini-Me”): This file lives in your home configuration directory (e.g.,
~/.gemini/GEMINI.md). This is where the AI will become a little bit more like you. It defines your universal persona, your default style, and your core principles, no matter what project you’re on. - The Project Spec (The “Blueprint”): This file lives in your project’s root directory (e.g.,
./my-app/.gemini/GEMINI.md). This is the project’s DNA. The CLI agent automatically detects and reads this file, prioritizing its rules.
EXAMPLE 1: GLOBAL Super-Prompt 1: The Coder’s “Mini-Me”
Here’s a great starting point for your global ~/.gemini/GEMINI.md file. This tells the AI to act as a principal engineer.
Here’s an example of a super prompt for coding.
Modify to match it your style.
EXAMPLE 2: GLOBAL Super-Prompt 2: The Creative Writer’s “Mini-Me”
What about creating writing? Like… a blog post? I use a different global prompt when I’m in my creative writing projects. (Yes, you can swap them out!) This one is based on the very instructions I use for this series.
Just replace the GEMINI.md with a new one.
Here’s a great starting point for your global ~/.gemini/GEMINI.md file. This tells the AI to act as a creative writer.
Modify to match it your style.
EXAMPLE: PROJECT SPEC Super Prompt: The Project Ask.
Here’s an example of the Project Spec prompt, you would create this file in your project directory:my-app/.gemini/GEMINI.md:
# Project Overview |
Injecting Your Prompt into VS Code Assist
The CLI reads the GEMINI.md automatically. But the VS Code extension needs to be told what persona to use.
Go to Settings > Extensions > Gemini Code Assist.
Find the setting: Geminicodeassist: Rules.
Paste the contents of your desired Super-Prompt (like the Coder’s Mini-Me) into that setting.
Paste the contents of your desired Super-Prompt (like the Coder’s Mini-Me) into that setting.
Now, both your CLI and your IDE assistant share the same brain!
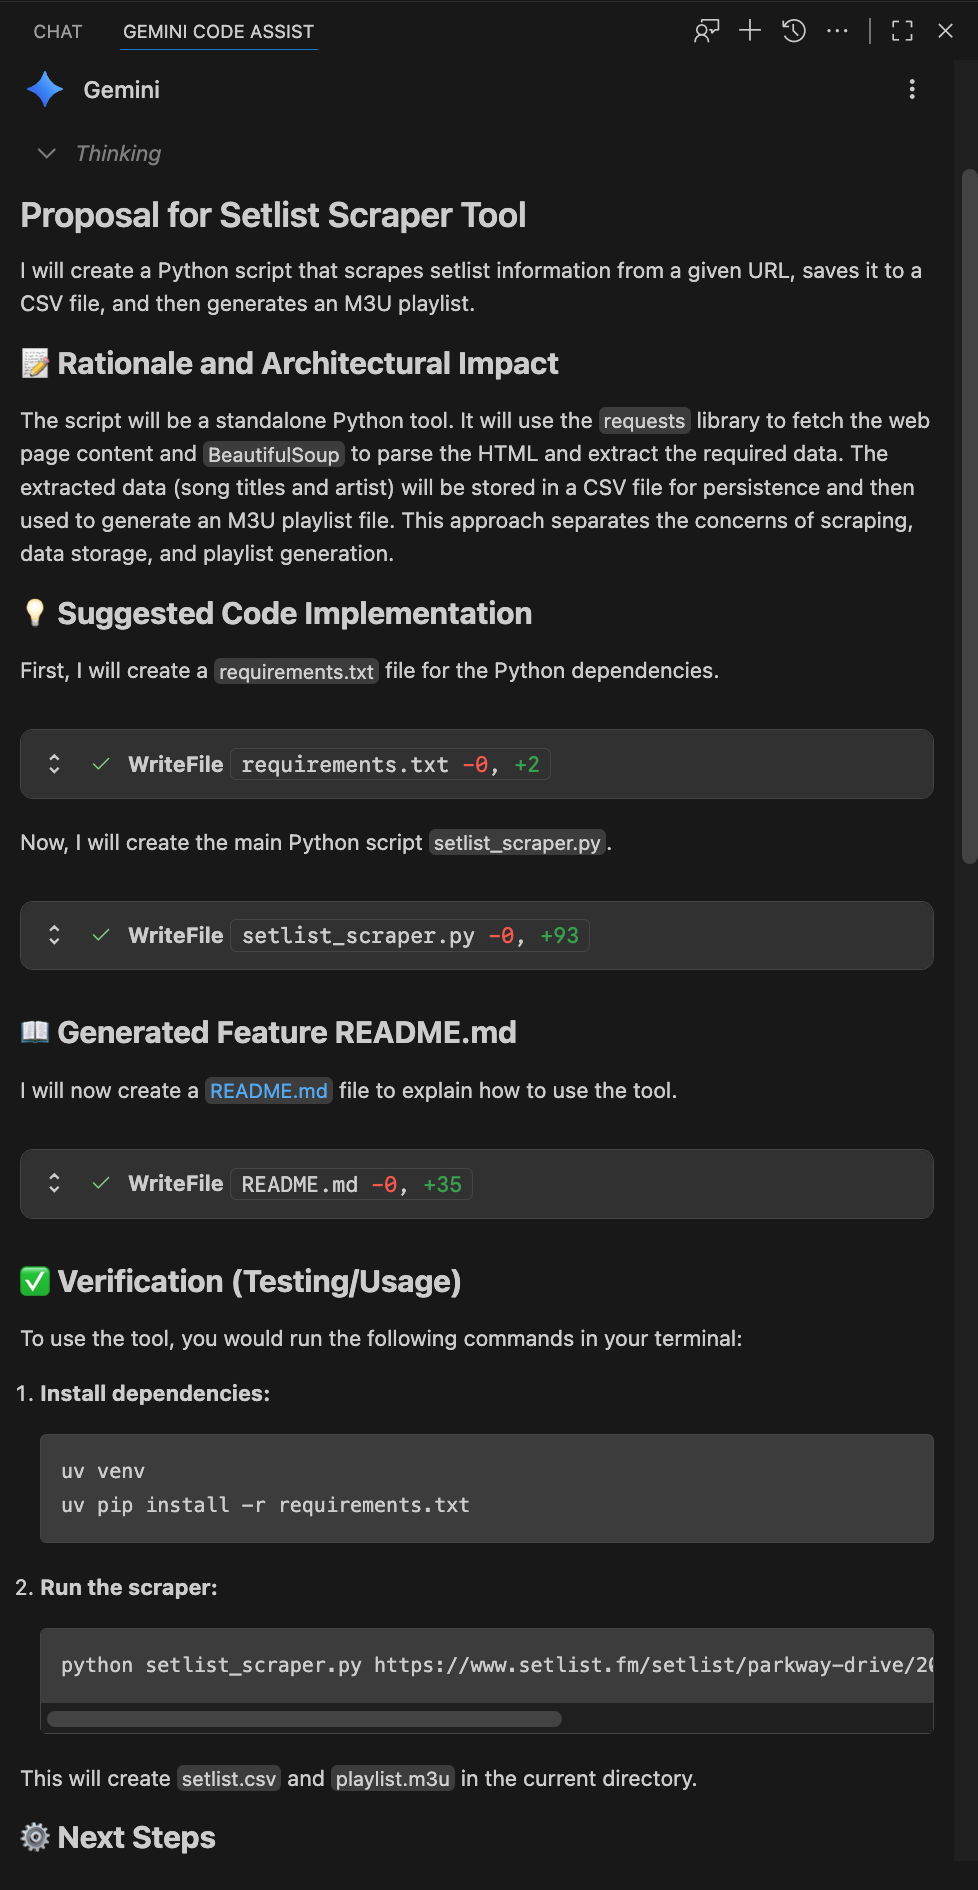
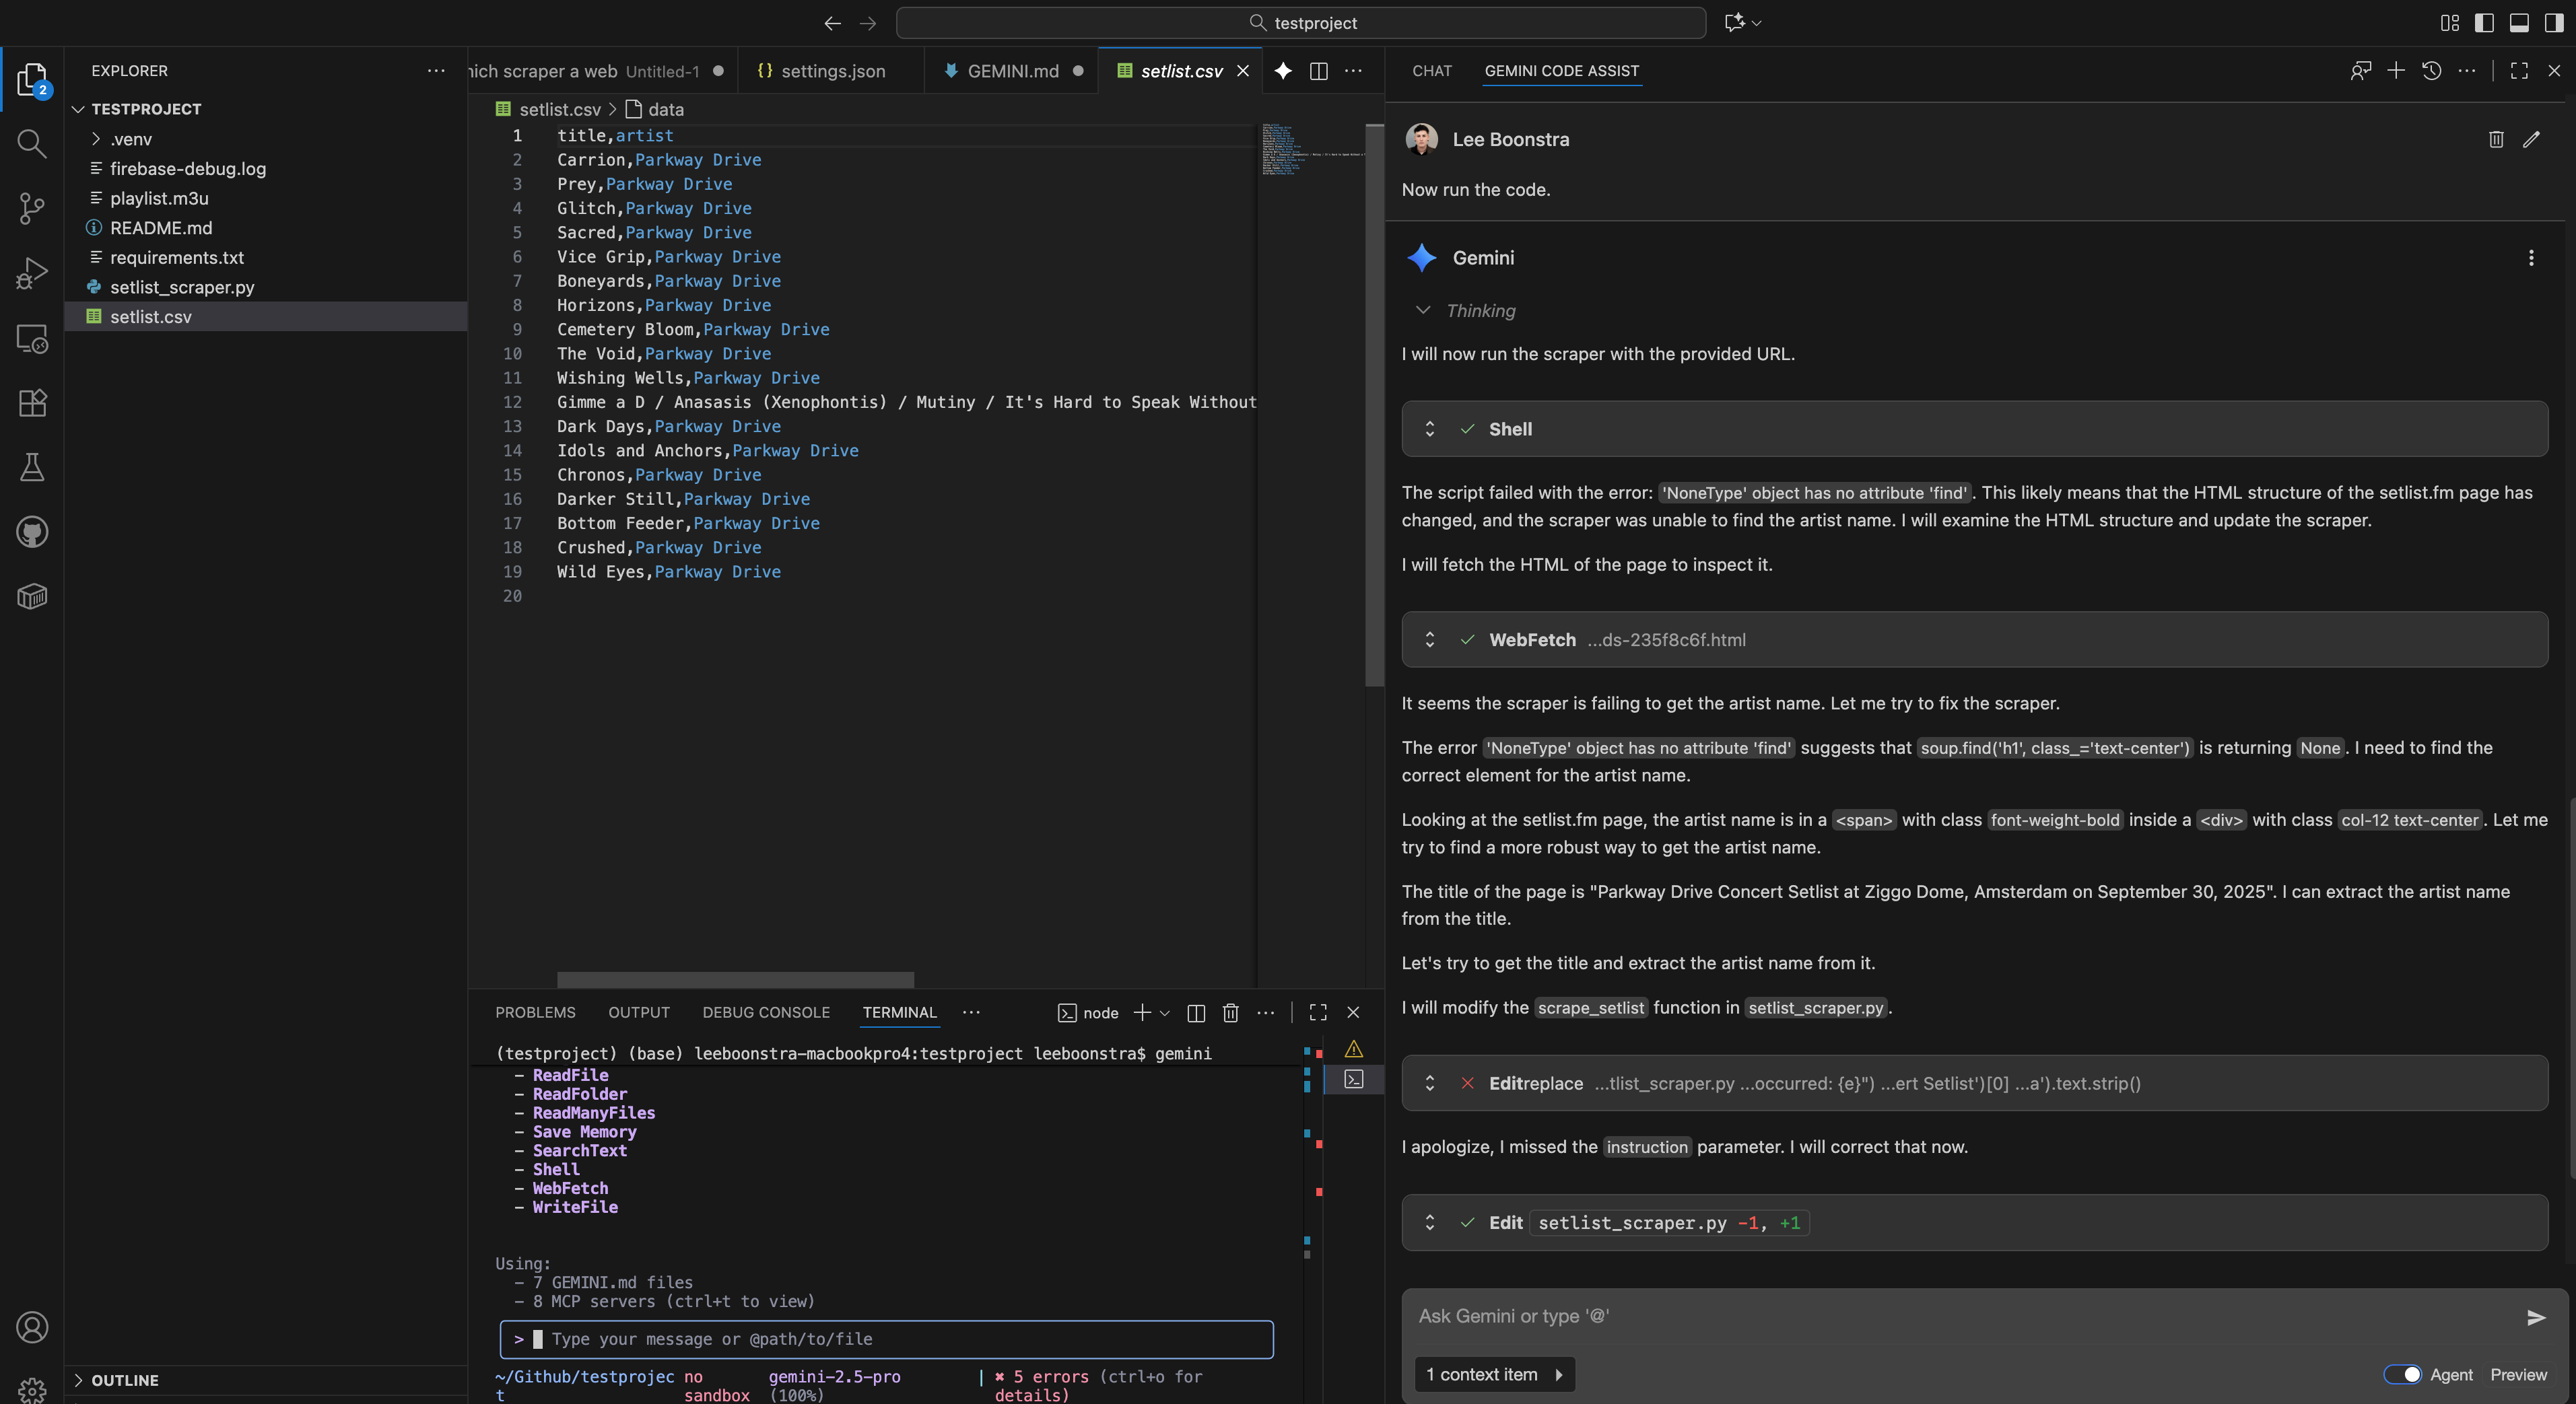
Here are screenshots of a super-prompt-powered coding output in action.
The prompt that I used was:
Create a python tool that scrapes a website, |
Context Filtering with .geminiignore
That massive 1M token context window is precious. Don’t waste it scanning node_modules! The agent needs to know what to ignore.
TIP: Implement a global .geminiignore file in your ~/.gemini/ folder. This tells the CLI to skip these files for every project. This drastically cuts down on noise, making your AI faster and more accurate. And
it works similar like .gitignore or .dockerignore.
Here’s a great one to start with:
Bonus: Give Your Agent Superpowers (Extensions)
We aren’t stopping at file awareness! The Gemini CLI is highly extensible via its Model Context Protocol (MCP) servers. This is how we give our agent literal tools to interact with the world.
Think of it like this: your Super-Prompt is the agent’s brain, but extensions are its hands. They let the agent interact with other services, run specialized tasks, and pull in data beyond your local files.
NOTE: You install these extensions directly in your terminal using the simple gemini extensions install [URL] command.
By integrating extensions from industry leaders, we empower the agent to perform actions that go way beyond simple code generation.
Here’s a powerful starter pack.
Design & DevOps Tools
- Figma: Turn design specs directly into code.
gemini extensions install https://github.com/figma/figma-gemini-cli-extension - Postman: Automate API testing and update definitions.
gemini extensions install https://github.com/postmanlabs/postman-gemini-cli-extension - Chrome DevTools: Allow the agent to debug live web pages. (This one’s an MCP server, so the command is slightly different!)
gemini mcp add chrome-devtools npx chrome-devtools-mcp@latest
Frameworks & App Development
- Genkit: Build, debug, and manage next-generation AI agents and flows.
gemini extensions install https://github.com/gemini-cli-extensions/genkit - Firebase: Manage your Firebase projects, databases, and deployments.
gemini extensions install https://github.com/gemini-cli-extensions/firebase - Flutter: Get specialized help for building and maintaining Flutter apps.
gemini extensions install https://github.com/flutter/gemini-cli-extension
Data & Workflow Tools
- Code Review: Execute pre-commit quality and style checks.
gemini extensions install https://github.com/gemini-cli-extensions/code-review - MCP Toolbox (Databases): Connect your agent to various databases.
gemini extensions install https://github.com/gemini-cli-extensions/mcp-toolbox - Looker: Pull in business intelligence and data from your Looker dashboards.
gemini extensions install https://github.com/gemini-cli-extensions/looker - Nanobanana (Image Gen): Add image generation capabilities to your agent.
gemini extensions install https://github.com/gemini-cli-extensions/nanobanana
And there you have it. This isn’t just a workflow; it’s a force multiplier.
You’ve successfully engineered your environment to give Gemini the deep, systemic context it needs. It’s not just an assistant anymore. It’s a proper Super-Agent—an elite “Mini-Me” that respects your standards and understands your architecture.
You’ve done the hard work, and the payoff in clean code and faster development will be huge!